background image

5

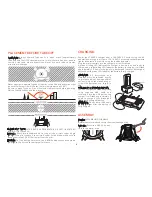
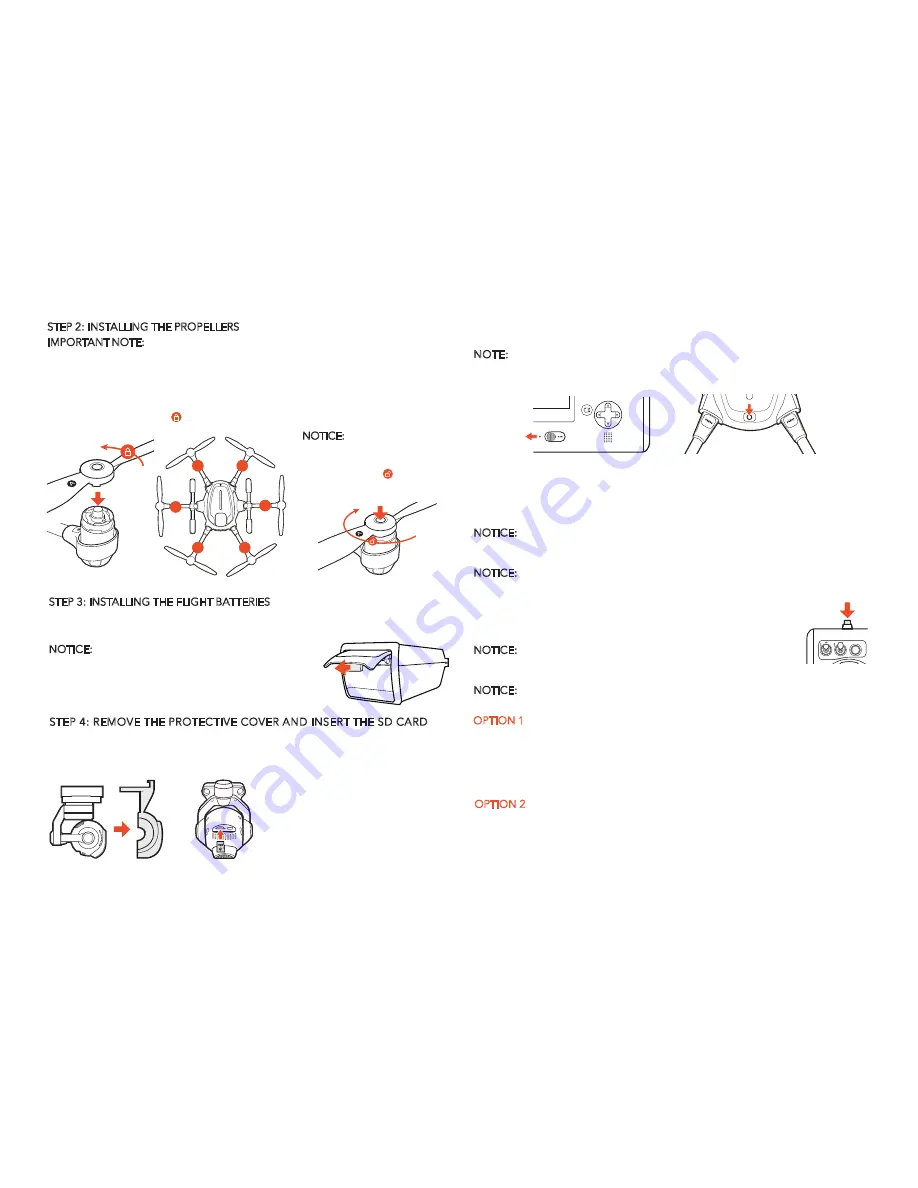
STEP 2: INSTALLING THE PROPELLERS 

IMPORTANT NOTE: Always ensure propellers are installed properly. The motors are 

extremely powerful, meaning that if the device is misused there is a risk of material 

damage, serious injury and even fatal injury.

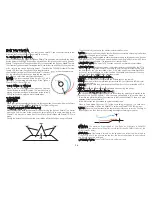
Mount the propellers on the motors and note the 'A' and 'B' given on the motor 

arms. This  distinction  between  'A'  and  'B'  refers  to  propeller  'A'  and  'B'.  Mount 

propeller 'A' on motor 'A' and propeller 'B' on motor 'B'

press and rotate propel-

lers in the direction the [       ] points to, and the propellers will be locked.

STEP 3: INSTALLING THE FLIGHT BATTERIES

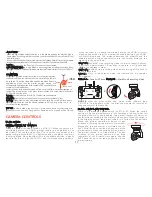
Push the battery into the battery compartment with the Yuneec logo facing upwards 

until hearing a 'click', which means the battery is installed successfully. 

STEP 4: REMOVE THE PROTECTIVE COVER AND INSERT THE SD CARD  

Carefully  remove  the protective cover from the camera lens. Insert the 

included 16GB card or any Class 10  microSD card (U3 speed capable of 4K 

data rates) from 16GB to 128GB.

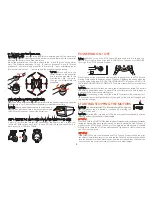
NOTICE: Gently open the battery cap to the maximum 

degree (to a position where is almost horizontal with 

the GPS cover), then you can pull the battery out.

A

A

B

A

B

B

NOTICE:  Press  and  hold  the 

center  button  on  the  propeller 

and rotate the propeller in the 

direction the [         ] points to, 

then  you  can  disassemble  the 

propellers.

POWERING ON / OFF

NOTE: ALWAYS turn on the ST16 Ground Station and allow it to boot up 

BEFORE turning Typhoon H on (and ALWAYS turn Typhoon H off BEFORE 

turning off the ST16 Ground Station).

STARTING/STOPPING THE MOTORS 

NOTICE:Only with sustainable GPS or IPS activated or GPS being turned 

off,  the  motors  can  be  started  or  stopped  by  pressing  the 

START/STOP button. 

NOTICE: After the GPS is turned off, IPS will be turned off automatically and the 

indoor positioning function will be disabled.

Place Typhoon H on a level and stable surface then power on the ST16 Ground 

Station. Press and hold power button on Typhoon H. Release the button when the 

aircraft emits a rising tune. DO NOT TOUCH OR MOVE THE Typhoon H UNTIL THE 

INITIALIZATION PROCESS IS COMPLETE. The gimbal camera will spin to the front 

position.

NOTICE: If the main LED blinks red slowly, the initialization has failed. The aircraft 

needs to be powered on again. To power off the aircraft, press and hold the power 

button until the aircraft emits a falling tune.

NOTICE: After hearing a rising tune, the main LED indicator will blink green for 1 

to 2 seconds once with flight battery fully charged, yellow with half charged and 

red with low voltage.

00 : 35 : 25

9

12.6V

FSK

WIFI

GPS

VOL

FSK

WiFi

CHA

POS

CHA

POS

OPTION 1

Press and hold the START / STOP button for about 3 seconds to start, and about 2 seconds 

to stop the motors. Step back approximately 26 feet (8 meters) behind Typhoon H, 

make sure the ST16 Ground Station is in the Angle mode. When there is suitable 

GPS signal  for both the ST16 Ground Station and Typhoon H, or IPS for the aircraft, 

you can start the motors. 

OPTION 2

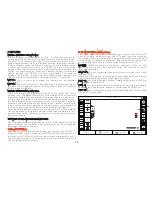
With the GPS of both the aircraft and the ST16 Ground Station locked, the pilot 

can select Camera/Task switch icon, and tap the Take Off on the task row. Make 

sure the pilot is more than 5 meters away from the aircraft and then slide the icon 

on the screen, the aircraft will take off and hover at default height.

Summary of Contents for RS-V1.2

Page 1: ...USER MANUAL RS V1 2 ...

Page 2: ...ATION FUNCTIONS FLIGHT CONTROLS FLIGHT MODES CAMERA CONTROLS SINGLE MODE TEAM MODE TAKING PHOTOS AND RECORDING VIDEO GPS FUNCTIONALITY DISABLING GPS CREATE A NEW MODEL PREPARING THE ST16 BINDING THE TYPHOON H GUI INSTRUCTION CALIBRATION COMPASS CALIBRATION GIMBAL CAMERA CALIBRATION ACCELEROMETER CALIBRATION UPDATE LED STATUS INDICATIONS Wizard LED STATUS NOTICES AND WARNINGS GENERAL SAFETY PRECAUT...

Page 3: ...eds for function and portability Typhoon H has two configurations the professional version with Intel RealSense equipped with a portable backpack and the advanced version with Sonar Collision Avoidance which features an upgrade path to the professional version with the purchase of a RealSense module sold separately Typhoon H with Intel RealSense technology builds a 3D model of the world The Intel R...

Page 4: ...S SPECIFICATIONS Electronic Shutter Video Transmission Range Transmission System Video UHD 1 30 1 8000s Up to 1 2mile 2km 5 2GHz 5 8GHz 4K UHD 30fps Weight Dimensions Maximum Detecting Distance from Forward Facing Obstacles Distance Front Collision Avoidance 70g 6 0 4 2in 153 107mm 32 8ft 10m 9 8ft to 23ft varying according to the environment REALSENSE SPECIFICATIONS Ground to IPS Distance Maximum...

Page 5: ...Li ion LiPo batteries can result in fire FOR THE ST16 GROUND STATION You can charge the ST16 battery by using supplied USB cable and inserting it into the USB port on the charger It will take approximately 5 hours to charge a fully discharged not over discharged battery WARNING Do not leave the battery in the charger after the battery is fully charged Never attempt to operate Typhoon H nearby tall ...

Page 6: ...OTICE OnlywithsustainableGPSorIPSactivatedorGPSbeingturned off the motors can be started or stopped by pressing the START STOP button NOTICE After the GPS is turned off IPS will be turned off automatically and the indoor positioning function will be disabled Place Typhoon H on a level and stable surface then power on the ST16 Ground Station Press and hold power button on Typhoon H Release the butt...

Page 7: ... Mode 2 and Mode 1 Throttle Altitude Control Mode 2 Elevator pitch control Mode 1 Take Still Photo Button Landing Gear Switch Obstacle Avoidance Switch Flight Mode Selection Switch Aileron Roll Control Mode 2 and Mode 1 Elevator Pitch Control Mode 2 Throttle joystick mode 1 Start Stop Video Recording Button Power Switch Antenna 5 8GHz patch antenna Proportional Control Rate Slider Gimbal Tilt Cont...

Page 8: ...n t fly back automatically If the aircraft is controlled flying towards the obstacle by the pilot it will stop in front of the obstacle when in Angle Mode or steer clear of the obstacle when in Smart Mode ALWAYS turn off Typhoon H BEFORE turning off the ST16 Ground Station Then remove the battery from Typhoon H and allow it to cool to ambient room tempera ture before recharging NOTICE If the signal ...

Page 9: ...ct 9 12 6V FSK WIFI Roll 120 Pitch 0 300M 125km h TS05 TS06 TS07 TS08 GPS VOL FSK WiFi CHA POS CHA POS SMART ANGLE HOME WATCH ME Watch Me enables the camera to keep tracking the remote controller no matter where and how it moves as the camera can automatically tilt its angle according to the controller Usually the default function under Smart Mode is Follow Me Watch Me function can be switched to ...

Page 10: ...r beginning pilots who aren t quite ready to land Typhoon H themselves It can also be helpful for pilots that lose orientation during flight Simply activate Home Mode until Typhoon H automatically TS01 TS02 TS03 TS04 00 35 25 D R 0 System Setting Channel Setting Model Select 9 12 6V FSK WIFI Roll 120 Pitch 0 300M 125km h TS05 TS06 TS07 TS08 GPS VOL FSK WiFi CHA POS CHA POS NOTICE If the landing gea...

Page 11: ... column Select Home Altitude and set a height as the desired altitude and then Home Mode can be activated The flight path is as follows When the Flight Mode selection switch is in the bottom position Typhoon H will be in Home also known as Return to Home Mode In Home Mode the GPS connectivity will fly back Typhoon H in a straight line in the direction of the pilots current location and automatically...

Page 12: ...ettings Pad Channel Settings Model Select TASK CAMERA GPS CALIBRATION FOLLOW WATCH ANGLE G Disabled OBS BACK RESET LIST SAVE START SLIDE TO START CANCEL Make sure the H is clear of all obstacles before starting mission CCC PONINT 1 PONINT 1 PONINT 2 PONINT 3 INSTRUCTION RESET Delete all waypoints Add Delete a waypoint LIST Load existing waypoint SAVE Save waypoint START Start waypoint mission 11 T...

Page 13: ...erface NOTICE You can increase decrease radius by apply forward back on right stick You also can trim the gimbal pan position by adjusting pan control knob on ST16 The pilot can refer to ORBIT for camera tilt trimming NOTICE Adjust the Throttle Control joystick to change the height of the aircraft adjust the Aileron Control joystick to change the orbit direction of the aircraft When the pilot tap ...

Page 14: ...2 13 14 15 Aircraft Mode LED Wizard GPS LED Aircraft Status LED Turn Fly to the Left Side Button Ascend Forward Button Magic Button Turn Fly to the Right Side Button Descend Backward Button Tilt Control Button down Disabled in team mode 01 02 03 04 05 06 07 08 09 Gimbal Tilt Slider in Tilt Angle Mode Tilt Mode Angle Velocity Gimbal Tilt Control in Velocity Mode Mode 1 Take Still Photo Button Gimba...

Page 15: ...ngle mode the operation steps are as follows STEP 1 Tap the settings icon on the original ST16 and then switch from team mode to single mode STEP 2 When the Typhoon H Main LED Status Indicator starts to blink the aircraft enters binding mode STEP 3 Wait for a few seconds as the remote control will automatically bind to the camera and aircraft You will hear two beeps from the aircraft when the bind...

Page 16: ...me again when landing WARNING Always land as soon as possible after the first low level voltage battery warning or land immediately after the second level low voltage battery warning by the Motor LED Status Indicators flashing rapidly 15 WIZARD BUTTON COMBINATION FUNCTIONS Turn On Off altitude follow function Short press Blink slowly Turn off PRESS LED Switch between Watch Me Follow Me function Shor...

Page 17: ... 36 9MPH 16 5m s If the movement of the pilot is much faster than 36 9MPH 16 5m s the aircraft may fly away WARNING After realsense is turned on the speed of the aircraft will be limited to 11 2MPH 5m s If the pilot moves too fast the distance between the aircraft and the Wizard might be enlarged IMPORTANT NOTE Crash is NOT covered under warranty IMPORTANT NOTE In the team mode the gimbal camera is...

Page 18: ...bratingwhentheaircrafttravels further than 656 ft 200 m HOME MODE When the Flight Mode Selection Switch is in the bottom position the aircraft will be in the Home Mode The Aircraft Mode LED will be solid red To exit the Home Mode switch the Mode Switch to Angle Smart Mode then the aircraft will stop moving and automaticallyholditsposition withasuitableGPSsignal lock and maintain a level attitude t...

Page 19: ...an position of the gimbal camera 18 TAKING PHOTOS AND RECORDING VIDEO The ST16 seamlessly integrates control of the CGO3 so you can easily take still photos and start stop video recording using the correspond ing buttons located on the face To Take A Still Photo Press the button located near the bottom left corner of the ST16 You ll hear an audible shutter sound from the ST16 and the LED indicator...

Page 20: ...ond ing features only work when GPS is active and Typhoon H has a suitable GPS signal lock If you disable turn off GPS Typhoon H can only be flown in Angle Pilot Mode If you cannot properly control the Typhoon in Angle Pilot Mode the aircraft may crash or even fly away NOTICE IPS will be turned off when GPS is turned off do not turn off GPS when the pilot needs IPS to fly indoor IMPORTANT NOTE Crash ...

Page 21: ...ecially if you re a first time or low time pilot However if you re an experienced pilot that s able to properly control Typhoon H in Angle Pilot Mode you can disable turn off GPS Do NOT disable turn off GPS unless you accept ALL responsibility and liability for crashes or CREATE A NEW MODEL PREPARING THE ST16 STEP 1 Switch on the ST16 Ground Station then tap Model Select and if required press OK to...

Page 22: ...turn it forward as shown by the red arrow above until the two LEDs turn off CAUTION Do not calibrate the compass in parking garages close to buildings or near roads with a metal core For optimum performance only calibrate Typhoon H in open spaces far away from power lines and other metal structures or concrete buildings NOTICE Be sure to perform the compass calibration procedure at least 11 feet a...

Page 23: ...rcraft and wait till the RC and WiFi connected STEP 2 Make sure the tilt mode and pan mode all switched upwards then tap the GPS Calibration button and choose the GIMBAL CALIBRATION STEP 3 The Gimbal camera will calibrate itself automatically Wait the gimbal camera align in 3 axis and stay still which means the gimbal calibration completes NOTICE The whole calibration will take about 2 3 minutes D...

Page 24: ...Calibration Mode Entered Compass Calibration Started Accelerometer Calibration Mode Entered Accelerometer Calibration started Calibration failed CGO3 CAMERA LED STATUS INDICATIONS Without T card or T card Memory Full WiFi Error WiFi Initialized WiFi Connected Recording Video or Taking Still Photos Pulses red 3 times per second Blinks orange very rapidly 10 times per second Blinks red and white rap...

Page 25: ...s or alter this product in any way outside of the instructions provided by Yuneec The quick start guide and instruction manual contain instructions for safety operation and maintenance It is essential to read and follow all the instructions and warnings prior to assembly setup and or use in order to operate the product correctly and avoid damage or serious injury AGE RECOMMENDATION NOT FOR CHILDRE...

Page 26: ...with any worn and or damaged components parts etc including but not limited to damaged propellers rotor blades old batteries etc Never operate your aircraft in poor or severe weather conditions including heavy winds precipitation lightning etc Always operate your aircraft starting with a fully charged battery Always land as soon as possible after the first level low voltage battery warning or land...

Page 27: ...in reduced power flight duration or failure of the battery entirely LiPo cells should not be discharged to below 3 0V each under load Store the LiPo battery at room temperature and in a dry area for best results When charging transporting or temporarily storing the LiPo battery the temperature range should be from approximately 40 120 F 5 49 C Do not store the battery or aircraft in a hot garage c...

Page 28: ...r if the main components exhibit visible damage defects or missing parts Damage and or injury as well as violation of legal regulations caused by operating the model in a magnetic field e g high voltage lines electricity transformer stations radio towers mobile phone masts etc a strong wireless signal environment no fly zones poor visibility and in the event of vision impairments or other impacts ...

Page 29: ...s Reorient or relocate the receiving antenna Increase the separation between the equipment and receiver Connect the equipment into an outlet on a circuit different from that to which the receiver is connected Consult the dealer or an experienced radio TV technician for help RF EXPOSURE WARNING This equipment must be installed and operated in accordance with provided instructions and the antenna s ...

Page 30: ... FCC ID 2ACS5 SR24P IC 11554B SR24P must be used COLLECTION AND PROCESSING OF DATA Yuneec may collect navigation information such as GPS data to help improve our products We may also collect Depth Map information and Infrared Image information from your drone delivered to our service center for repair and maintenance service or any other service We may also collect other information such as device...

Reviews: