background image

6 - 

CABIN SYSTEM

6

436

CIRCUlATION 

VENTS

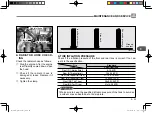
With the circulation vent set in any

position outside air will still be pulled

into the cab.

HEATINg SYSTEM

The heater is switched on and ad-

justed by rotating the control knob 

at the roof console, then switching 

on the blower and setting the selec

-

tor at the preferred speed.
Warm the cab up quickly, the knob 

should  be  rotated  fully  clockwise 

and the blower set to speed 3.

The screen is demisted or defrosted 

by air directed through a slot vent. 

For defrost or fast demist, all other 

vents should be closed off. 

NOTE

For ideal system operation, the

engine must run at 1,000 rpm.

Speed heating fan

Electric resistances

Air filter

Recirculation inlets

A

ir 

vents

T7O61A

Ventilation is provided by a

single blower unit serving both

the heating system and the air

conditioning system.

After  reaching  the  desired

temperature adjust the system

to suit your needs.

IMpORTANT

T4NO606A

T474NH-영문-06(바).indd   9

2019-03-06   오전 10:01:11

Circulation 

Vents

Summary of Contents for T474

Page 1: ...as cause accidents with the associated injuries Please note that in some cases differences can exist between this manual and your tractor due to the manu facture s policy of constant product improveme...

Page 2: ...h the warning WARNING Hazard or unsafe practice that can lead to severe injury or death CAUTION Hazard or unsafe practice that can lead in injury or death IMPORTANT Instructions for the correct operat...

Page 3: ...the chassis number T4HO001B The manufacturer warrants this product and full details of the war ranty are provided on a separate warranty schedule WARRANTY OF THE PRODUCT Service is available from any...

Page 4: ...ices as specified in this manual are carried out at the rec ommended intervals Read this Manual carefully and keep it in a convenient place for fu ture reference If at any time you re quire advice con...

Page 5: ...ors They stock genuine spare parts and are backed by the Company s full support Through this manual The use of the terms LEFT RIGHT FRONT and REAR must be understood to avoid any confusion when follow...

Page 6: ...Transmission The Tractor is fitted HST with 3 Range and can be selected Speed range by HIGH LOW selector lever The Tractor has Two pedals for for ward reverse control Tractor with Independent Power T...

Page 7: ...tributor s Service Departments however misunder standing can occur If you feel that your problem has not been handled to your satisfaction we suggest the following Contact the owner or General Man age...

Page 8: ...the mounting structure is damaged or cracked the faulty component must be replaced with a new unit Such a unit must meet all of the test criteria of the original unit Fitment of an in ferior item or...

Page 9: ...recom mended torque values are applied to the attaching bolts WARNING Do not use solvents to clean the seat Use warm water with a little detergent added NOTE SEAT SLIDING WARNING Do not weld drill or...

Page 10: ...if frayed or damaged DANGER 6 SAFETY INSTRUCTIONS T74O201A This symbol means ATTENTION YOUR SAFETY IS INVOLVED The message that follows the symbol contains important information about safety Carefully...

Page 11: ...OTECTION CHILDREN T72O204A Keep children and others away from the tractor while operating BEFORE YOU REVERSE Look behind tractor for children Do not let children to ride on trac tor or any implement U...

Page 12: ...the operator in the event of a roll over T72O206A Do not drive where the tractor could slip or tip Stay alert for holes and rocks in the terrain and other hidden hazards Slow down before you make a s...

Page 13: ...ame or sparks Always stop engine before refueling tractors Always keep your tractor clean of accumulated grease and debris Al ways clean up spilled fuel HANDLE FUEL SAFELY AVOID FIRES T72O210A Entangl...

Page 14: ...not attempt to service tractor when it is in motion Keep body and clothing away from rotating shafts Always lower equipment to the ground Stop the engine Remove the key Allow tractor to cool before a...

Page 15: ...gas can explode Never check battery charge by plac ing a metal object across the poles PREVENT BATTERY EXPLO SIONS T72O215A Sulfuric acid in battery electrolyte is poisonous It is strong enough to bur...

Page 16: ...these items were to get caught severe injury could re sult Remove rings and other jeweler to prevent electrical shorts and entan glement in moving parts SERVICE TRACTOR SAFELY 1 When working with you...

Page 17: ...standing nearby the tractor 2 For additional safety keep the pull to stop knob Fuel shut off con trol in fully pulled out position Transmission in neutral position Foot brake engaged and PTO le ver i...

Page 18: ...for versions with openable front window T74O223A Never let anyone get in the loader and use the loader as a workbench Otherwise it may lead to a fatal in jury or even death Safety precautions when us...

Page 19: ...allow loader arms or attach ment to contact electrical power lines Electrocution will cause seri ous injury or death T74O229A T74O228A IMPORTANT ROPS Roll Over Protective Structure sun canopy or cab i...

Page 20: ...object low during driving Otherwise it may lead to an injury or even death T74O230A When attaching or detaching the loader fix all parts which are con nected to the bucket and boom The bucket or boom...

Page 21: ...arts of the tractor or ma chine and protect him or her from the elements When spraying or using chemicals please ensure that clothing and pro tective equipment is worn which pre vents respiratory or s...

Page 22: ...nsure that the area is well ventilated as exhaust gases are very harmful and can cause death 6 Do not work under raised imple ments 7 When changing wheels or tires ensure that a suitable wheel stand i...

Page 23: ...ly trained operators should op erate the tractor and so taking care to ensure that other workers are not injured In particular they should take care during dusty op erations which will reduce visibili...

Page 24: ...and seat belt for safe operation Over turning of a tractor without a rollover bar can result in death or injury 3 Do not remove ROPS Roll Over Protective Structure Always use the seat belt 4 Fiberglas...

Page 25: ...sides the tractor Always sit on the tractor seat when the engine or operating controls 3 Safety start In order to prevent the acciden tal starting of the tractor a safe ty switch has been provided The...

Page 26: ...gency stopping instruction If tractor fails to stop even after application of brakes Pull the knob of fuel shut off control rod DRIVING THE TRACTOR 1 Watch where you are going es pecially at row ends...

Page 27: ...e gaso line In a closed container such as a fuel tank DO NOT USE THESE BLENDS 3 Never remove the fuel cap or re fuel the tractor with the engine running 4 Do not smoke while refueling or when standing...

Page 28: ...ly DO S For Better performance DO Keep the radiator filled with clean water and in cold weath er use anti freeze mixture Drain the system only in an emergency and fill before starting the engine DO En...

Page 29: ...the engine with the PTO engaged DON T Use the governor Control Lever Hand throttle while driving on roads Don ts For safe operation DON T Run the engine with the air cleaner disconnected DON T Start t...

Page 30: ...30 SAFETYPRECAUTIONS MEMO T474NH 01A indd 30 2019 03 06 9 22 12...

Page 31: ...GENERAL INFORMATION DESCRIPTION OF TRACTOR CONTROLS OPERATION WORK PROCEDURE MAINTENANCE CABIN SYSTEM STORAGE AND DISPOSAL TROUBLESHOOTING SAFETY STANDARD FOR FARM WORK APPENDIX INDEX 11 T474NH 01B i...

Page 32: ...InT lInKaGE TPL NON CAB MODEL 2 31 7 OPERaTInG THE 3 POInT lInKaGE CABIN MODEL 2 32 OPERATION 3 1 Engine starting 3 2 2 Engine Stopping 3 3 3 Engine idling 3 3 4 Running in period 3 4 5 Starting off s...

Page 33: ...dule 5 24 CABIN SYSTEM 6 1 MAJOR FEATURES 6 2 2 Instrument and Related parts 6 3 3 How to Controls Cabin 6 5 STORAGE AND DISPOSAL 7 1 Tractor storage 7 2 2 Usage and disposal 7 3 TROUBLESHOOTING 8 1 E...

Page 34: ...TABLE OF CONTENTS APPENDIX 10 1 Major specifications 10 2 2 Major consumables 10 4 INDEX 11 1 Index 11 2 T474NH 01B indd 4 2019 03 06 10 17 53...

Page 35: ...GENERAL INFORMATION 1 EXTERIOR VIEW NON CAB MODEL 1 2 2 EXTERIOR VIEW CABIN MODEL 1 4 3 SAFETY SIGNS 1 7 1 T474NH 01B indd 1 2019 03 06 10 17 54...

Page 36: ...1 GENERAL INFORMATION 1 EXTERIOR VIEW NON CAB MODEL Tire Rear Tire Front Sub Fender T4HO101A Turn Signal Lamp R Headlamp T474NH 01B indd 2 2019 03 06 10 17 55...

Page 37: ...1 1 GENERAL INFORMATION T4HO102B Hood Headlamp Steering Wheel Muffler Pipe Turn signal lamp L T474NH 01B indd 3 2019 03 06 10 17 56...

Page 38: ...1 GENERAL INFORMATION 2 EXTERIOR VIEW CABIN MODEL Outside Rearview Mirror Head Lamp Door Handle Tire Rear T4HO103C T474NH 01B indd 4 2019 03 06 10 17 57...

Page 39: ...1 1 GENERAL INFORMATION Turn Signal Position Lamp Front Tire Front Engine Muffler Engine Hood Wiper Front Working Lamp Front T474NH 01B indd 5 2019 03 06 10 17 57 T4HO104c...

Page 40: ...GENERAL INFORMATION Towing Hitch Turn Signal Lamp Rear Working Lamp Rear Fuel Tank Position Brake Lamp Rear Lift Rod Lower Link PTO Shaft Top Link T39O202C T4HO109A T474NH 01B indd 6 2019 03 06 10 17...

Page 41: ...or acetone because these can erase characters or pictures If washed with high pressured water a decal may be peeled off Do not apply high pressured water directly onto decals If a safety decal is dama...

Page 42: ...shudwru v Pdqxdo 46 60 530 3403 Rshudwh derxw 63plq GSI HJW RQ Exwwrq eolqnlqj Frpsohwh Odps rii 41Sdun rxwvlgh vdih orfdwlrq 51Vwrs doo ixqfwlrqv1 61Sdunlqj eudnh RQ 71Hqjlqh vshhg wr Pd USP Suhvv fo...

Page 43: ...hqjlqh fdq vwduw zlwk wudqvplvvlrq lq jhdu1 Gr qrw frqqhfw ru vkruw dfurvv whuplqdo rq vwduwhu vrohqrlg1 Dwwdfk errvwhu fdeohv dv vkrzq rq edwwhu ghfdo dqg rshudwruv pdqxdo1 Vwduwlqj lq jhdu fdxvlqj u...

Page 44: ...0 WARNING LOCK UNLOCK Push the button to lock position with joystick lever is neutral whenever the implement is not operation 1769 910 009 0 WARNING Stay clear of raised boom and bucket 1769 910 010...

Page 45: ...odic ventilation should be made to avoid suffocation while heating an air conditioning is used Sleeping in the cab is prohibited WARNING Work in ventilated 1200 910 003 0 area GSI uhjqhudwlrq surfhgxu...

Page 46: ...qqhfw ru vkruw dfurvv whuplqdo rq vwduwhu vrohqrlg1 Dwwdfk errvwhu fdeohv dv vkrzq rq edwwhu ghfdo dqg rshudwruv pdqxdo1 Vwduwlqj lq jhdu fdxvlqj uxqdzd fdq uhvxow lq vhulrxv lqmxu 1 W L O W K D Q G O...

Page 47: ...1 1 13 GENERAL INFORMATION GDQJHU T4HO112A T474NH 01B indd 13 2019 03 06 10 18 17...

Page 48: ...MEMO T474NH 01B indd 14 2019 03 06 10 18 18...

Page 49: ...AND SWITCHES CABIN TYPE 2 3 3 operating method 2 15 4 Instrument panel lamp and buzzer op erating conditiONS 2 16 5 OPERATION THE CONTROLS 2 19 6 OPERATING THE 3 POINT LINKAGE TPL NON CAB MODEL 2 31 7...

Page 50: ...TCHES NON CAB TYPE Horn Turn signal switch Light switch T4HO202E Key switch Hazard switch Brake pedal Tilt lever Cruise switch INFO Switch Regen switch PTO ON OFF switch PTO mode switch Parking brake...

Page 51: ...AND SWITCHES CABIN TYPE Tilt lever Light switch Turn signal switch Horn Hazard switch T4HO219C Regen switch INFO Switch Tacho Meter PTO ON OFF switch Key switch PTO mode switch Parking brake lever T4...

Page 52: ...tion The ignition key can be inserted and removed in this position When turning the switch to the OFF position with the engine running the engine is stopped ON position The engine is kept running and...

Page 53: ...w vG W Y ZW XWW YW X XW W Z W XYZ U ZW V o m l T4HO205A Fuel gauge This indicates the amount of fuel while the main switch is in the ON position F Full E Empty Poor fuel quality can damage the engine...

Page 54: ...l switch Turn signal RH Turn signal LH Light switch Horn switch The high beam can obstruct the view of other drivers coming in the opposite direction on a road leading to an unexpected accident WARNIN...

Page 55: ...ockwise Then the left turn signal lamp and the left turn signal indica tor on the instrument cluster blink If one side is blinking The other side is still on Right turn Push the turn signal switch clo...

Page 56: ...if pressing the switch to the OFF portion or depressing the brake pedal T4HO209B Cruise switch T4HO215B throttle To activate the auto throttle function Depress the speed control pedal To forward spee...

Page 57: ...HO210B Right Turn Signal lamp Low Beam Lamp Coolant Warning Lamp Charge Warning Lamp Parking Brake Lamp Preheat Lamp Engine Oil Pressure Warning Lamp PTO Lamp High Beam Lamp Left Turn Signal lamp Crui...

Page 58: ...beam lamp This comes on when the high beam is turned on High beam lamp Low beam lamp Turn signal lamp 1 Turn signal lamp This lamp is used to indicate the intended turning direction of the driver Whe...

Page 59: ...When the oil pressure warning lamp comes on this indicates malfunction of the lubrication system Check the engine oil immediately and have your ve hicle serviced by your workshop as necessary NOTE 7...

Page 60: ...r work dur ing regeneration NOTE 11 DPF warning lamp This lamp blinks when carbon is accumulated in the diesel particulate filter If this lamp blinks press the regeneration button DPF warning lamp 12...

Page 61: ...ically stopped Manual The rotating status of the PTO shaft can be controlled by operat ing the PTO ON OFF switch to the ON OFF position manually 2 Operation of PTO ON OFF button switch Operation for a...

Page 62: ...O shaft is rotating OFF The PTO shaft is stopped T4HO211A INFO Switch Pressing the button displays useful information on the instrument clus ter such as the battery voltage and coolant temperature T4H...

Page 63: ...ration Engine Max RPM Regeneration Button Press more than 3 sec Electronic Exhaust Valve Operation Regeneration Complete DPF Lamp Off T474NH 02 indd 15 2019 06 14 9 49 54 Stop the tractor in open plac...

Page 64: ...uzzing again in 1minute DPF regeneration start Buzzing 1time 2s During DPF regeneration DPF EGT on Regeneration button blinking DPF regeneration complete Lamp Off Buzzing 3times 1s 1s 1s Installation...

Page 65: ...m Lamp Buzzer Coolant temperature over 105 C during DPF regeneration ACK DPF EGT On Regeneration button blinking Release mode Regeneration failure DPF EGT Blinking Release mode DPF EGT Blinking Force...

Page 66: ...zzer Engine sensor fault RPM RPM OFF On Coolant temperature Coolant temp OFF On Electronic exhaust valve fault Fail EGT Blinking DPF fail DPF damage Fail DPF On DPF removal Fail DPF On Engine and DPF...

Page 67: ...TRACTOR CONTROLS 2 2 19 T4HO212B Position lever Steering wheel 4WD lever Throttle lever Tilt lever Joystick lever P T O Shift lever 5 OPERATION THE CONTROLS T474NH 02 indd 19 2019 06 14 9 50 00 Parki...

Page 68: ...ed off There is an engaging hook for con necting the left and right brake ped als T4HO223A Brake pedal LH Engaging hook Never use it unless working in a field It can lead to speeding and an accident G...

Page 69: ...t and right brake ped als interlocked depress the brake pedal with a right foot firmly and pull up the parking brake lever to lock the pedals To release the parking brake de press the brake pedal firm...

Page 70: ...ins Engagement Depressing pedal Disengagement Releasing pedal T39O318A Differential lock pedal G NOTE Operate the sub shift lever only after the tractor is com pletely stopped Shifting the le ver duri...

Page 71: ...eleasing the differential lock pedal gently depress the left and right brake pedals alternately NOTE Examples of useful conditions of differential lock One wheel slips or tractor cannot be driven forw...

Page 72: ...The seat can be adjusted by moving it forwards and backwards with the seat sliding lever on its front pushed to the left After adjustment make sure that the seat is firmly secured 2 Seat belt Before...

Page 73: ...SHAFT CAP When the PTO shaft is not in use grease the PTO shaft and install the cap to it It is dangerous to use an imple ment at a high speed if it is de signed to be operated at a low speed Before u...

Page 74: ...here fore when connecting the hydraulic pipes set the valve connection according to the op erating directions specified on the label attached to the joystick lever WARNING T4HO220A LOADER VALVE 3th KI...

Page 75: ...tor stopped If so operate the steering wheel while driving the tractor at a low speed 3 When the steering wheel is completely turned to one end the safety valve is activated to output the audible sign...

Page 76: ...226A Position lever When leaving the tractor make sure to lower the implement and stop the engine Others may operate one of the controls leading to a dangerous situa tion WARNING Hydraulic lowering sp...

Page 77: ...rn the knob counterclockwise faster Lock Turn the knob clockwise slower to its end T253O241A Slower Faster Lock Aux hydraulic lever When using an attachment for an implement rotavator hydraulic plow e...

Page 78: ...How to disengage coupler Lower the implement on the ground to release pressure in the hydraulic hose Stop the engine and operate the remote hydraulic lever to remove any residual pressure in the hose...

Page 79: ...TING THE 3 POINT LINKAGE TPL NON CAB MODEL T39O323A Lift rod Lower link PTO shaft PTO cover Towing hitch Brake lamp Turn signal lamp Top link Working Lamp Option Power connector for trailer Option Che...

Page 80: ...NTROLS 2 32 7 OPERATING THE 3 POINT LINKAGE CABIN MODEL Top link Lift rod Check link PTO Shaft Towing hitch PTO cover Lower link Brake lamp Turn signal lamp T4HO221A Fuel Tank Working Lamp T474NH 02 i...

Page 81: ...K An implement can be attached to this The installation type is Catego ry I When no implement is at tached fix the lower links with the left and right check links so that they do not touch the rear wh...

Page 82: ...eiling such as a ga rage T4HO201A ROPS TOWING HITCH Install only an implement applicable to this tractor Make sure to use the towing hitch for towing to avoid roll over Never tow anything by connectin...

Page 83: ...LS 2 2 35 If a rollover accident occurs without the safety frame the frame cannot protect the driver leading to a severe injury or even death Never drive with the safety frame detached WARNING T474NH...

Page 84: ...MEMO DESCRIPTION OF TRACTOR CONTROLS T474NH 02 indd 36 2019 06 14 9 50 25...

Page 85: ...ting off shifting and driving 3 4 6 Turning in field 3 5 7 Stopping and parking 3 5 8 Driving on slope 3 6 9 Cautions for driving into out of field 3 7 10 Loading to Unloading from truck 3 7 11 Cautio...

Page 86: ...firm that all monitoring lamps go off after the engine is started 1 Engine starting The engine will not start unless the brake pedal is depressed Do not turn the main switch to the START position whil...

Page 87: ...t If neglecting to idle the engine it can cause Seizure of the hydraulic pump Filure in the hydraulic system NOTE Make sure to apply the parking brake while idling the engine Never idle the engine in...

Page 88: ...e to the speed in the forward direc tion Make sure to check the surroundings carefully when driving backward Especially never drive back wards with the range shift lever in the position H The driving...

Page 89: ...rge Be extra care with other people and ob jects around when turning Connect the left and right brake pedals when it is about to drive WARNING T39O401A Interlock Raise Open 7 Stoppingandparking Operat...

Page 90: ...ion on a slope to prevent the engine from stop ping 2 Keep the driving speed low on a downhill road 3 Do not set the range shift lever in the neutral position on a downhill road On a downhill road but...

Page 91: ...become out of balance and roll over It is very dangerous to ride a person as a front weight WARNING For detailed precautions refer to the page 0 26 10 lOAdINg TO uNlOAdINg fROm TRuCk When loading the...

Page 92: ...he followings 12 Operation check during driving When the coolant temperature warning lamp comes on the engine is overheated If running the engine under this condi tion continuously the engine parts ca...

Page 93: ...4 Work Procedure 1 Precautions for handling implement 4 2 2 General implement 4 2 34 T474NH 04 indd 1 2019 03 06 9 41 16...

Page 94: ...joint When adjusting each part disen gage the PTO and stop the en gine in advance When driving on a road keep the PTO disengaged Also keep the rotavator lowered on a road as long as it does not hit t...

Page 95: ...set a lit tle narrower than three times of one plowing width The starting point is the ending point Plow in a sequential pattern from 1 to 6 and in a circular pattern from 7 to 18 When driving forwar...

Page 96: ...nd 4 should be overlapped with the one for 5 6 and 7 for approx 10 cm For the sections 1 to 7 per form plowing in an alternating pattern For the sections 8 to 19 plow in a circular pattern Refer to th...

Page 97: ...working in a wet field fill the field with a sufficient amount of water so that the trace of plowing cannot be seen The border shown in the fig ure should be set a little narrow er than two times of o...

Page 98: ...4 WORK PROCEDURE MEMO T474NH 04 indd 6 2019 03 06 9 41 24...

Page 99: ...g oil 5 6 5 Replacing filter and cartridge 5 10 6 Fuel system 5 12 7 Checking and cleaning air cleaner 5 13 8 Adjusting tread 5 14 9 Greasing 5 15 10 Checking hoses 5 15 11 Checking electric system 5...

Page 100: ...following order 2 Inspection items Check the items that were faulty yesterday Go around the tractor and check Lamps for proper illumina tion and damage Tires for inflation pressure crack damage and we...

Page 101: ...e for proper op eration Fuel level Engine oil and charge warning lamps for blinking operation Turn signal lamp Horn operation Brake pedal free play Start the engine drive the tractor slowly and check...

Page 102: ...5 minutes Then check coolant in the reservoir tank and add more coolant as necessary Do not open the cap when the engine is hot Otherwise hot steam can burn you seriously Wait until the engine is suff...

Page 103: ...ator and condenser grilles When working in a grassy field or working at night the radiator or condenser grille may be clogged by grass straws or bugs reducing cooling performance In this case clean th...

Page 104: ...specified amount of the specified engine oil through the filler hole 4 Checking and changing oil Checking and changing engine oil 1 Inspection Pull out the dipstick wipe its tip and insert it again T...

Page 105: ...orm inspection with the engine stopped Check the transmission fluid level through the sight glass to see if the level is between the upper and lower limits If insufficient add oil If engine oil gets o...

Page 106: ...ole If transmission fluid gets on your skin it can irritate the skin and cause a skin condition Make sure to clean your skin with soap and water or hand cleaner thoroughly CAUTION Do not add fluid ove...

Page 107: ...ugs on the bottom of the axle and left right final cases to drain engine oil Since hot fluid flows out of the engine first be careful not to get burnt After draining oil tighten the oil drain plug Add...

Page 108: ...again If still insufficient add more If oil gets on your skin it can ir ritate the skin and cause a skin condition Make sure to clean your skin with soap and water or hand cleaner thoroughly Make sur...

Page 109: ...placing engine oil filter cartridge Remove the engine oil filter car tridge by turning it counterclock wise with a wrench Apply a thin film of oil to the O ring of a new cartridge and install the new...

Page 110: ...the fuel filter cock to the OFF position Loosen the ring screw on top of the cap to remove the cap Then Flush the element with diesel fuel to remove any foreign material from it If the element is seve...

Page 111: ...a rock or concrete during its cleaning Make sure to install the element firmly Tighten each part of the air cleaner securely to block dust completely NOTE Vacuum valve cleaning Pull out the valve with...

Page 112: ...nged Keep this in mind during driving CAUTION For safety have tread adjust ment performed by your dealer or workshop Never remove tires if there is no safe supporting device The tractor can roll over...

Page 113: ...el to access to the grease nipple Add grease with the supplied grease gun 9 Greasing 10 Checking hoses Rubber parts such as the fuel hose and radiator hose are aged by time even when the tractor is no...

Page 114: ...y electrolyte is sulfu ric acid so can burn your skin and eyes Be careful not to spill any DANGER Checking and charging battery If the battery electrolyte gets on your eyes skin clothes or object rins...

Page 115: ...battery with the nor mal procedures and avoid quick charging Turn the charger switch OFF and connect the cables to the nega tive and positive battery termi nals correctly When using a charger its char...

Page 116: ...al battery Then start the engine of the tractor with the discharged battery After the engine is started discon nect the negative cable first Then disconnect the positive cable Charge the discharged ba...

Page 117: ...ty Also never use a steel wire or foil instead of a fuse WARNING 2 High capacity fuse 50 A This tractor is equipped with four fuses for wirings These fuses are blown to cut cur rent to the electric ci...

Page 118: ...p Remove the bulb from the socket and check for blown filament If the filament is blown replace the bulb with a new bulb with the same capacity Bulb Specifications Headlamp 12V H4 55W Turn signal lamp...

Page 119: ...g it clockwise decreases the play After adjustment tighten the lock nut firmly 12 Check and adjust each part Lock nut Turn buckle T0499 If the left and right brakes are not operated simultaneously bra...

Page 120: ...t or some pieces are detached T254O525B Mounting bolt Fan belt 0 15 mm Fuel hose checking Check the fuel hose as follows Stop the engine After the engine is sufficiently cooled down open the hood Chec...

Page 121: ...PR Rear R1 Agricultural 12 4 24 6PR Front R4 Industrial Tires 27 10 5 15 8PR Rear R4 Industrial Tires 12 5X20 12PR Front R3 Turf Tires 28x8 5 15 4PR Rear R3 Turf Tires 41x14 20 4PR RADIATOR HOSE CHECK...

Page 122: ...e Daily 50 100 150 200 250 300 350 400 450 500 550 600 Engine Engine oil cartridge Every 250 hrs 5 6 Cleaning fuel filter and replacing element Replace element every 500 hours 5 12 Radiator coolant 5...

Page 123: ...Toe in 2 6 mm Greasing each part Add every 50 hours daily if working in watery field 5 26 Brake pedal play Check frequently before driving check simultaneous operation of left and right parts Play 30...

Page 124: ...ulic Fluids API GL 4 Grade Below 4 20 ISO VG 32 Above 4 20 ISO VG 46 9 25 35 4 Front axle Gear Oils API GL 4 Grade SAE 80W 90 2 16 8 2 5 Fuel tank Diesel fuel 9 51 36 T39O516A Front axle oil filler ho...

Page 125: ...CABIN SYSTEM 1 MAJOR FEATURES 6 2 2 Instrument and Related parts 6 3 3 How to Controls Cabin 6 5 1 6 4 36 T474NH 06 indd 1 2019 03 06 10 00 50...

Page 126: ...ng equipment is generating dan gerous noise levels CAUTION Be very careful during imple ment hitching and unhitching operations When using imple ment supports be sure they are suitable and sufficientl...

Page 127: ...downwards T72O603A Rear Window The rear window is fitted with cen tral handle for opening When opened it is held in place by two dampers T72O604A Working lamps front and rear The working lamps are loc...

Page 128: ...ways be positioned in compliance with road traffic regulations when driving on a public highway Cab ceiling The ceiling is padded with insulation material to block heat radiation into the cab and keep...

Page 129: ...talled in the rear section of the cab roof The fan switch can be operated only after the ignition key is inserted The air flow can be regulated and directed by suitable positioning the air diffusers A...

Page 130: ...ab it is necessary to take the air from the outside therefore the inside air recirculatiing grille should be fully closed Working lamp switch The front and rear working lights are ON when push the but...

Page 131: ...the windscreen washer fluid Interior Lamp Push the button to light on and push it again to light off Blower control switch Blower switch Air volume can be changed in 5 steps from 0 to 4 At the 4 posi...

Page 132: ...6 C to 15 C less than the ambient temperature will occur When operating the air condition er system the moisture level is de creased NOTE During cold weather with am bient temperature above 32 F 0 C o...

Page 133: ...nd the blower set to speed 3 The screen is demisted or defrosted by air directed through a slot vent For defrost or fast demist all other vents should be closed off NOTE For ideal system operation the...

Page 134: ...dusty environments HEATING Air conditioner system The system is designed to ensure optimum temperature inside the cab and maximum comfort and safety for the operator However it is advisable to consul...

Page 135: ...ents T72O616A Cab Air intake filter The paper filter is not suitable for the treatment of pesticides and so must be replaced by an active car bon filter available optionally Once the pesticide treatme...

Page 136: ...are not capable of removing chemicals used in spraying crops or in weed con trol Many chemicals used for these purposes are toxic when improperly used and can be hazardous to operators and others in t...

Page 137: ...d point between both pul leys 3 Condenser fins must always be duly clean using water or an air set T72O620B Cup Holder Checking the air condi tioning system charge 1 Check the refrigerant charge Run t...

Page 138: ...or oil leakag Sealing washer damaged Replace Head bolt released Tighten the bolts D ring damaged Replace Excessive pressure Low High pressur Insufficient refrigerator Adjust Compressor Replace 2 Moto...

Page 139: ...nction Replace 2 How to check the air conditioning system with the needle of high low gauge To connect with manifold pressure gauge can find the cause of air conditioning system Because manifold press...

Page 140: ...6 16 CABIN SYSTEM MEMO T474NH 06 indd 16 2019 03 06 10 01 19...

Page 141: ...7 Storage and Disposal 1 Tractor storage 7 2 2 Usage and disposal 7 3 6 4 37 T474NH 07 indd 1 2019 03 06 10 04 06...

Page 142: ...or 5 min utes to distribute oil to each part evenly 2 Drain coolant from the radiator Then make a label indicating No Coolant and fix it onto the steering wheel If antifreeze is already added it is no...

Page 143: ...power If wiring is damaged by rodents its short circuit can start a fire CAUTION It is recommended to keep the fol lowings to protect the environment 1 Avoid overloading work as it can lead to incompl...

Page 144: ...7 STORAGE AND DISPOSAL MEMO T474NH 07 indd 4 2019 03 06 10 04 19...

Page 145: ...TROUBLESHOOTING 1 Engine SYSTEM 8 2 2 Brake system 8 6 3 Steering system 8 6 4 Hydraulic system 8 7 5 Electric system 8 8 8 76 4 38 T474NH 08 indd 1 2019 03 06 10 05 55...

Page 146: ...ed or replaced by workshop The start motor runs but its speed cannot be increased Weak battery Charge the battery Poor ground Clean the contact and connect the ground firmly Incorrect viscosity of eng...

Page 147: ...paired by workshop Low idle speed Adjust it to the standard speed Faulty nozzle Have it repaired by workshop The engine overruns Restricted governor Have it repaired by workshop Oil rise Have it repai...

Page 148: ...ired by workshop The engine does not produce sufficient power Clogged or carbon on nozzle tip Have it repaired by workshop Insufficient compression or gas leak from valve seat Have it repaired by work...

Page 149: ...ogged oil filter element Replace the oil filter The charge warning lamp comes on during driving Defective wiring Check for loose or missing terminal short circuit and poor ground and repair as necessa...

Page 150: ...the spring No grease on each sliding section Remove rust and apply grease 3 Steering system TROUBLE PROBABLE CAUSE SOLUTION Steering system The steering wheel feels heavy The steering wheel vi brates...

Page 151: ...e it repaired by workshop Damaged and seizured lift shaft rotating part Have it repaired by workshop The hydraulic pressure won t be increased Insufficient engine RPM Set the speed to 1000 to 1500 RPM...

Page 152: ...elt Defective battery function Check for loose or corroded terminal and insufficient elec trolyte and take any necessary action The headlamp does not produce enough light Low charging level of battery...

Page 153: ...nal lamp does not blink Blown bulb Replace the bulb Defective flasher unit Replace Poor contact Check and clean the ground and terminal The work lamp does not come on Blown bulb Replace the bulb Conta...

Page 154: ...8 10 TROUBLESHOOTING MEMO T474NH 08 indd 10 2019 03 06 10 05 58...

Page 155: ...use 9 2 2 Checkup list before operation 9 3 3 Cautions during the work 9 4 4 Cautions when driving on the farm road 9 5 5 Instruction after use 9 6 6 Cautions for inspectionand maintenance 9 6 7 Tract...

Page 156: ...ipping Put on an appropriate non slippery shoes to prevent a fall from the machine scattering soil and slippery surface Measures against dust and toxic gas Wear an appropriate protective gear Measures...

Page 157: ...keep them away and then drive the machine Do not load flammable explosive material diesel gasoline etc on the machine When getting on and off a truck have a helper give you signal and follow his her l...

Page 158: ...off the operating machine except for emergency Be cautious not to let anyone touch the belt Always check the connected area of belt When two people are working collaboratively ex change signals each...

Page 159: ...fast abrupt starting abrupt accelera tion sudden stop and quick turning When driving at high speed do not slam on the brake Never slam on the brake especially when turning at high speed When loading...

Page 160: ...refuel either when the engine is still hot or while driving Measures against a fire Every working place with a risk of fire should be provided with a fire extinguisher Prevent a fire by taking measur...

Page 161: ...modify it Replace the damaged safety frame with a new one If the safety frame was removed for specialized work restore it immediately Be careful to touch dangerous area such as power transmission gea...

Page 162: ...9 SAFETY STANDARD FOR FARM WORK MEMO T474NH 09 indd 8 2019 03 06 10 07 08...

Page 163: ...Appendix 1 Major specifications 10 2 2 Major consumables 10 4 1 1 10 T474NH 10 indd 1 2019 03 06 10 07 48...

Page 164: ...ange MaxTravellingspeed mph km h 18 4 9 7 Brakes Wet Disc Steering Hydrostatic Model t474nH sH Hydralic System Pump type Dual Gear Pump Implement pump cap gpm L Min 6 4 4 4 Steering pump cap gpm L Min...

Page 165: ...of ROPS in mm Noncabtype 94 4 2 400 Cab type 92 5 2 350 Min Ground Clearance in mm 12 8 325 Min Turn Radius witd Brakes in mm Noncabtype 107 6 2 735 Cab type 104 2 655 Min Turn Radius w o Brakes in mm...

Page 166: ...n belt 3 Fuel filter 1 Fuel filter 4 Engine oil filter 1 Engine oil filter 5 Filter cartridge 1 Transmission hydraulic oil V belt Fuel filter T254O901A HST Filter Element SET V belt Engine oil filter...

Page 167: ...INDEX 1 INDEX 11 2 11 T474NH 11 indd 1 2019 03 06 10 09 00...

Page 168: ...ions during the work 9 4 Cautions for driving into out of field 3 7 Cautions for driving on road 3 8 Cautions for inspection and maintenance 9 6 Cautions when driving on the farm road 9 5 Charging 3 8...

Page 169: ...lock pedal 2 22 Doors 6 3 Driving on slope 3 6 driving speed control pedal 2 21 E Electric system 8 8 EMISSION SYSTEM WARRANTY 12 5 Engine and DPF malfunction 2 18 Engine coolant 3 8 Engine coolant i...

Page 170: ...2 14 Inspecting and changing coolant 5 4 Inspection items 5 2 Inspection items 5 2 Installation and DPF regeneration 2 16 Instruction after use 9 6 Instruction before use 9 2 Instrument and Related p...

Page 171: ...t 4 2 PTO SHAFT CAP 2 25 PTO shift lever 2 25 R RADIATOR HOSE CHECK ing 5 23 Radio CD player If equipped 6 12 Rear Window 6 3 Rearview mirrors 6 4 Replacing engine oil filter cartridge 5 11 Replacing...

Page 172: ...TION 6 12 TOP LINK ADJUSTMENT 2 33 TOWING HITCH 2 34 Tractor 9 7 Tractor storage 7 2 Transmission strainer cleaning 5 10 TROUBLESHOOTING 8 1 Turning in field 3 5 U Usage and disposal 7 3 Use after lon...

Page 173: ...kage 4 Independent PTO operation 2 Transmission fluid level and leak age 5 Work lamp illumination Instrument Device 1 Instrument flash and light Driving and Control Device 1 Shuttle shift lever operat...

Page 174: ...T474NH 12 indd 15 2019 03 06 10 09 50...

Page 175: ...T474NH 12 indd 15 2019 03 06 10 09 50 T474 NH SH Operator s Manual for Tractor Code No 1383 912 002 0 Printed on August 2020...

Reviews: