background image


6


Mounting the 5MP Pro Fisheye Camera  

To tilt mount the Illustra 5MP Fisheye camera, complete the following steps:  
  

1.  Unscrew the two M3 x 10 hex standoff screws on the tilt plate, using a Torx wrench.  
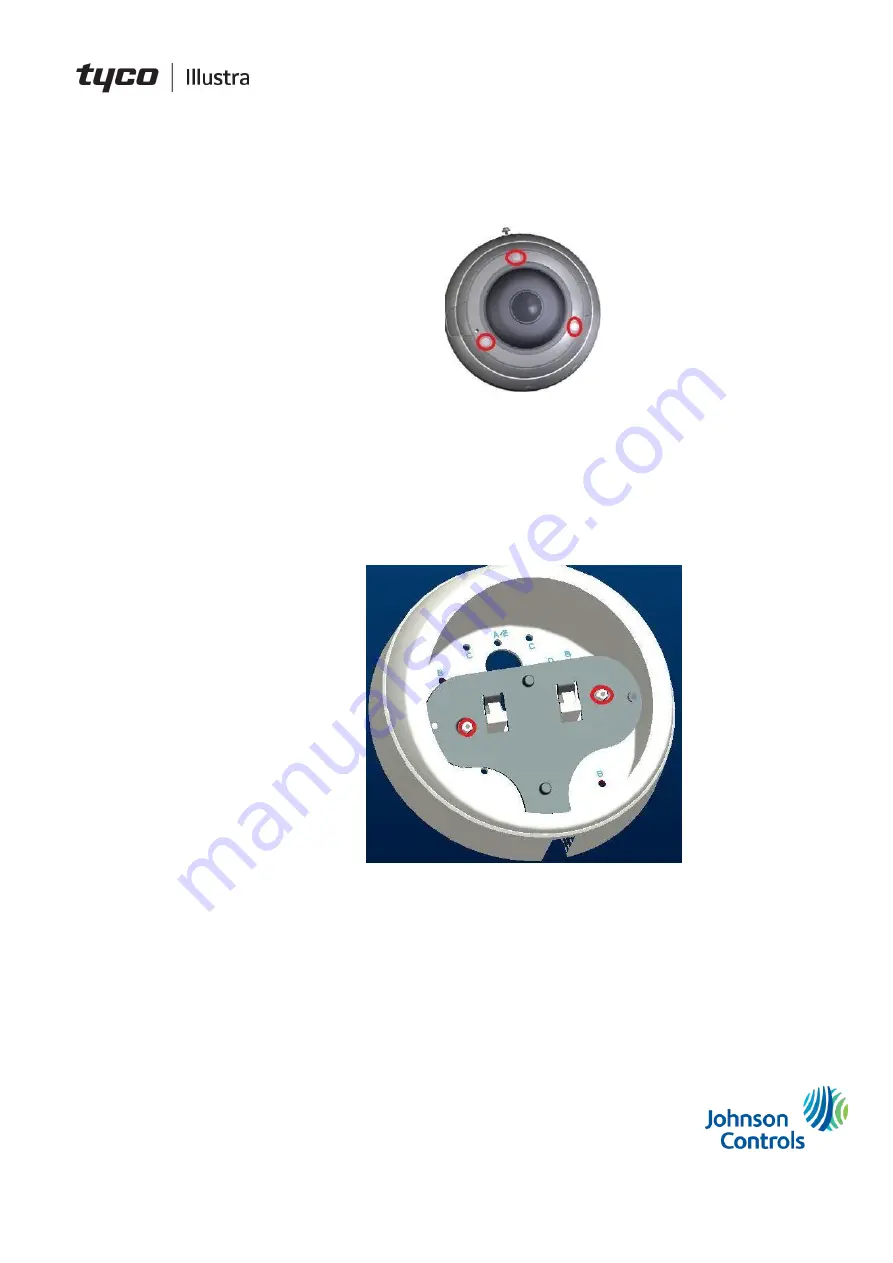
2.  Unscrew the three screws on the camera front cover using a Torx wrench, and remove the 

camera front cover.  


Figure 6

. Site of screws on camera front cover 


3.  Thread the camera network cable into an opening on the back plate and align the top side of the 

camera with the top of the back plate.  

4.  Secure the camera base to the M4 threaded inserts that are fitted in the tilt plate, using the M4 

fasteners supplied in the installation kit. Ensure the camera is rotated to a horizontal plane and 
that it is centered on the tilt plane. Refer to Table 1. Wall Box Information for information on 
securing the tilt plate to the wall box.  


                             Figure 7

. Camera base assembly with tilt mount attached 


Note: 

Remove the two M3 Hex Standoffs, circled in red, before fitting the camera.  


5.  To adjust the angle of the tilt on the tilt mount, loosen the locking screw at the bottom of the mount 

and slide the lock to the desired point on the slot. Tighten the locking screw when the tilt mount is 
at desired angle.  

6.  Replace the camera cover on the camera and secure it by tightening the two screws using the 

Torx wrench.  

Summary of Contents for ADCI825LT-F311

Page 1: ...1 Tilt Mount Quick Start Guide Illustra Pro 12MP Fisheye Camera Illustra Pro 5MP Fisheye Camera Illustra Pro Gen 2 12MP Fisheye Camera 8200 1306 02 C0...

Page 2: ...you need service or support Our dealers are empowered to provide the very best in customer service and support Dealers should contact Tyco Security Products at 800 507 6268 or 561 912 6259 or at www...

Page 3: ...ble of Contents What is in the Box 4 Overview 4 Mounting the 12MP Pro Fisheye Camera 5 Mounting the 5MP Pro Fisheye Camera 6 Wall Box information 7 IPFETILTMOUNT Illustra Pro Fisheye Tilt Mount Templa...

Page 4: ...tilt of between 5 and 20 degrees You can be use it with the following range of wall boxes US Single Gang US Double Gang US Double Gang Wall Box US Octo Box Euro Box UK Single Gang Box The tilt mount...

Page 5: ...rotated to a horizontal plane and that it is centered on the tilt plate Refer to Table 1 for information on securing the tilt plate to the wall box Figure 5 Screw sites on camera body 5 Thread the cam...

Page 6: ...hat are fitted in the tilt plate using the M4 fasteners supplied in the installation kit Ensure the camera is rotated to a horizontal plane and that it is centered on the tilt plane Refer to Table 1 W...

Page 7: ...Box information Table 1 Wall Box Information describes how to attach the tilt plate to different wall box options Figure 8 displays the location of the hole patterns Figure 8 Tilt Mount with hole pat...

Page 8: ...d to remove the tilt plate Use two screws from the four screws provided to secure the tilt plate to the box Use hole pattern F Euro Gang Box Remove the tilt plate for fitting Use four of the screws pr...

Page 9: ...Fisheye Tilt Mount Template The tilt mount template below has been reduced 50 The full size template document 3610 0619 01Illustra FE Tilt Mount_Template is included in the box and is available online...

Reviews: