Seite / Page 9 of 11 ECOC: EGC0 ; LOC: AI
Hand tool 1-10 position 100-200µm
412-18732 Rev.A
Handzange 1-10 polig 35-100µm
412-18732 Rev.A
8. Bedienen
1. Als Erstes wird das FFC-Kabel, wie in Kapitel „6.
Schneiden
des FFC“
beschrieben, auf die
gewünschte Länge geschnitten.
2. Die Kabelführung wird, wie in Kapitel „7.
Einstellen
der
Kabelführung“
beschrieben,
eingestellt.
3. Als Nächstes werden die Kontakte eingelegt. Um
sie einlegen zu können, muss die Kontaktaufnahme
nach vorne geschwenkt werden. Die Kontakte
werden so eingelegt, dass die Crimpflanken aus
der Kontaktaufnahme herausschauen und die
flachen Seiten beim einschwenken auf den
Ambossen liegen. Nun wird die Kontaktaufnahme
wieder zurückgeschwenkt, wobei darauf zu achten
ist, dass die Handzange vorher komplett geöffnet
wurde (siehe Abbildung 8, 9 und 10).
Abbildung 8
Abbildung 9
8. Operation
1. At first the FFC is cut to a certain length as
described in chapter “6. Cutting the FFC”.
2. The wire guide is set as described in chapter “7.
Setting the wire guide”.
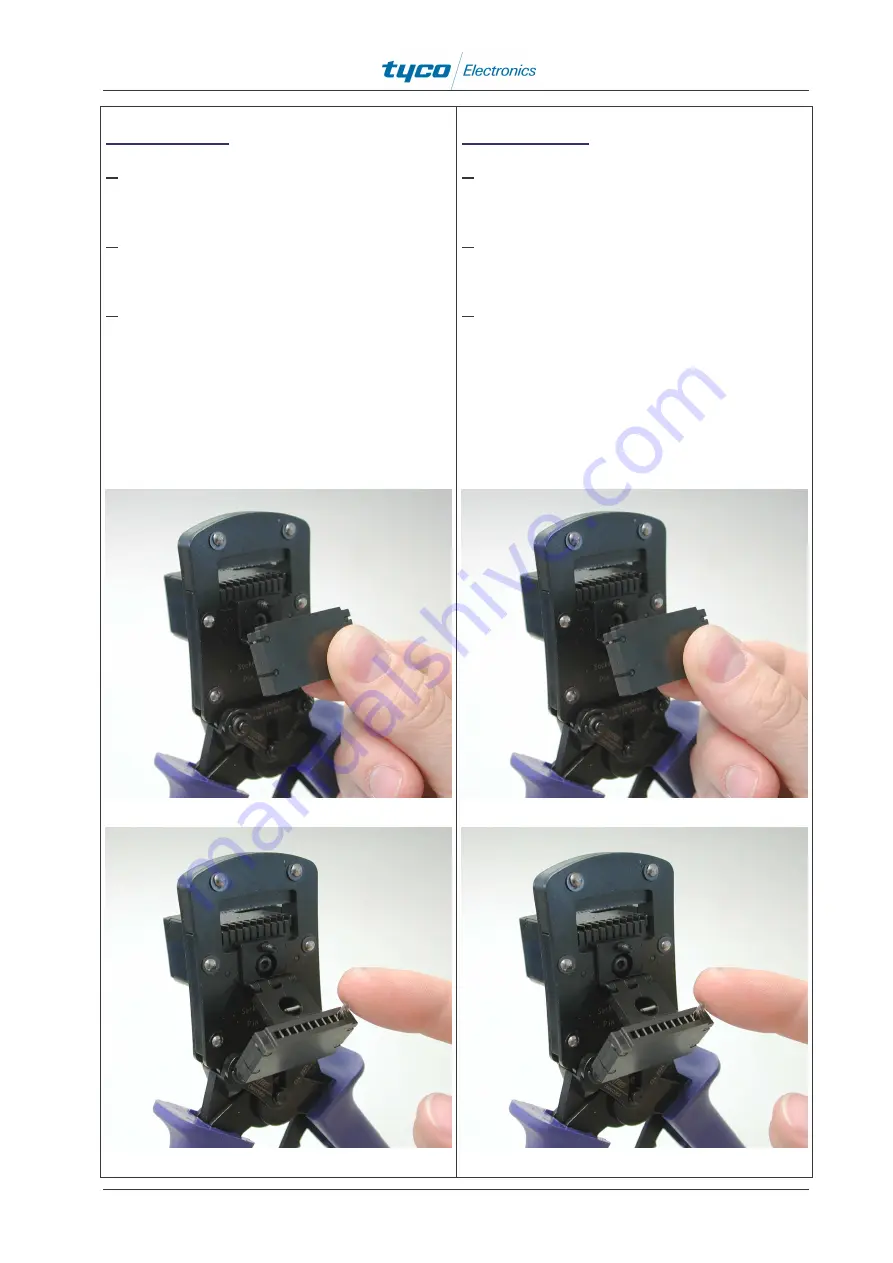
3. Next the contacts are inserted. In order to be
able to insert them the contact holder needs to be
swivelled out to the front. The contacts are placed
in such a way, that the crimp flanks look out of the
holder and the flat surface comes to rest on the
anvils when the holder is swivelled back. Now the
holder is swivelled back, considering that the hand
tool must be opened beforehand (see figure 8, 9
and 10).
Figure 8
Figure 9


