background image


http://www.tyan.com


33

2.2   Rack Mounting 


After installing the necessary components, the TYAN YR190-B7018 
can be mounted in a rack using the supplied rack mounting kit.   

 
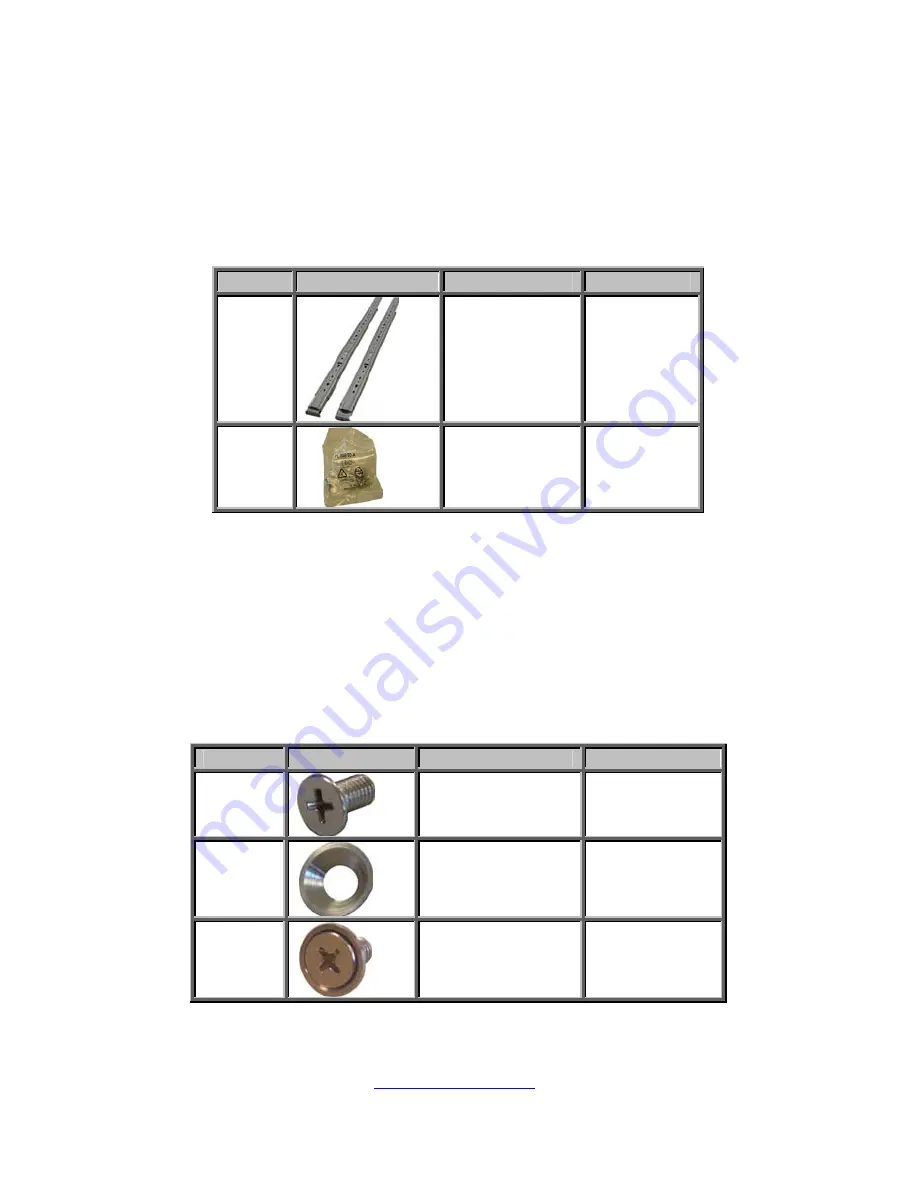
Rack mounting kit 
 

No. 

Item 

Description 

Quantity 


Sliding rails 


Screw kit 


2.2.1      Installing the Server in a Rack 


Follow these instructions to mount the TYAN YR190-B7018 into an 
industry standard 19” rack. 

NOTE

: Before mounting the TYAN YR190-B7018 in a rack, ensure that 

all internal components have been installed and that the unit has been 
fully tested. 

Screw Kit List   
 

No. 

Screw 

Size 

Quantity 


M5 8 


Washer 8 

Total: 
A+B 


M5 and Washer 

Total: 8 sets 


Summary of Contents for YR190-B7018

Page 1: ...http www tyan com 1 YR190 B7018 Service Engineer s Manual...

Page 2: ...2 http www tyan com...

Page 3: ...bility or warranties relating to fitness for a particular purpose or merchantability MiTAC retains the right to make changes to produce descriptions and or specifications at any time without notice In...

Page 4: ...t into an outlet on a circuit different from that of the receiver Consult the dealer on an experienced radio television technician for help Notice for Canada This apparatus complies with the Class A l...

Page 5: ...an introduction to the TYAN YR190 B7018 barebones standard parts list describes the external components gives a table of key components and provides block diagram of the system Chapter2 Covers proced...

Page 6: ...pose of this pin If you outlet does not support this kind of plug contact your electrician to replace your obsolete outlet Do not place anything on the power cord Place the power cord where it will no...

Page 7: ...and Heatsink 27 2 1 3 Installing the Memory 30 2 2 Rack Mounting 33 2 2 1 Installing the Server in a Rack 33 2 2 2 Installing the inner Rails to the Chassis 34 2 2 3 Installing the Outer Rails to the...

Page 8: ...SATA Backplane Board Features 54 3 7 2 SATA Backplane Board Connector Pin Definitions 55 3 8 Replacing the Power Supply 57 Appendix I Cable Connection Tables 59 Appendix II FRU Parts Table 61 Appendix...

Page 9: ...8 server system is capable of offering scalable 32 and 64 bit computing high bandwidth memory design and lightning fast PCI E bus implementation The YR190 B7018 not only empowers your company in nowad...

Page 10: ...ap 4 External Drive Bay per blade Supported HDD Interface SATA II 3 0Gb s System Cooling Configuration per blade FAN 3 4cm fans Type ERP1U cold swap Input Range Full range AC 100 240V Frequency 47 63...

Page 11: ...J 45 Total 3 ports 1 dedicated for IPMI Chipset Winbond W83793G Temperature Monitors temperature for CPU system environment LED Fan fail LED indicator Over temperature warning indicator System Monitor...

Page 12: ...ing at 35 C RoHS RoHS 6 6 Complaint Yes Barebone 1 YR190 B7018 Barebone Manual 1 Quick Ref Guide 1 MB User s manual 1 BB User s manual Installation CD 1 TYAN installation CD Rail kit 1 Sliding rail ki...

Page 13: ...kaged as illustrated below 1 4 1 Box Contents Per Node Component Description 1U chassis 2 nodes 4 hot swap HDD bays per node TYAN S7018 system board pre installed 450W single Power Supply pre installe...

Page 14: ...browse to TYAN s website for service http www tyan com The web site also provides information of other TYAN products as well as FAQs compatibility lists BIOS settings etc 1 x TYAN Motherboard Drive CD...

Page 15: ...15 http www tyan com Rail Kit Rail x 2 Screw Pack...

Page 16: ...Per Node HDD LED Description Activity LED Off Fault LED Off Drive present no activity Activity LED blinking green Fault LED Off Drive present with activity Activity LED Off Fault LED Red HDD Fail Acti...

Page 17: ...us Amber System Failed Without IPMI module FAN failed system thermal problem With IPMI module IPMI fault alert event is raised 5 Power Green Power ON Blue ID LED Front Panel Button Description 6 Power...

Page 18: ...ck for later repair LAN LED The three onboard Ethernet ports have green and amber LEDs to indicate LAN status The table below illustrates the different LED states Ethernet LAN Link Activity LED Descri...

Page 19: ...http www tyan com 1 5 3 Internal View Per Node Number Description 1 HDD Cage 2 SATA HDD Backplane Board 3 System Fans 4 Power Distribution Board 5 Memory Slots 6 CPU Sockets 7 PCI E Riser Card Assemb...

Page 20: ...20 http www tyan com NOTE...

Page 21: ...separated Putting all small components in separate containers prevents them from becoming lost Adequate lighting and proper tools can prevent you from accidentally damaging the internal components 2...

Page 22: ...other grounded appliance z Avoid touching motherboard components IC chips connectors memory modules and leads z The motherboard is pre installed in the system When removing the motherboard always plac...

Page 23: ...nts on to the mainboard including CPUs memory modules HDD and add on cards 2 1 1 Installing Hard Drives The YR190 B7018 supports four 2 5 hard drives per node Follow these instructions to install a ha...

Page 24: ...http www tyan com 24 3 Press the locking lever latch and pull the locking lever open...

Page 25: ...http www tyan com 25 4 Slide the HDD tray out 5 Unscrew the HDD tray bracket 6 Place a hard drive into the drive tray Use four screws to secure the HDD...

Page 26: ...http www tyan com 26 7 Reinsert the HDD tray into the chassis 8 Press the locking lever to secure the tray Repeat the same procedures to install other HDD trays...

Page 27: ...lling the CPU and Heatsink Follow the steps below to install the processor and heatsink 1 Locate the CPU socket Pull the CPU lever up to unlock the CPU socket 2 Open the socket to a full open position...

Page 28: ...http www tyan com 28 3 Place the CPU in the CPU socket...

Page 29: ...http www tyan com 29 4 Close the socket and press the CPU socket lever down to secure the CPU 5 Place the heatsink on top of the CPU and secure it with 4 screws...

Page 30: ...board 1 Locate the memory slots on the motherboard 2 Press the memory slot locking levers in the direction of the arrows as shown in the following illustration 3 Align the memory module with the slot...

Page 31: ...nnel Two DIMMs per Channel Single Rank Memory DIMM C0 x x x x x x x x DIMM C1 x x x x x DIMM B0 x x x x x x DIMM B1 x x x DIMM A0 x x x DIMM A1 x Dual Rank Memory DIMM C0 x x x x x x x x DIMM C1 x x x...

Page 32: ...IMM A1 x Dual Rank Memory DIMM C0 x x x x x x x x DIMM C1 x x x x x DIMM B0 x x x x x x DIMM B1 x x x DIMM A0 x x x DIMM A1 x Quad Rank Memory DIMM C0 x x x x x x x x DIMM C1 x x x x x DIMM B0 x x x x...

Page 33: ...tity A Sliding rails 2 B Screw kit 1 2 2 1 Installing the Server in a Rack Follow these instructions to mount the TYAN YR190 B7018 into an industry standard 19 rack NOTE Before mounting the TYAN YR190...

Page 34: ...com 34 2 2 2 Installing the inner Rails to the Chassis 1 Draw out the inner rails from the rail assembly Install inner rails to left and right side of chassis 2 Push the rails forwards to lock the ra...

Page 35: ...ackets in the rack 2 Secure the outer rail to the rack using 4 M5 screws and 4 washers 2 sets front 2 sets rear for each side Secure the rails to the rack as shown 3 Repeat Step 2 if you want to insta...

Page 36: ...http www tyan com 36 2 2 4 Rack mounting the Server To install the chassis to the rack 1 Lift the chassis and then insert the inner slide rails into the outside rails 2 Push the chassis into the rack...

Page 37: ...http www tyan com 37 3 Screw the chassis to the rack 4 Insert the node into the chassis 5 Repeat Step 4 for the second node To remove the chassis from the rack 1 Remove the nodes 2 Unscrew the chassis...

Page 38: ...Press the locking tabs on both sides of the chassis to pull the chassis out Note To avoid injury it is strongly recommended that two people lift the TYAN YR190 B7018 into the place while a third perso...

Page 39: ...he pre installed components including the Motherboard front panel board SATA HDD board M2087 R PCI E Riser card System fans and Power supply unit etc 3 2 Disassembly Flowchart The following flowchart...

Page 40: ...http www tyan com 40 Front Components Node HDD PCBs FAN Front Panel Board SATA HDD Board...

Page 41: ...ow Chapter 2 1 1 to pull the node out 3 3 1 Replacing Expansion Card The YR190 B7018 has one preinstalled M7018_R16 1L riser card Follow the instructions below to disassemble the M7018 R16 1L and inst...

Page 42: ...the assembly 4 Screw the riser card to the assembly and put it back in place 5 optional for M7018 R16 1L Unscrew to replace a new M7018 R16 1L card 6 Follow the procedures mentioned earlier in reverse...

Page 43: ...d Cables Before replacing the motherboard or certain components remove cables connected to the motherboard Follow these instructions to remove all motherboard cables 1 Disconnect all the power and fan...

Page 44: ...ll of the aforementioned cables follow the instructions below to remove the motherboard from the chassis 1 Remove the heatsink and processor if installed 2 Remove the nine screws securing the motherbo...

Page 45: ...rd Follow these instructions to replace the Power Distribution Board 1 Disconnect all cables from the power distribution board 2 Unscrew to take out the power distribution board 3 Repeat the procedure...

Page 46: ...e Front Panel Board Follow these instructions to replace the Front Panel board 1 Release cables from the cable clip Unscrew the front panel tray 2 Pull the front panel tray from the chassis 3 Disconne...

Page 47: ...4 Unscrew to take out the front panel board 6 Replace a new front panel board and screw it to the front panel tray 7 Repeat the procedures described earlier in reverse order to place the front panel...

Page 48: ...cation LED 6 PW_LED FPB power LED 21 ID_SW Location Switch 7 WLED IPMI LED 22 FP5V_STBY 5VSB power 8 WLED IPMI LED 23 FPB_HDD_ACTIVITY_G HDD Green LED 9 SMBDAT I 2 C BUS Data 24 FPB_HDD_FAULT_R HDD Re...

Page 49: ...m Fan Follow these instructions to replace the cooling fans in your system 1 Locate the cooling fans in your system 2 Unplug the cables connected to the mainboard and lift the fan unit up from the cha...

Page 50: ...new fan and use the screw driver to push the screw back into the screw hole 5 Reinstall the fan into the chassis following the procedures described earlier in reverse order 6 Remove the rubber screws...

Page 51: ...http www tyan com 51 8 Reinstall the fans into the chassis following the procedures described earlier in reverse order 9 Connect the fan cables...

Page 52: ...http www tyan com 52 3 7 Replacing the SATA Backplane Board 1 Disconnect all cables from the backplane board 2 Unscrew the backplane bracket 3 Lift the bracket up from the chassis...

Page 53: ...http www tyan com 53 4 Unscrew the backplane board from the bracket Replace a new SATA Backplane Board and reinstall it into the chassis following the above steps in reverse...

Page 54: ...tp www tyan com 54 3 7 1 SATA Backplane Board Features Front View Rear View Connector Description SATA0 SATA3 SATA Connector J1 J4 HDD Connector PW1 Power Connector J8 CPLD Connector J10 SGPIO Connect...

Page 55: ...GND HDD Connector J1 J2 J3 J4 Pin NO Pin name Pin NO Pin name S1 GND P1 NC S2 SAS_TX P2 NC S3 SAS_TX P3 NC S4 GND P4 GND S5 SAS_RX P5 GND S6 SAS_RX P6 GND S7 GND P7 VDD_5_RUN S8 SAS_Present_L P8 VDD_5...

Page 56: ...PLD_JTAG_TDO JTAC_TDO DataOut 8 NC 4 VDD_3P3_RUN 3 3V 9 CPLD_JTAG_TDI 5 CPLD_JTAG_TMS JTAC_TMS DataOut 10 GND Ground Pin No Net Name Description Pin No Net Name Description 1 SMBUS_3V3_CLK_CPLD SMBus...

Page 57: ...tyan com 57 3 8 Replacing the Power Supply 1 Press and hold the latch to pull the power supply out 2 After replacing a new power supply press and hold the latch to push the power supply back into the...

Page 58: ...http www tyan com 58 NOTE...

Page 59: ...n1 J18 Fan2 J17 Fan3 J16 2 SATA HDD Cable SATA SAS Backplane BP Board to S7018 MB Cable SATA SAS BP Board Connect to S7018 MB J5 SATA0 J6 SATA1 J7 SATA2 SATA Cable J9 SATA3 3 B4P PWR and SGPIO Cable S...

Page 60: ...Ctrl and USB Cable Front Panel Board FPB to S7018 MB FPB Connect to S7018 MB Control Cable J1 FP Conn J23 USB Cable J3 USB2 Conn J11 Power Supply Cables PDB to S7018 MB PDB Connect to S7018 MB 2x10P P...

Page 61: ...BA M5376 FPB 541178710005 1 Front Panel Board HDD Tray CHDT 0140 451789200004 4 2 5 Dummy HDD Carrier Module Power Supply CPSU 0430 471786900001 1 3Y YM 2451CER 450W 1U CFAN 0380 336252012374 1 FAN 12...

Page 62: ...http www tyan com 62 NOTE...

Page 63: ...Online Support sections with downloadable Linux drivers and comprehensive compatibility reports for chassis memory and much more With all these convenient resources just a few keystrokes away users ca...

Page 64: ...per maintenance of products Note A receipt or copy of your invoice marked with the date of purchase is required before any warranty service can be rendered You may obtain service by calling the manufa...

Reviews: