23
http://www.tyan.com
2.22 – Attaching IDE and Floppy Drive Cables
Attaching IDE drive cabling is simple. These cables are “keyed” to only allow them to be
connected in the correct manner. Tyan motherboards have two on-board IDE channels, each
supporting two drives.
The black connector designates the Primary channel, while the white
connector designates the Secondary channel.
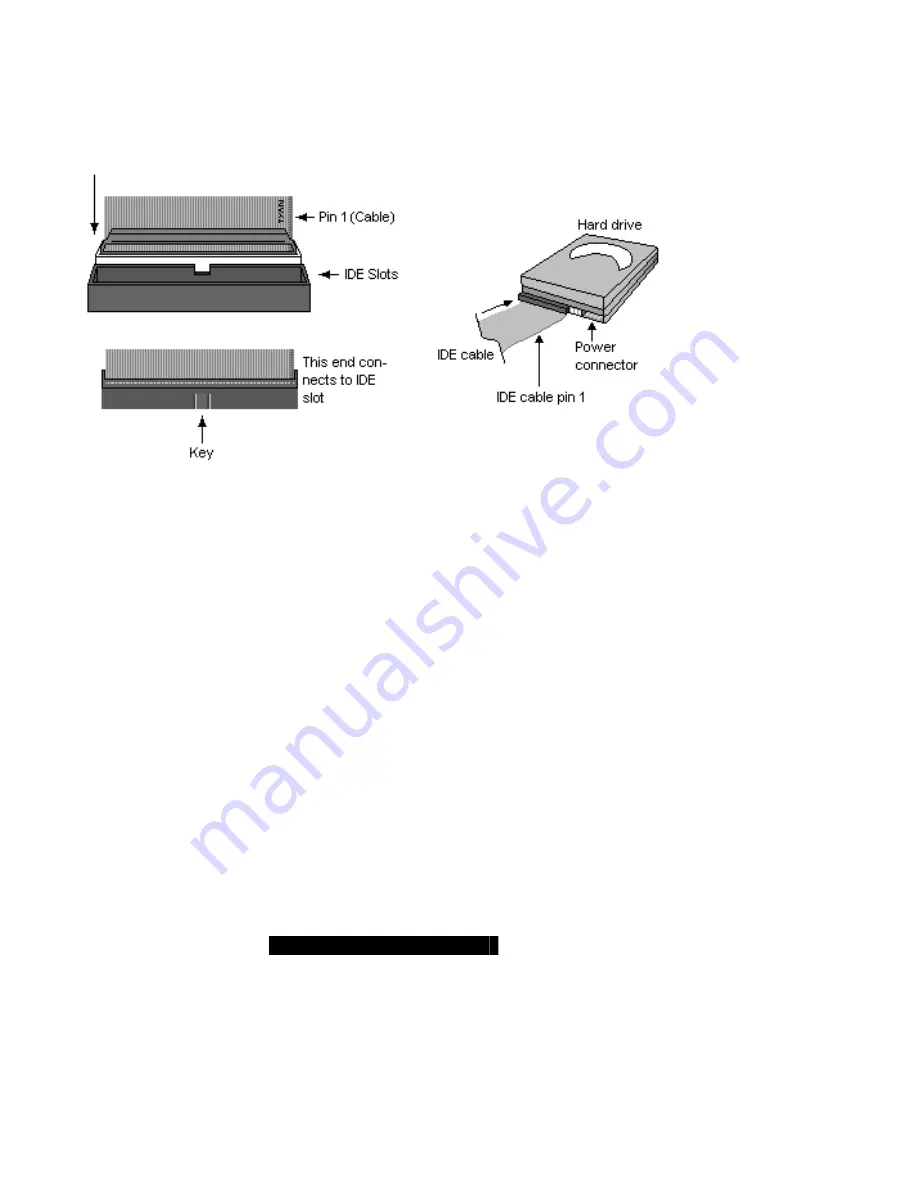
Attaching IDE cables to the IDE connectors is illustrated below
Simply plug in the BLUE END of the IDE cable into the motherboa rd IDE connector, and the other
end(s) into the drive(s). Each standard IDE cable has three connectors, two of which are closer
together. The BLUE connector that is furthest away from the other two is the end that connects to
the motherboard. The other two connectors are used to connect to drives.
Attaching a floppy drive can be done in a similar manner to an IDE drive. Most of the current
floppy drives on the market require that the cable be installed with the colored stripe (pin -1)
positioned next to the power connector. In most cases, there will be a key pin on the cable which
will force proper connection of the cable.
Below are some symptoms of incorrectly installed floppy drives:
§
Drive is not automatically detected
-
Check if the floppy controller is enabled under the BIOS settings
-
Verify there is only one floppy drive in the system
-
Verify that the floppy cable is installed correctly (i.e. using the connector with pin10~16
twisted)
-
Verify that the floppy drive is working properly (i.e. try a new drive)
§
Drive Fail message at bootup
-
Verify with another drive or cable
§
Drive does not power on
-
Check power cable and cabling
-
Check power supply
§
Drive activity light is constantly on
-
Cable is on backwards
TIP: Pin 1 on the cable (usually designated by a colore d wire) faces the drive’s power
connector.


