background image

Automatically Tuning

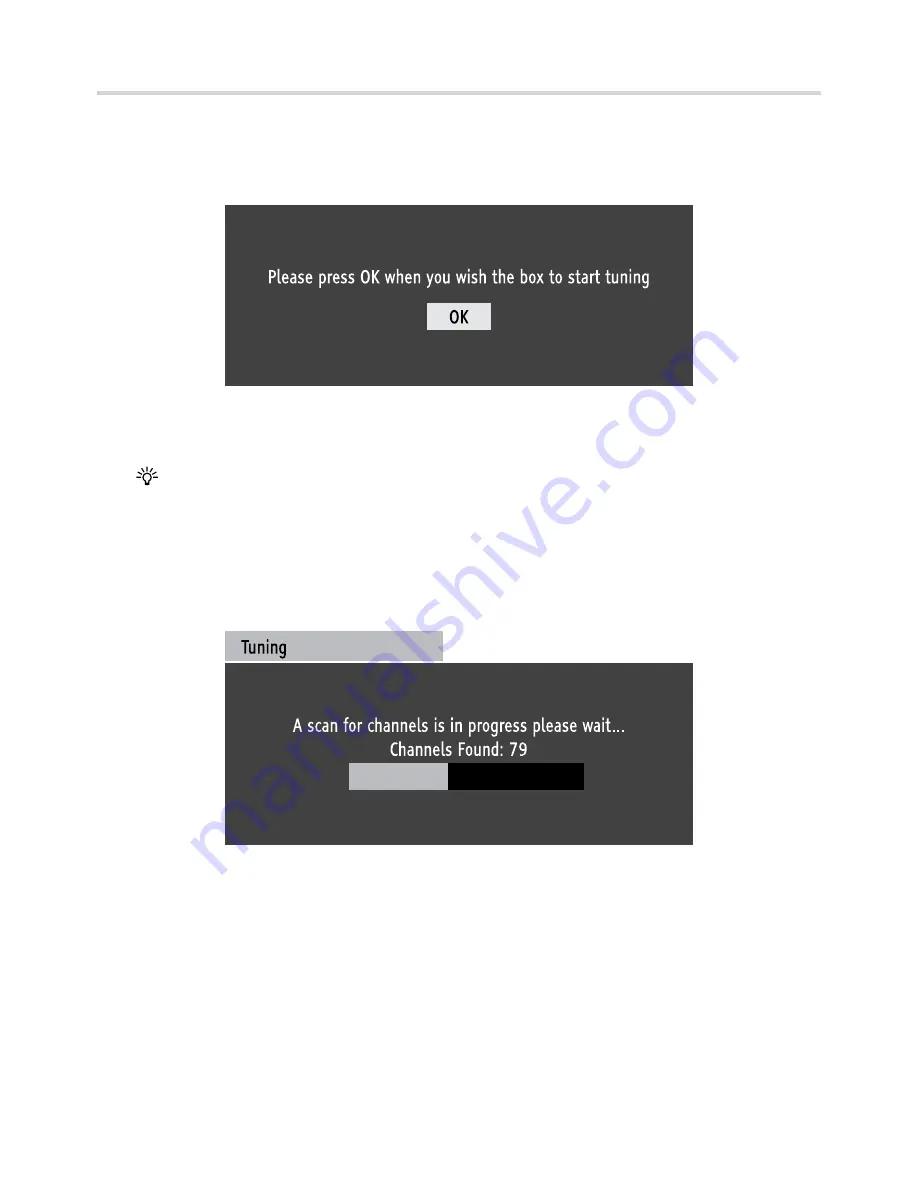
Switch on your TV, then connect the F box to the mains. The TV should automatically 

1. 

switch to the correct AV channel and display the ‘Start up’ screen below:

Start up screen

Press the 

[OK]

 button on the remote control to begin automatic tuning.

If the remote control does not work, press the 

[DTR]

 button and try again.

The F box will now scan and store all available channels. Depending on the quality of 

2. 

your reception, this may take several minutes. Please be patient and do not press any buttons.

Tuning progress screen

10

Summary of Contents for DTR-Z500

Page 1: ...Watch and record Digital TV minus the contract Digital TV Recorder User Guide ...

Page 2: ...rain or moisture Do not obstruct the fan on the rear of the unit Do not expose the unit to shocks or vibrations as this could cause disk failure To clean the unit use a lightly dampened soft cloth Do not use any kind of abrasive cloth sponge or cleaner To help prevent Screen burn on Plasma and LCD screens use the Screen Saver feature whenever possible Do not attempt to open the unit Refer all serv...

Page 3: ...yday Use 12 The Electronic Programme Guide EPG 13 The Channel List 14 The Info Display 15 Picture In Picture PIP 16 Recording Programmes 17 Pause Live TV 19 The Timers Screen 20 The Library Menu 22 Common Symbols 24 Navigating the Menu 25 Main Menu Options 26 Programming the Remote Control 28 Automatically Programming the Remote Control 28 Finding the Remote Control s Current Codes 29 Controlling ...

Page 4: ...l TV minus the contract Digital TV Recorder User Guide Quick Start Guide Watch and record Digital TV minus the contract 1 Freeview box 2 AA Batteries 2 3 Remote Control 4 User Guide 5 Quick Start Guide 6 SCART Lead 7 Power Adaptor 8 RF Lead 4 ...

Page 5: ...cator Red Recording in progress 3 Play Indicator Green A recording is being played back 2 Power Indicator Green On Red Standby Rear 1 Aerial In from aerial 2 Aerial Out to TV 3 SPDIF Digital Audio Output 4 SCART to TV 5 SCART to VCR 6 DC Jack Input 5 ...

Page 6: ...Overview of the Remote Control 1 2 4 5 6 7 8 q 9 qa qf qg qh wk wj wh wg wf wd ws wa w ql qk qj qd qs 3 6 ...

Page 7: ...isplays subtitles if available In TV mode changes the Video Input on the TV qj TEXT Displays digital text if available In TV mode selects double digit channel numbers qk Coloured buttons Selects options in digital text EPG Channel List menu Red Green Yellow Blue ql L Skips forward 30 seconds when viewing a recording Press and hold to skip to the end when viewing a recording w LIB Displays the Libr...

Page 8: ...he Batteries into the Remote Control Always check the positive negative symbols on the batteries to ensure they are inserted correctly Don t forget to dispose of old batteries in an environmentally friendly way 8 ...

Page 9: ...ead supplied 3 To your TV VCR or DVD Recorder RF Lead supplied 4 To your Hi Fi Surround Sound System 3 5mm jack plug lead optical lead not supplied 5 To your VCR DVD Recorder SCART Lead not supplied 6 To the mains power outlet Power Adaptor supplied For safety reasons DO NOT cut off the supplied power adaptor s plug 9 ...

Page 10: ...en below Start up screen Press the OK button on the remote control to begin automatic tuning If the remote control does not work press the DTR button and try again The Freeview box will now scan and store all available channels Depending on the quality of 2 your reception this may take several minutes Please be patient and do not press any buttons Tuning progress screen 10 ...

Page 11: ...s finished a summary screen is displayed The number of channels found may vary according to your location and reception Automatic tuning summary screen Press the OK button on the remote control remove the summary screen and start watching digital TV 11 ...

Page 12: ...ew box will automatically switch to standby mode at 3am every day if there has been a period of inactivity If you are still watching TV at this time a screen will be displayed allowing you to stop the Freeview box entering standby mode If no button is pressed while this screen is displayed the Freeview box will enter standby mode after a few seconds It is possible to deactivate this automatic stan...

Page 13: ... 24 hours View information for the highlighted programme INFO button Press again to return to the EPG Set a highlighted programme to record z REC button After pressing the z REC button if Series Record is available for the selected programme you can press the BLUE button to record all programmes in the series Preview a current programme in the background OK button Exit the EPG and switch to a prev...

Page 14: ...nnel List OK button while watching TV Select channels v V buttons Display the previous nine channels in the list RED button Display the next nine channels in the list GREEN button Switch to the selected channel OK button Exit the Channel List BACK button List of channels Highlighted channel 14 ...

Page 15: ...mmes on the current channel B button View information for programmes on other channels v V buttons Change the Audio setting if available RED button Change the Subtitle setting if available GREEN button Switch to another channel when viewing that channel s information OK button Set a future programme to record z REC button After pressing the z REC button if Series Record is available for the select...

Page 16: ...PIP button Change the channel displayed in the PIP screen CH buttons when the PIP screen is selected Change the channel displayed in the main picture 0 9 buttons The CH buttons can also be used when the PIP screen is not selected Swap the channels on the PIP screen and the main picture button Exit Picture In Picture PIP button when the PIP screen is selected highlighted Picture In Picture is not a...

Page 17: ...e required programme highlighted in the Info display press z REC to set the recording For full details on the Info display refer to page 15 4 Manually recording You can manually set a recording from the Timers screen With the Timers screen displayed press the YELLOW button to manually set a recording For full details on the Timers menu refer to page 20 The Freeview box will record programmes even ...

Page 18: ...or cancel the recording request you have just made Cancel timer You will then be presented with a list of all the programmes which overlap If one of the programmes is repeated later in the week then when it is highlighted the box will give you the option to press the Green button Alternative to record the repeated programme instead If none of the programmes are repeated simply delete one of the pl...

Page 19: ...f time you can pause a programme for can be adjusted in the menu See Pause Buffer Size on page 27 Rewinding live and paused TV Press j to rewind live TV Press B to resume You can press j a further 3 times to rewind faster Fast forwarding paused TV Press J to fast forward pause TV Press B to resume You can press J a further 3 times to fast forward faster Watching in slow motion Press X to pause liv...

Page 20: ...he series or just this instance Modify the selected timer GREEN button see next page for more details Manually set a timer YELLOW button see next page for more details Show all timers currently set including all Series Record programmes BLUE button Press again to display a summary of all timers currently set Exit the Timers menu TIMER or BACK button List of timers Today s date and current time Siz...

Page 21: ...t have been protected from change or deletion Playback options Use parental settings If the recording is made from a locked channel the PIN must be entered correctly before the recording can be viewed see Parental Control on page 27 Allowed The recording can be viewed even if it was recorded from a locked channel Disallowed The recording can not be viewed The PIN must be entered correctly before t...

Page 22: ...elow for more details Delete the selected recording RED button Edit the selected recording to set protection and playback options GREEN button see below for more details Add the selected recording to the playlist YELLOW button see below for more details Sort the recordings BLUE button Press the corresponding colour button to select the required sort option Exit the Library menu LIB or BACK button ...

Page 23: ...s Press GREEN to save any changes A symbol will be added to recordings that have been protected from deletion A symbol will be added to recordings that have been protected from playback Using the playlist You can set multiple recordings to be played one after another This can be useful when saving multiple recordings to a video tape DVD or just to watch several recordings in one go With the requir...

Page 24: ...Teletext available Channel selected for moving Timer is set to Series Record Timer is set to repeat daily weekly Timer has been set Recording has been viewed Playback of recording has been locked Play Record Selected channel is hidden Playback of recording has been locked Recording has been protected from deletion Play Pause Record Slow motion Fast Forward Fast Forward x16 Fast Forward x128 Rewind...

Page 25: ...ating the Menu To Press Access the Menu MENU button Highlight an option v V buttons Select an option OK button Adjust an option s settings b B buttons Go back a step BACK button Exit the Menu MENU button 25 ...

Page 26: ...ou to switch the picture output between RGB Y C and CVBS Picture Mode Allows you to change between widescreen traditional 4 3 normal and traditional letterbox 4 3 letterbox picture formats Auto Standby Allows you to select whether the Freeview box automatically switches to standby mode at 3am every day Update Channels Allows the Freeview box to automatically search for new channels when in standby...

Page 27: ...lete all the recorded programmes stored on the hard disk Parental Control Allows you to set your PIN and lock channels Locked channels can only be viewed once the correct PIN is entered The default PIN is 0000 Tuning Allows you to automatically or manually tune channels You will be asked to enter your PIN The default PIN is 0000 Tune the Freeview box to search for any new channels that may have be...

Page 28: ...weak batteries are not replaced immediately Even if your TV DVD brand is listed in the code table in some instances it may not be possible to operate all of the available functions Automatically Programming the Remote Control If your TV or DVD brand is not included in the code list or the brand codes in the list do not operate your equipment it may still be possible to programme the remote control...

Page 29: ...hold the 2 button for approximately 3 seconds The TV DVD button flashes twice Use the 3 0 9 buttons to enter the code 990 The TV DVD button flashes when every digit of the code is entered If the code has been entered correctly the TV DVD button will flash once quickly Press the 4 1 button and count the number of times the TV DVD button flashes The number of flashes is the first number of the code ...

Page 30: ...Freeview box again Button Function in TV Mode Function in DVD Mode Mutes the TV No function 1 Switches the TV on off Switches the DVD player on off VOL Adjusts the volume No function CH Selects the next previous channel No function v V b B No function Navigates menus OK No function Makes a selection in menus x STOP No function Stops playback j No function Rewind B No function Play X No function Pa...

Page 31: ... to 860MHz Video Decoder Video Decoding MPEG 2 Main Level Main Profile Video Formats 16 9 4 3 Video Output RGB Y C CVBS Audio Decoder Audio Decoding MPEG 2 Layer 1 Audio Mode Stereo Mono AV Connectors Video 2x 21 Pin SCART TV SCART RGB Y C CVBS VCR SCART CVBS Audio 1x 3 5mm Jack miniTOS Analogue Stereo PCM Audio Optical SPDIF Supplied Accessories Universal Remote Control AA R06 Batteries 2 User Gu...

Page 32: ...rt Y C Change the TV Out setting refer to TV Out on page 25 No sound 3 TV is muted Check the aerial is correctly connected to the unit Check all connections between the unit and TV Hi Fi or Surround Sound System Check the signal strength for the channel you are watching If the signal is weak then you may have picture but no sound Refer to Service Menu on page 26 No power 4 Check the power adaptor ...

Page 33: ...Use the Reset Set Top Box option in the Settings menu see page 25 Please note this resets the box your recordings will be preserved but you will loose all other settings and timers You will also need to retune the box after carrying out this option Reformat the Hard Disk see page 26 Please note that this should only be done as a last resort as formatting the Hard Disk will permanently delete all r...

Page 34: ...2 0546 Sony 1535 1681 1040 0041 1781 0383 0066 0132 0067 0586 0187 Beko 0744 0065 0516 0400 0067 0448 1067 0586 0636 0745 0838 Logik 0041 0090 0039 0294 0401 0910 1247 Teac 0542 0067 1067 0586 0742 0698 0485 0247 0294 1939 0208 0039 0442 0379 0312 0448 0200 0744 1179 1785 Daewoo 0664 0404 1939 0529 0691 0067 0586 0039 0246 0248 0247 1167 1938 0910 Matsui 0067 0586 0517 0039 0265 0207 0041 0385 010...

Page 35: ... 0820 2076 1301 Mitsubishi 0743 Toshiba 0533 1075 1540 2036 Ferguson 0681 1760 0928 Orion 0725 1158 1725 1263 1449 Umax 1181 Goodmans 0743 1034 0753 0791 0813 0760 0681 0820 0848 Panasonic 0520 1938 1935 1864 1937 XBox 0552 Grundig 0725 0805 0569 0681 0735 0820 0743 0700 0753 1725 2076 1034 1760 1950 1466 1513 Philips 0569 0676 0915 0705 0533 1842 1843 1848 1188 Yamada 1034 0902 1181 1446 1086 151...

Page 36: ...Printed in the EU on 100 recycled paper 2008 TVonics Solutions Ltd U MAN 001 62 71 800 033 10 www tvonics com ...

Reviews: