background image

Digital C-FLUOR Submersible Probe


998-2131 


Rev. 1.0 

Page 12 

6) 

Click the “Calibrate C-FLUOR” button, then click “OK”. 

7)  Wait for the progress bar to complete. 
8)  When prompted to insert C-FLUOR into Calibration Solution, remove 

the probe from the blank solution. 

9)  Empty the blank solution from the beaker and wipe the beaker dry. 
10) Fill your 500 ml beaker with standard solution. 
11) Submerge the probes optical head no more than an inch below the 

surface of the standard solution.  See Appendix B for recommended 
lab practices. 

12) 

Click “OK”. 

13) Wait for the progress bar to complete. 
14) 

Click “Yes” to save the new calibration. 

15) 

Click “Get Datapoint” to read the standard solution with the newly 
calibrated probe; you should see the Concentration Value you 
entered displayed in the “Datapoint Value” box confirming the 
calibration was saved. 


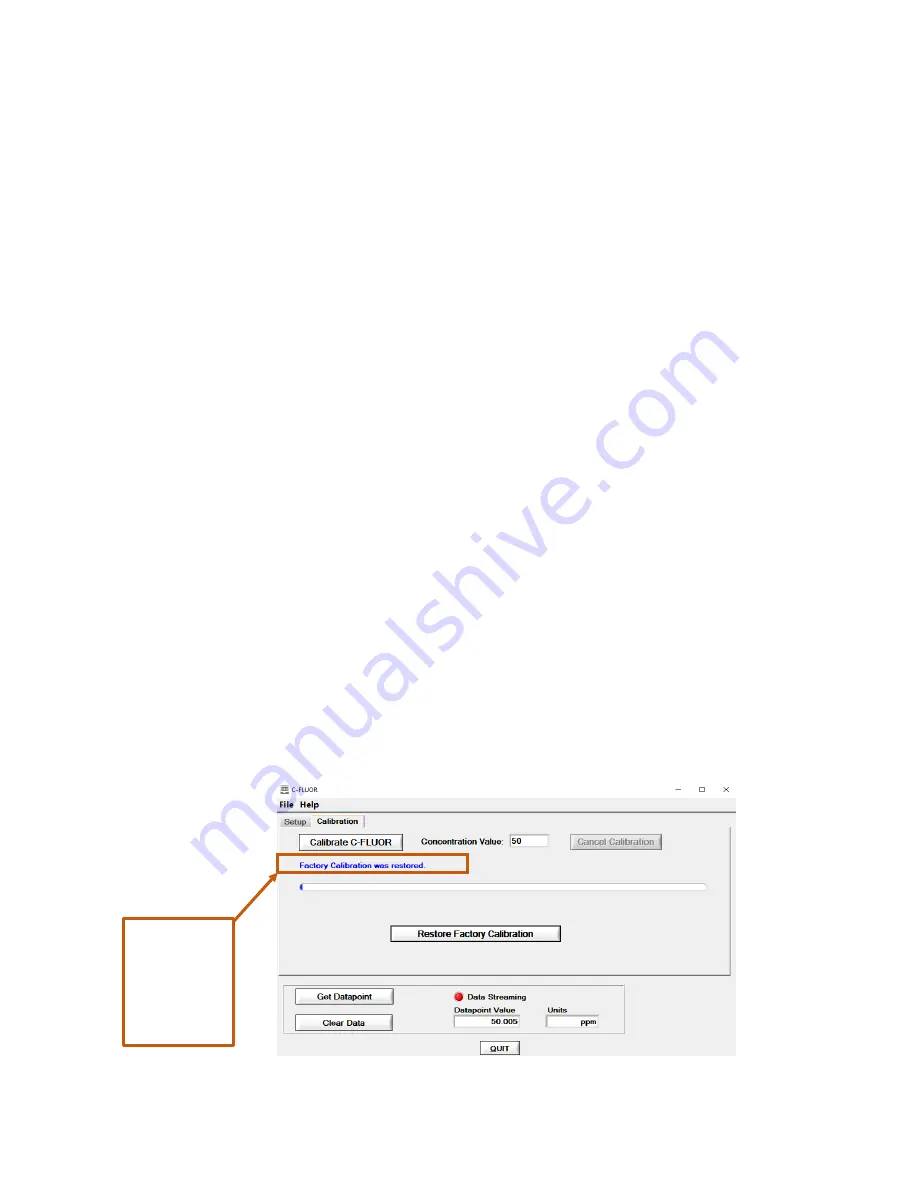
3.2.2   Restoring Factory Calibration  


To restore the factory calibration of your Digital C-

FLUOR Probe, you’ll 

need to connect your probe to a computer with Digital C-FLUOR 
software, communicate with your probe using the software and click on 
the Calibration tab.  Then click “Restore Factory Calibration”.  You will be 
asked if you wish to continue, select “Yes” to restore or “No” to keep your 
custom calibration.   
 
If factory calibration is restored, the software will display Factory 
Calibration was restored meaning your custom calibration was deleted 
and cannot be retrieved.  
 

Note:  Once customer calibrations are deleted, they cannot be 
retrieved.  Please be sure you intend to delete your custom 
calibration before choosing to restore to factory calibration.   


Will be 
displayed 
after 
restoring 
factory 
calibration 

Summary of Contents for C-FLUOR

Page 1: ...Digital User s Manual March 13 2020 P N 998 2131 Revision 1 0 TURNER DESIGNS 1995 N 1st Street San Jose CA 95112 Phone 408 749 0994 FAX 408 749 0998...

Page 2: ...ling Mode 9 3 1 2 Data Streaming Mode 10 3 13 Setting New Baud Rate 10 3 2 Calibration 11 3 2 1 Calibrating the Digital C FLUOR Probe 11 3 2 2 Restoring Factory Calibration 12 4 Maintenance and Warran...

Page 3: ...e return of an end of life product proceed as follows If you purchased your instrument through a Turner Designs Distributor please contact your local representative They will instruct you where to ret...

Page 4: ...re factory calibrated and a probe specific calibration certificate is included with each probe The certificate contains information that states the probe s minimum level of detection and range of conc...

Page 5: ...ification Letter 232 C FLUOR Without Connector Digital P N 2120 000 Identification Letter NC 232 Note No end cap is supplied for the C FLUOR Without Connector Digital see Section 2 5 For end cap speci...

Page 6: ...d SSS for in vivo Chlorophyll Phycocyanin Phycoerythrin Rhodamine Fluorescein P N 2100 900 Note The SSS can be used for both C FLUOR and Cyclops for the applications specified above Solid Secondary St...

Page 7: ...gramming Cable s USB plug into an available USB port on your computer and wait for the drivers to automatically install 2 Once USB drivers have installed download and install Digital C FLUOR s Softwar...

Page 8: ...then the instrument s detector is working 2 5 Digital C FLUOR with no connector Digital C FLUOR can be purchased without a 6 pin bulkhead connector or end cap If the No Connector version is purchased...

Page 9: ...are two modes that can be selected Polling and Data Streaming 3 1 1 Polling Mode Polling Mode is used when data storage or power is limited Power is supplied to the probe and a command is used to trig...

Page 10: ...change from red to green indicating the unit is streaming data Note Data rates faster than 1 reading per second will be updated at a rate of 1 reading per second in the Datapoint Value box To see the...

Page 11: ...rate Digital C FLUOR you ll need the following PC with Digital C FLUOR Software RS 232 Programming Cable P N 2120 160 12 Volt Power Supply P N 7000 941 Blank solution Standard solution of known concen...

Page 12: ...the Concentration Value you entered displayed in the Datapoint Value box confirming the calibration was saved 3 2 2 Restoring Factory Calibration To restore the factory calibration of your Digital C...

Page 13: ...n contact with any organic solvents i e acetone methanol or strong acids and bases 4 2 Warranty Terms Turner Designs warrants the C FLUOR and accessories to be free from defects in materials and workm...

Page 14: ...eturned free of charge for all customers in the contiguous continental United States For customers outside of the contiguous continental United States who purchased equipment from one of our authorize...

Page 15: ...Digital C FLUOR Submersible Probe 998 2131 Rev 1 0 Page 15...

Page 16: ...igital Data String RS 232 Temperature Range Ambient 0 to 50 C Water Temp 2 to 50 C Light Source Light Emitting Diode Excitation Wavelength Visible CHL RWT PC PE F UV CDOM fDOM Oil OB IR Turbidity Dete...

Page 17: ...Note Plastic may fluoresce and interfere with the sample s fluorescence 2 If using a glass container place the container on a non reflective black surface 3 Ensure that the probe is more than 3 inches...

Page 18: ...onnection Black 2 Supply Ground 0VDC PSU Ground Connection Orange 3 Receive Data RX Green 4 Transmit Data TX Blue 5 Digital Ground GND Yellow 6 N A Note Pin 6 is not used Pigtail Connector and Wire Co...

Page 19: ...ing sleeve Impulse P No MCDLS F C FLUOR Pins and Wire Color 3 4 2 1 5 6 3 4 2 1 5 3 4 2 1 5 3 3 4 4 2 2 1 5 5 Pigtail Connector and Wire Color 3 6 4 2 1 5 5 2 4 4 6 1 3 3 6 4 2 1 5 5 2 4 4 6 1 3 3 3 6...

Page 20: ...Stop bits 1 Flow Control None Once connected you can communicate using the list of commands below to setup collect information and program Digital C FLUOR Probes Command Name Note I Sensor Informatio...

Reviews: