background image

Safety Instructions:

  Carefully unpack the product and take care not to throw away 

any part of the packaging before you find all the parts of the 

product.

  Store the product in a dry place out of reach of children.

  Work only under good visibility.

  Do not place hands or feet near the brush head.

  Do not open the rear cover during use.

  Acquaint yourself with the surroundings of your work area. Check 

for potential dangers, which may not be audible due to the noise of 

the machine.

  Wear solid footwear and long trousers to protect your legs.

  Make sure that your legs are at a sufficient distance from moving 

parts.

  Make sure that there are no other people (particularly children) or 

animals in the work area.

  Always push the artificial grass sweeper at walking speed.

  Operating position: make sure that you have safe foot support 

during operation.

  Be careful when changing direction on a sloped area.

  Read all warnings and instructions in this manual as not following 

the instructions may lead to injury by electrical shock, a fire, and/or 

other serious injuries.

Page No. 16

www.turfmatic.info

Summary of Contents for TM380-1800

Page 1: ...ARTIFICIAL GRASS SWEEPER TM380 1800 INSTRUCTION MANUAL ...

Page 2: ...ifications Introduction Features Symbol Purpose of use Assembly Instructions Setting Up Product Operation Replacing Brush Head Safety Instructions Maintenance Warnings Disposal 03 04 04 05 05 06 07 07 11 12 14 16 18 19 19 Page No 01 www turfmatic info ...

Page 3: ... the duration of the warranty Following the instructions in the included user s manual is a prerequisite for the proper use of the machine This user s manual also contains operating maintenance and repair instructions Keep the user s manual in a safe place where it can be easily retrieved for future use Pack this machine in the original cardboard box to ensure maximum protection during shipping or...

Page 4: ...le Section of Handle 7 Bottom Section of handle 8 Brush Depth Level Control 9 Collection Basket 10 Basket Cover 11 Basket Support Frame 12 Cable Retaining Clip 13 Quick Release 14 Bottom Handle Screw 15 Middle Handle Screw 16 Handle Angle Adjust 17 Handle Washer 8 2 1 5 13 6 15 11 3 12 5 14 16 4 7 17 10 Page No 03 www turfmatic info ...

Page 5: ...ications Electric Sweeper Rated Power Working Brush Width Working Depth Collection basket capacity Weight Protection class Brush head operating speed Sound pressure level Guaranteed sound power level Vibrations Turfmatic 380 1800 1800W 38cm 6 to 12mm 48l 12 6kg IPX4 3500rmp L 85 56 db A K 3 db A L 104 db A 5 508 m s K 1 5 m s Page No 04 www turfmatic info pa 2 2 wa ...

Page 6: ...area Its 2 in 1 function allows for power brooming of the grass together with debris collection The Turfmatic 380 Artificial Grass Sweeper increases the lifespan of the artificial grass and ensures it looks fresh all the time Features Electric Motor Type 10 meter working cable length Maximum power needed to run is 1800 watts IPX4 Protection 1 level forward speed Large 48L Collection Basket Operati...

Page 7: ... the sweeper continues to rotate for some time after it is turned off Attention rotating brush Protect yourself against injury and loss of fingers If the electric power cable has become jammed or is damaged always turn off and pull the plug out of the electric power sockets While working use protective aids Before performing work on the machine pull the power cord out of the electrical power socke...

Page 8: ... uses ATTENTION To prevent injury the electric sweeper must not be used on garden borders hedges and bushes Furthermore the electric sweeper must not be used on uneven terrain or gravel surfaces Assembly Instructions 1 Attach the handle s bottom parts using the screw 14 Adjust the required handle item 7 angle using the spline connector 16 as shown in the figure below Page No 07 www turfmatic info ...

Page 9: ...s middle part with the power cord safety retainer clamp 4 attached using the quick release coupling and the handle screw 13 3 Screw on the handle s top part as shown in the figure below Page No 08 www turfmatic info 15 15 15 ...

Page 10: ...hown in the figure below 5 Place the steel frame 10 into the textile collection basket 9 and attach all fasteners to the left right and rear poles of the frame Make sure that all fasteners are secured correctly as shown in the figure below Page No 09 www turfmatic info ...

Page 11: ...llection basket is seated correctly Note The sweeper may be used without the collection basket with the protective cover in the lower position This allows the sweeper to be used to lift flat blades of artificial grass back into an upright position It is recommended to prolong the life of your artificial grass and keep it looking its best that this is carried out at least yearly Use the lowest poss...

Page 12: ...ng depth may result in damage to the brush head cylinder or the overloading and destruction of the motor The lawn may also be damaged Adjustment after wear To maintain the recommended working depth use the depth adjustment control fig 1 item 8 Note The brush head of the sweeper wear out depending on the manner in which they are used The more intensively the sweeper is used the greater the wear on ...

Page 13: ...brush has come to a complete stop Do not turn on and off in rapid succession Starting 1 Press and hold the safety button1 Pull the starting lever 2 towards the handle 2 Release the safety button Turning off Release the starting lever 2 Page No 12 www turfmatic info ...

Page 14: ...e starting lever and reduce the brush depth Otherwise the machine could be damaged NOTE The motor is protected by a safety mechanism that is activated at the instant that the brush is caught or the engine is overloaded Whenever this occurs turn the machine off and pull the power plug out of the power source The safety mechanism will reset only when the starting lever is released Remove all obstruc...

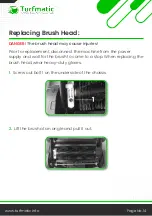
Page 15: ...placement disconnect the machine from the power supply and wait for the brush to come to a stop When replacing the brush head wear heavy duty gloves 1 Screw out bolt 1 on the underside of the chassis 2 Lift the brush at an angle and pull it out Page No 14 www turfmatic info ...

Page 16: ...3 Slide the replacement brush on to the drive shaft so that pin 5 fits into the respective part of the drive shaft 4 4 Retighten screw 1 to secure the brush Page No 15 www turfmatic info ...

Page 17: ...ble due to the noise of the machine Wear solid footwear and long trousers to protect your legs Make sure that your legs are at a sufficient distance from moving parts Make sure that there are no other people particularly children or animals in the work area Always push the artificial grass sweeper at walking speed Operating position make sure that you have safe foot support during operation Be car...

Page 18: ...power cord The extension cord must be water resistant providing protection against spraying water or the power sockets for the extension cord must be made from rubber or must have a rubber cover Any extension cords must meet the requirements of local electrical standards Only use approved extension cords with the corresponding conductor cross sections Please consult your electrician It is necessar...

Page 19: ...fore attempting to remove the object from the brush Maintenance Prior to maintenance disconnect the machine from the power supply and wait for the brush head cylinder to come to a stop While performing maintenance use work gloves The sweeper should be cleaned after every use Do not clean the sweeper under running water Do not pressure wash Do not use hard or pointed items for cleaning the sweeper ...

Page 20: ...eave the electric sweeper in the work area without supervision Warranty 1 Year Limited Lifetime Warranty The original purchaser for this unit is provided with a 1 YEAR WARRANTY Covered Under Warranty The warranty begins from the date of purchase For the first year coverage is for both parts and labour on warranty repair services Note Customers have to provide proof of purchase to initiate the repa...

Page 21: ... us for service and repair 4 We do not cover the cost of repairs and replacements due to misuse by the owner s improper maintenance and or lost units 5 Any water damage on the product will not be covered 8 All replacement costs for either the brust head or other parts will be the owner s responsibility 9 The warranty is void if the unit has been altered or an unauthorized person has damaged the un...

Page 22: ... and technical specifications may be made without prior notice and we reserve the right to make these changes The power tool and its accessories are manufactured from various materials e g metal and plastic Take damaged parts to a recycling centre Inquire at the relevant government department This product meets all the basic requirements of EU directives that apply to it Page No 21 www turfmatic i...

Reviews: