background image

30

29

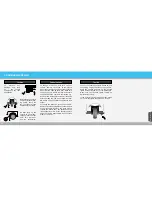
Jacking

Changing tires

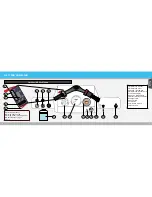
Do NOT jack up the 

vehicle on the diago-

nal beam near the rear 

axle.  This  will  dam

-

age the suspension.

To prevent any 

damage,  only  jack 

up  the vehicle 

underneath the rear 

supsension.

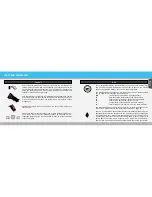
To  change  a  rear  tire,  first  jack  up  your 

vehicle.  Remove  the  screw  of  the  plastic 

wheel cover. Remove the 4 nuts that hold the 

wheel in place. Take off the wheel. Make sure 

you put the new wheel in place and secure 

the bolts while the vehicle is still jacked up.

Use a thread locking material on all the bolts 

before putting the new wheel back in place. 

We advice using Loctite Blue 242 Nut & Bolt 

Locker.

To change the front tire, jack up the vehicle. 

Remove the brake calliper and loosen the bolt 

of the front axle. Remove the front axle to 

release the front wheel. Pay attention to the 

right assembly order of the several spacers 

and other parts. Reassembly is the reverse 

order of removal.

Only jack up the vehicle 

on the allocated jack-

ing points. These are 

the cylindrical blocks 

underneath the frame.

TROUBLESHOOTING

Towing

In case your vehicle needs to be towed, use 

the  towing  ring  at  the  front  of  the  vehicle. 

Start the vehicle and turn on the hazard 

lights button located left of the dashboard. 

Make sure your hazard lights remain on 

whilst being towed.
If the vehicle is being towed at night, make 

sure your tail lights are turned on as well. 

Maintenance

Summary of Contents for E-TUK LIMO-GT

Page 1: ...T TU UK KT TU UK K F FA AC CT TO OR RY Y Keep this booklet with your vehicle USER MANUAL MAINTENANCE GUIDE E TUK LIMO GT Version number LGT01 Version release date August 2017...

Page 2: ...Tuk Tuk Factory team Getting familiar Driving Battery Maintenance Quick start guide 3 Getting familiar 5 Dashboard handlebars 5 Controls 7 BDI Battery Display Indicator 8 Maximum load 9 Safety 10 Dri...

Page 3: ...and make sure the throttle is not engaged Turn the key clockwise The display will switch on and you will hear two clicks one louder than the other Check the state of charge and Ub or system voltage I...

Page 4: ...ndscreen wiper 3 Hazard light switch 4 Windscreen washer fluid 5 Tell tales display 6 Speedo Odometer 7 Battery Display Indicator 8 Charger LED 9 Key switch 10 Throttle 11 Direction Switch 12 Outlet 1...

Page 5: ...up to date driving information The number of bars on the display shows the estimated battery level not an exact calculation The display alternates between 4 6 different screens The display button can...

Page 6: ...sing the off button will disable the battery and motor which will make the e Tuk shut down immediately Keep in mind that the pedal brake will need to be used to bring the vehicle to a stand still if t...

Page 7: ...eather reduces the range of your vehicle Your vehicle will drive normally but keep in mind that you may not be able to drive so many kilometres on a single charge It is recommended that you park your...

Page 8: ...water to clean if there is acid residue on the batteries or corrosion on the terminals Add distilled water to cells Never add acid to cells this is dangerous and will alter the chemistry Only add wate...

Page 9: ...illing wells Check the liquid level the lead plates in the battery should be submerged If necessary add water until the liquid level is 0 3cm below the bottom of the fill well A piece of rubber can be...

Page 10: ...er flowing through the Refilling the battery using the water filling system If your e Tuk is fitted with a water filling system This system lets you fill all batteries at once through a single hose In...

Page 11: ...r bench Charging your e Tuk from 0 to 100 takes about 14 hours TTF offers faster chargers which will Standard charging sequence Charging your e Tuk requires high current Make sure each socket has its...

Page 12: ...tant Contact your service supplier Yellow Flashing Reduced Power Mode Low AC Voltage or High internal charger temperature Use a shorter extension cord Red Flashing Charging error Re plug the charger p...

Page 13: ...nly use blade fuses with amps according to the schedule below In order to check if a fuse is broken carefully remove it from the fuse box If the metal wire between the 2 poles is broken the fuse is bl...

Page 14: ...icle is switched off If the battery voltage is 10V or less then the battery needs to be replaced Unscrew the two screws inside the dash board that holds the headlight in place Slide the black rubber p...

Page 15: ...rs Check for any visible leaks Use DOT 3 or DOT 4 type fluid Front fork Visually check for any leakage Replace the oil in the front fork when you have spotted leakage or when damping becomes less Also...

Page 16: ...ite Blue 242 Nut Bolt Locker To change the front tire jack up the vehicle Remove the brake calliper and loosen the bolt of the front axle Remove the front axle to release the front wheel Pay attention...

Page 17: ...istance can be given by authorised distributors and service mechanics The handheld device can be plugged into the communication port which is located underneath the rear passenger bench on the white b...

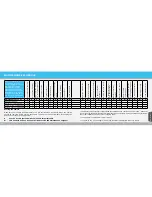
Page 18: ...X X X K e y c o n t a c t n o t t u r n e d c o r r e c t l y K e y c o n t a c t f a u l t y c o n n e c t i o n H a n d l e p a r k i n g b r a k e s t i l l o n E m e r g e n c y b u t t o n p u s...

Page 19: ...l not drive The motor temperature sensor has detached Check the 2 pin connection nearby the motor 36 Encoder error The encoder has detached Check the 4 pin connection by the motor 37 The motor face is...

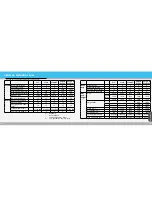
Page 20: ...m 3 100 000 3 100 000 3 100 000 3 100 000 3 100 000 Charger type Delta Q 3 1 Limo Limo GT Cargo Vendo Cargo Vendo XL Drive train Motor type AC Motor power kW 7 7 7 7 7 Reverse speed km h 10 10 10 10 1...

Page 21: ...s check Equalize batteries Clean motor Flush brake fluid Replace brake discs Replace brake pads Read controller history Update controller software Wiring harness check Differential oil level and quali...

Page 22: ...ice and repairs on your e Tuk Please keep in mind that your vehicle needs regular maintenance Regular checks need to be done on your battery You can find the maintenance schedule on page 39 We advice...
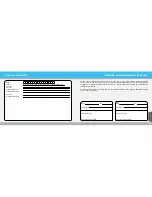
Page 23: ...service km date Service stamp Date Comments km Next service km date Service stamp Date Comments km Next service km date Service stamp Date Comments km Next service km date Service stamp Date Comments...

Page 24: ...service km date Service stamp Date Comments km Next service km date Service stamp Date Comments km Next service km date Service stamp Date Comments km Next service km date Service stamp Date Comments...

Page 25: ...e logging form can be used for this Measuring each battery cell can be done to determine which specific cell underperforms Each measurement can be filled in the battery logging form Appropriate values...

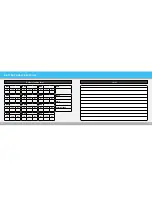
Page 26: ...g1 sg2 sg3 B04 sg1 sg2 sg3 B07 sg1 sg2 sg3 B10 sg1 sg2 sg3 B02 sg1 sg2 sg3 B05 sg1 sg2 sg3 B08 sg1 sg2 sg3 B11 sg1 sg2 sg3 B03 sg1 sg2 sg3 B06 sg1 sg2 sg3 B09 sg1 sg2 sg3 B12 sg1 sg2 sg3 VIN Date Time...

Page 27: ...h your vehicle please contact your local service provider Before you do please make sure you have read this manual carefully If the manual does not give you the answer to your problem please contact t...

Page 28: ...www tuktukfactory com service tuktukfactory com T TU UK KT TU UK K F FA AC CT TO OR RY Y...

Reviews: