-7-
Reviewing Data
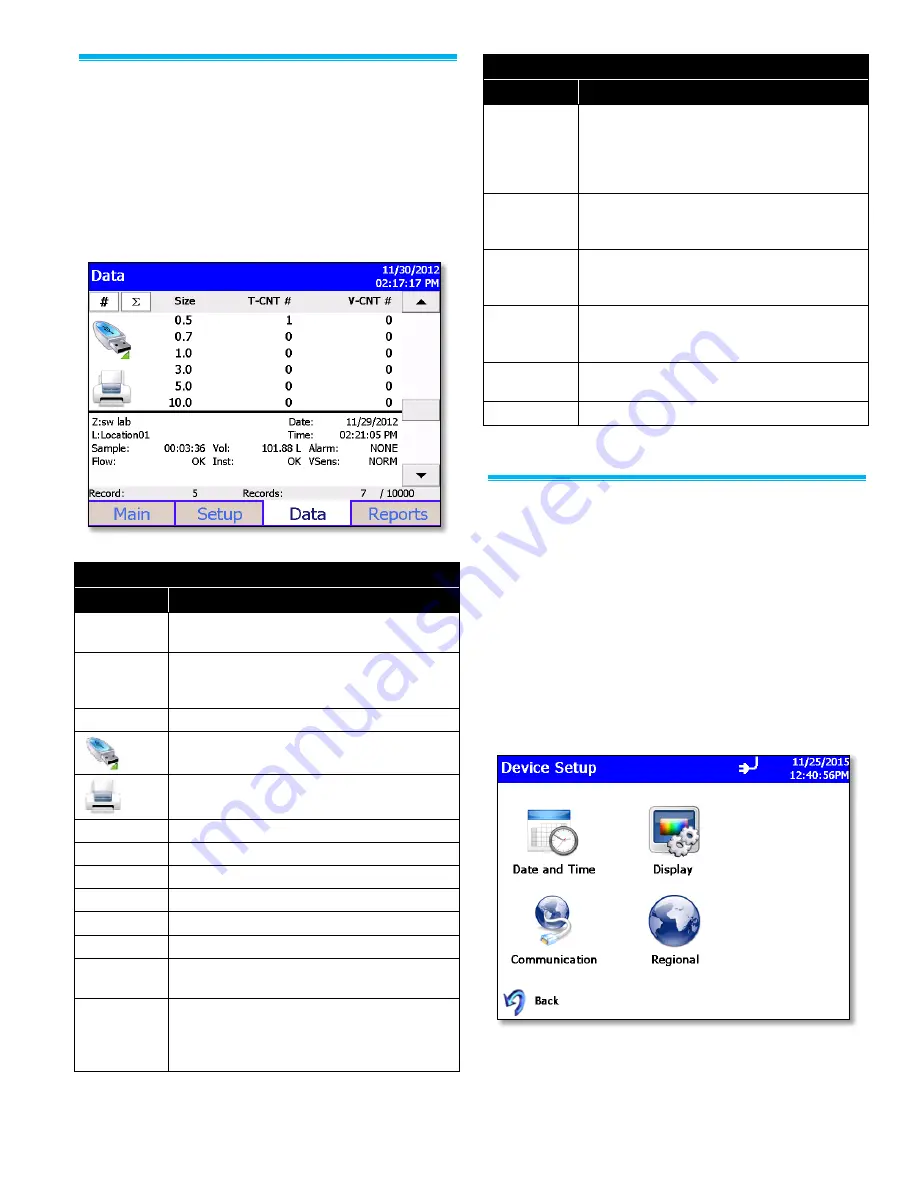
1. Use the Data screen to review data that has been
collected. Use the scroll bar control on the right to
scroll though the records.
2. The record number is displayed near the bottom of
the screen. As each record displays, its data and
relevant parameters are displayed.
3. Descriptions of each section of the data display
screen are described in the following table.
Data Screen Labels and Controls
Field
Description
#, ft
3
, m
3
Button used to change between counts and
concentration displays.
,
Button used to change between differential
(
)
and cumulative (
) values for T-CNT and
V-CNT.
Size
Channel size.
Export the data to a flash drive.
Print data to the optional printer.
Zone (Z)
Zone in which the data was collected.
Location (L)
Location within the Zone.
Date
Date on which the data was collected.
Time
Time at which data collection was initiated.
Sample
Duration of the sampling period.
Vol
Volume of air that was sampled.
Alarm
Alarm threshold was triggered (YES) or not
(NONE).
Flow
Status of the flow. Indications are
OK
or
ALRM
. OK indicates the flow rate is good;
ALRM indicates flow rate is below the defined
setting and the sample is invalid.
Data Screen Labels and Controls
Field
Description
Inst
Operational Status of the instrument.
Indications are
OK
or
SRVC
. SRVC indicates
that there is a problem with the laser or
another element of the system and that the
instrument requires Service.
Temp
Temperature at the end of the time the data
was collected (if optional probe was
connected during sampling).
RH
Humidity level at the end of the time the data
was collected (if option probe was connected
during sampling).
Vel
Velocity of the ambient air at the sampling
location as measured by a connected TSI
Velocity probe (optional).
Record
The record number of the sample being
displayed.
Records
Total number of records.
Instrument Configuration
On the Setup tab page tap the Device button to display the
Device Setup screen. This screen allows you to navigate
to other screens where you can set date and time,
calibrate the touchscreen, set up communications, and
make regional selections.
The BioTrak detector incorporates algorithms which are
utilized to determine if a particle is viable in nature or
not. To view the version of the algorithm installed on the
unit tap the Info button on the Setup page. The
Information Screen also displays firmware version,
model, serial number, USB IP Address, and other
information.


