Support: 855-473-7449 or 408-943-4100 Email:
Page 6
4 Handling Drives
When fewer than 24 drives are purchased with the system, air baffles are installed in all remaining drive tray slots.
To install new drive trays in the system, you can remove a baffle by inserting a flathead screwdriver in one of the
baffle grooves and gently pushing the baffle out of the slot. For proper airflow, it is recommended to keep all baffles
in place, unless new drive trays are being installed�
TrueNAS appliances only support qualified hard drives and SSDs. Contact the
if you need more drives
or replacements. Adding unqualified drives to the system voids the warranty. Call Support if drives are improperly
installed in trays�
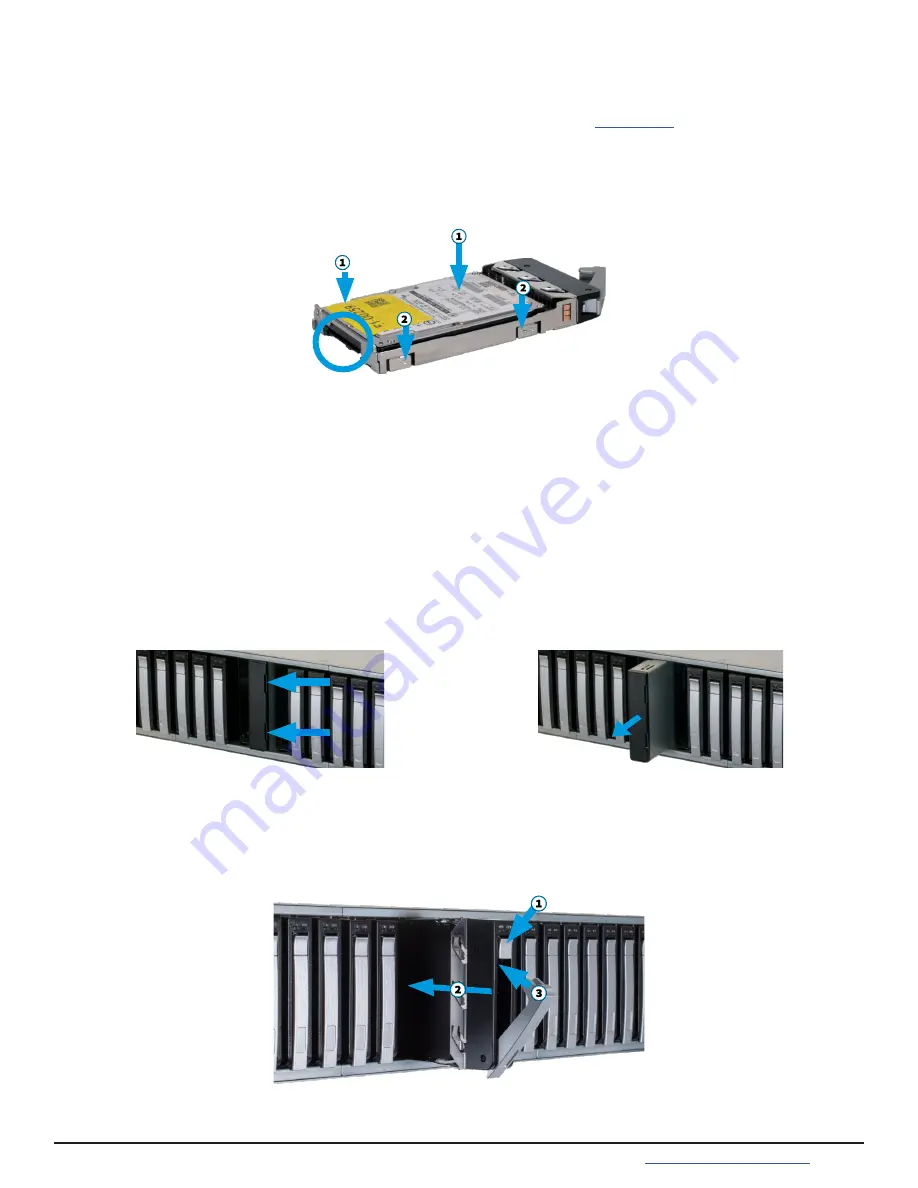
To insert a drive in a tray, align the drive connectors with the rear of the tray and drive side screw holes with the
trays retention pegs. Push the drive side screw holes into the fixed retention pegs (
1
) then into the flexible retention
pegs (
2
)� The drive will click into place�
To remove a drive, push on the drive from the bottom of the tray to pop the drive out from the flexible retention
pegs� Continue to lift the drive free from the tray�
4.1 Installing Drives into Trays
4.2 Inserting Drive Trays into the ES24F
To remove a drive tray, press the button to open the latch, gently swing the latch fully open, and slide the tray out of
the system�
Each drive tray has two indicator lights for status and fault� The status light is blue when the drive is active or a hot
spare� The fault light is solid red when a drive error has occurred or an identify command has been sent�
Press the button on the drive tray to open the latch (
1
)� Carefully slide the tray into a drive bay until the latch begins
to swing closed (
2
)� Gently push the latch closed until it clicks into place and the tray is secured in the chassis (
3
)�


