6
EN
cross line laser BD7A
Operation
Charging the battery
The battery is partially charged upon delivery to avoid damage
to the battery caused by a deep discharge.
Info
Upon delivery, the battery is only slightly charged.
Therefore, please charge the battery for at least
5 hours before using the device for the first time.
Warning of laser radiation
Laser class 2, P max.: < 1 mW, λ: 650 nm,
EN 60825-1:2014
Do not look directly into the laser beam or the opening
from which it emerges.
Never point the laser beam at people, animals or
reflective surfaces. Even brief eye contact can lead to
eye damage.
Examining the laser output aperture by use of optical
instruments (e.g. magnifying glass, magnifiers and the
like) entails the risk of eye damage.
When working with a laser of class 2, observe the
national regulations on wearing eye protection.
Warning of electrical voltage
Before each use of the charger or power cable, check
for damages. If you notice damages, stop using the
charger or power cable!
Note
The battery can be damaged in case of improper
charging.
Never charge the battery at ambient temperatures
below 10 °C or above 40 °C.
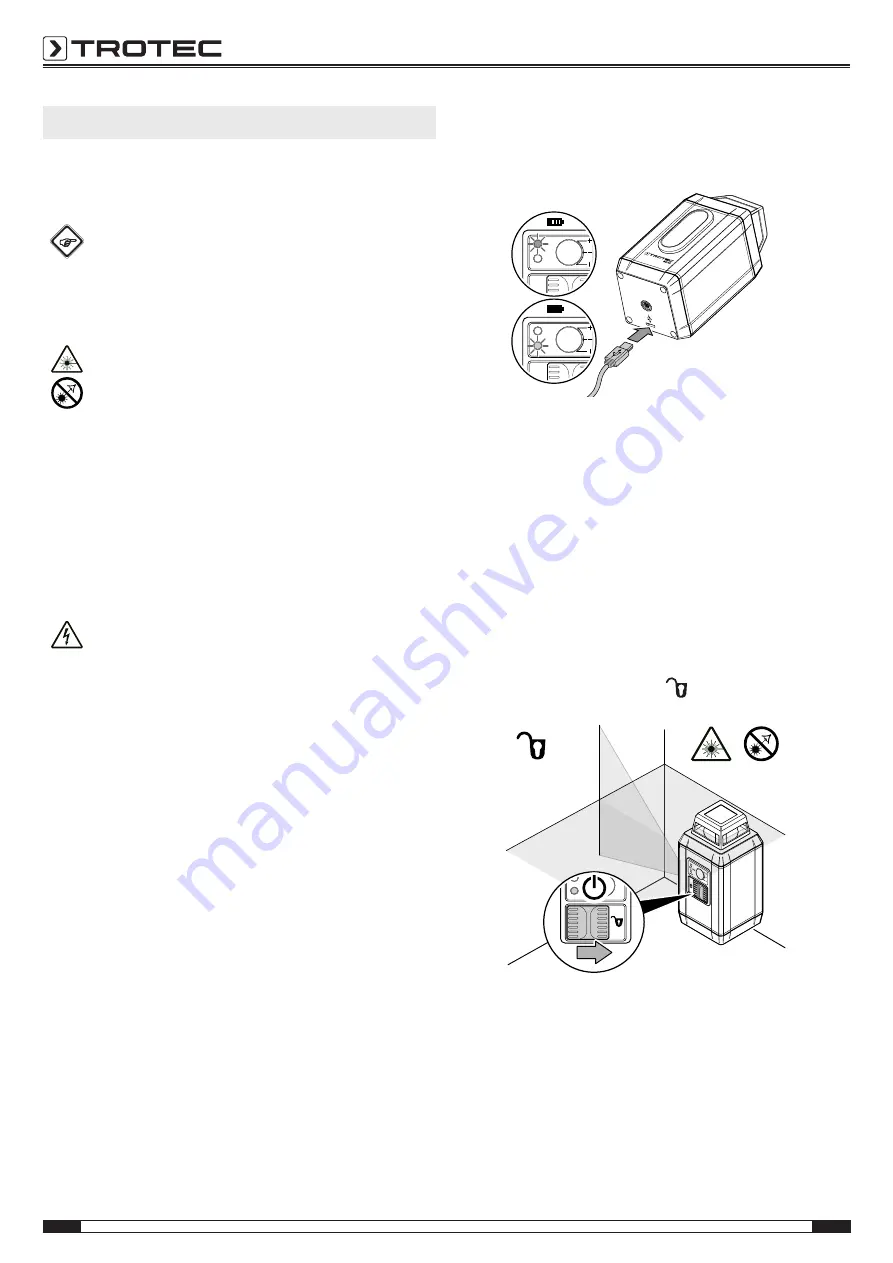
The battery should be charged prior to initial start-up and when
the battery is low. To do so, please proceed as follows:
1. Unscrew the device from the multifunctional mount.
2. Plug the charger into a properly fused mains socket.
3. Connect the charging cable to the device's micro USB port.
4. During charging, the levelling indicator "NO Level" (9) is
illuminated in red.
5. When the battery is fully charged, the levelling indicator
"Level" (8) lights up in green.
Switching the device on
The device has two different modes of operation. On the one
hand, you can use the device with the automatic self-levelling
function, on the other, it is possible to set the laser to a fix
position.
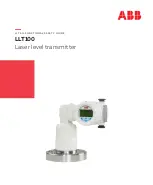
Self-levelling function of the laser
1. Place the device on a horizontal, solid surface or secure it
to the multifunctional mount.
2. Slide the on/off switch (7) to
to switch the device on.
ð
Both the vertical laser and the horizontal 360° laser
switch on.
ð
The device automatically compensates for unevenness
within the self-levelling range of ± 3°. During levelling,
the laser lines move.
ð
When levelling is completed, the levelling indicator
"Level" (8) lights up in green.


