Remote Indicator
Tropos 4210 MetroMesh Router Installation Guide
9
9.
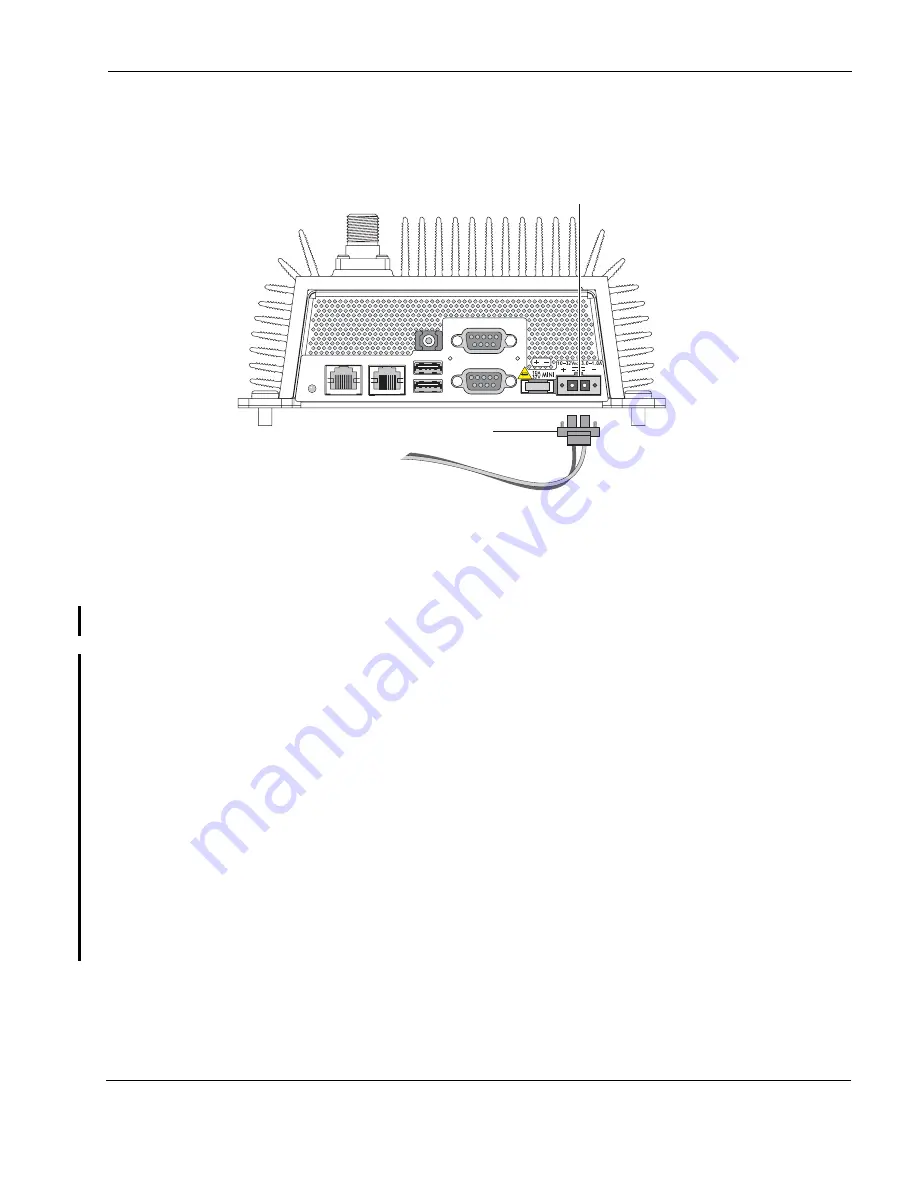
Trim 1/4-inch from the end of the #18AWG wire. Attach the red wire to the + side of the
power plug and the black wire to the - side.
Figure 7 Power Plug Connection
10.
Return the power plug to its location on the router and screw down tightly. Note that the unit
is powered as soon as the plug is connected and the other ends of the power wires are
attached to vehicle power.
Remote Indicator
The Mesh Link Remote Indicator is a optional indicator that allows a user to determine whether
the Tropos 4210 router is connected to the Tropos network without looking at the status LED.
The indicator is assigned to pin 9 of the bottom Factory Use Only serial connector.
The Mesh Link Remote Indicator functions as follows:
If the 4210 is not connected to the network: (the router is booting or off, or there is no RF
signal), pin 9 is electrically disconnected from pin 5 (ground). This state corresponds to the
status light being off or red.
If the 4210 is connected to the network, pin 9 is electrically connected to pin 5 (ground).
This state corresponds to the status LED being green)
It is a customer decision how the remote indicator should be used. Customers can set up a
custom LED indicator to show that the unit is connected, or they can connect the indicator to a
general load that turns on another device when the Tropos 4210 router is connected to the
network. In either case, installing and operating the indicator requires knowledge and skill in
basic electronics, wiring, and cable assembly.
Figure 8
is a schematic drawing of the indicator.
trp_133
Power connection
Terminal block
10
Power wiring


