


IN
ST
ALLA
TI
O
N
COM
P
ON
E
NT
S
W
AR
RANT
Y
D
A
TA-L
OG
G
IN
G
OPE
RA
TI
O
N
5
INSTALLATION
Install TrojanUVMax water treatment unit(s) if required. A "unit" is a complete system.
Make sure the unit(s) are powered.
Install
COMMcenter
on wall if so desired (it may also rest on a flat surface). Mounting holes are 2.5" (6.8 cm)
apart. If using RJ45 (Ethernet) cable, COMMcenter may be installed at any distance from unit(s). If using a
wireless connection, please refer to wireless instructions provided with your system to determine maximum
distance.
If connecting to a single unit, connect the unit's power supply (pictured below) to the
COMMcenter
using the
cable provided with the
COMMcenter
.
To connect to multiple units, see box below then return to step 5.
Please read pages 6 and 7 to familiarize yourself with the basic operations of the
COMMcenter
.
Set the time and date on the
COMMcenter
(refer to page 11).
If data-logging is desired, insert mini-SD card or connect to computer using
MAXtrack
software (free; to learn
more, visit http://protour.trojanuv.com). For details, refer to "Data-logging" section.
1.
2.
3.
4.
5.
6.
7.
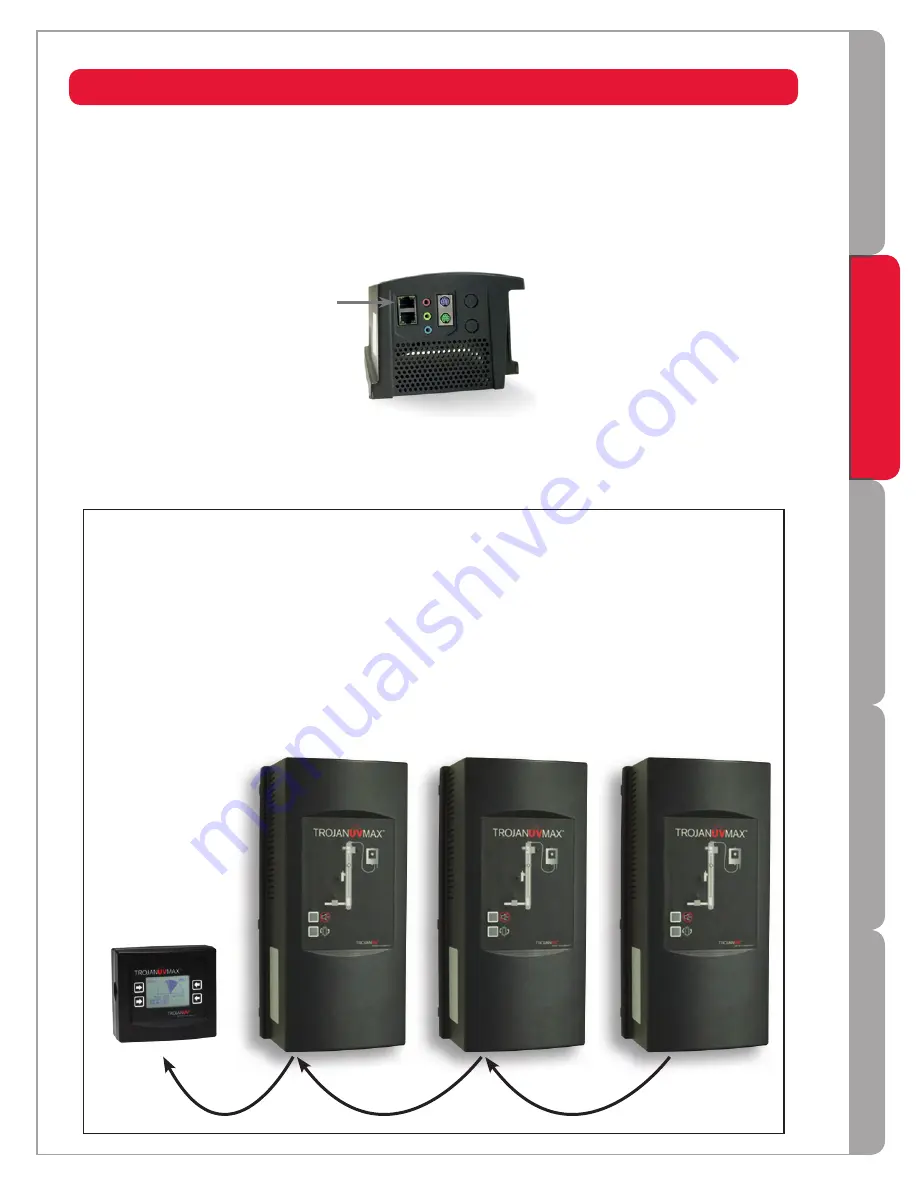
Connect cable here
(port for line out)
COMMcenter
Unit 3
Unit 1
Unit 2
Installations involving multiple units
Up to 9 units may be linked to the
COMMcenter
. Make the required connections in the sequence
illustrated below. The port closest to the front of each power supply is for the line out; the port closest
to the back is for the line in. Only one Ethernet connection cable is provided with the
COMMcenter
-
additional cables may be purchased (part # 602942).
The units are identified by an "address". Until they have been connected, all units are addressed
('numbered') "zero". The
COMMcenter
assigns each unit an address when first connected. Each unit then
retains the address it is assigned, even when unplugged or connected to another
COMMcenter
.
Step 1
Step 2
Step 3
Out
In
Out
Out
In
In


