background image

FAX Operation (Basic) 

3-12

Cancelling Communication

The method for cancelling communication with this machine differs depending on the transmission method 
(memory transmission or direct transmission) and communication form. Methods of cancelling in various cases 
are explained here.

Cancelling Memory Transmission (while originals are being scanned)

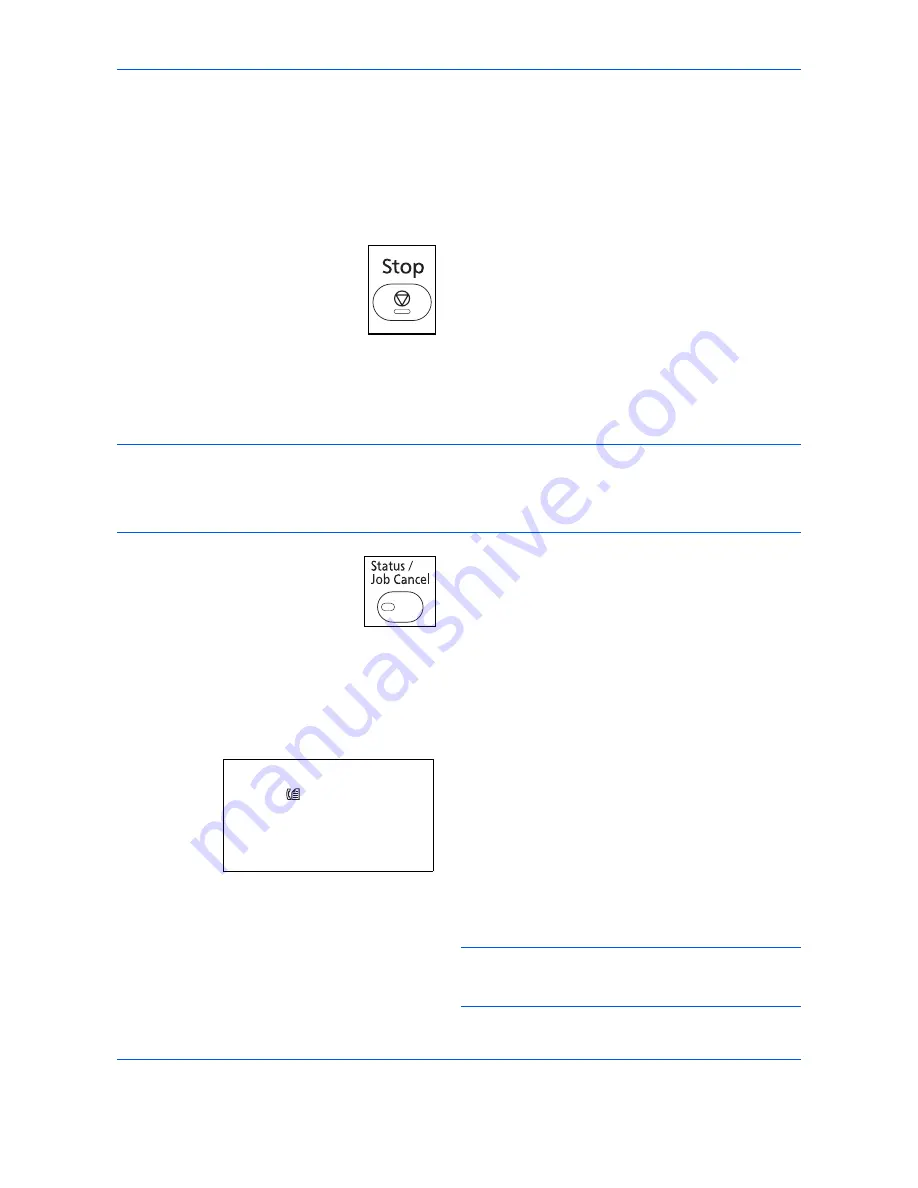
During memory transmission, to cancel scanning of 
originals, press the 

Stop

 key on the operation panel. 

Scanning of originals is canceled, and the originals are 
ejected. When originals remain in the document 
processor, take them out from the original output table.

Cancelling Memory Transmission (during communication)

During memory transmission, to cancel communication after it has started following the completed scanning of 
originals, use the following procedure.

NOTE: 

If user management is set to On, the administrator or the user who performs the memory transmission 

can be canceled the job.

You can cancel transmission by disconnecting the telephone line. For details, refer to 

Cancelling Transmission 

(Disconnection of Communication) on page 3-13

.

1

Press the 

Status/Job Cancel

 key.

2

Press the 

 or 


key to select [Send Job Status].

3

Press the 

OK

 key.

4

Press the 

 or 

 key to select the job you want to 

cancel.

5

Press [Cancel] (the 

Left Select

 key).

6

Press [Yes] (the 

Left Select

 key). Communication 

is canceled.

NOTE: 

Canceling is also possible by pressing [Menu] 

(the 

Right Select

 key), then selecting [Cancel Job] 

and pressing the 

OK

 key.

Send Job Status:

a


b


0010  

0667643333

r

0011  

p

 Broadcast

*********************

[ Cancel ]   [ Menu ]

0017  

0324256345

Summary of Contents for P-C2665

Page 1: ...User Manual Fax System P C2665 MFP P C2665 MFP Digital Multifunctional Colour System Copy Print Scan Fax A4 EN...

Page 2: ......

Page 3: ...ols The symbol indicates that the related section includes safety warnings Specific points of attention are indicated inside the symbol The symbol indicates that the related section includes informati...

Page 4: ...ii Note Due to performance updating information in this Operation Guide is subject to change without notice...

Page 5: ...errupt Send 4 7 Chain Dial 4 8 Manual Send 4 10 Manual Reception 4 11 Remote Switch Function 4 13 Printing Forwarding Received Documents Memory Forwarding 4 15 Sub Address Communication 4 29 Sub Addre...

Page 6: ...6 30 Connection to PBX Private Branch Exchange Europe only 6 41 Remote Diagnostics 6 42 7 About Network FAX What is Network FAX 7 2 Setup 7 4 8 Troubleshooting Indicators During Sending Receiving Ope...

Page 7: ...se read the Operation Guide before you start using the machine During use refer to the Operation Guide for your machine for information regarding the sections listed below Caution Labels Installation...

Page 8: ...INSTRUCTIONS When using your telephone equipment basic safety precautions should always be followed to reduce the risk of fire electric shock and injury to persons including the following CAUTION To...

Page 9: ...sous sol humide ou pr s d une piscine 2 Eviter d utiliser le t l phone sauf s il s agit d un appareil sans fil pendant un orage lectrique Ceci peut pr senter un risque de choc lectrique caus par la fo...

Page 10: ...mation technology equipment EN55022 Class B Limits for harmonic currents emissions for equipment input current 16A per phase EN61000 3 2 Limitation of voltage fluctuations and flicker in low voltage s...

Page 11: ...6R00 AN for D GR and P ES 01R01 National AN for E AN 07R01 AN for D E P and N GR 01R00 National AN for GR AN 09R00 AN for D GR 03R00 National AN for GR AN 10R00 AN for D GR 04R00 National AN for GR AN...

Page 12: ...witched telephone networks PSTN in the following countries Austria France Liechtenstein Slovakia Belgium Germany Lithuania Slovenia Bulgaria Greece Luxembourg Spain Cyprus Hungary Malta Sweden Czech I...

Page 13: ...iginals for each requirement Furthermore explains sub address communication functions of the machine that are compatible with other makers systems and job accounting functions convenient for checking...

Page 14: ...ails refer to the machine s Operation Guide Note Indicates supplemental information or operations for reference NOTE Important Indicates items that are required or prohibited so as to avoid problems I...

Page 15: ...1 1 1 Part Names and Functions This chapter explains the names of parts of the fax device For other parts refer to the machine s Operation Guide Operation Panel 1 2 Machine 1 4...

Page 16: ...s between on hook and off hook when manually sending a FAX Shifts to switch the one touch key numbers 1 to 11 and 12 to 22 Lamp is lit while shifted 12 to 22 Destinations can be checked and added Call...

Page 17: ...settings and displays the basic screen Starts sending operations and processing for setting operations Clears entered numbers and characters Numeric keys Enter numbers and symbols Displays the functio...

Page 18: ...the operation panel 1 2 3 4 5 1 Operation panel Perform the fax operation with this panel 2 Main power switch Set this switch to ON when performing the fax or copier operation The message display ligh...

Page 19: ...in the Document Processor 7 Original width guides Adjust these guides according to the original width 8 Original table Stack the sheet originals on this table 9 Original eject table Read originals are...

Page 20: ...Part Names and Functions 1 6...

Page 21: ...is used There is no need for the customer to undertake this preparation if it has already been carried out by a service representative Selection of Telephone Line Inch version only 2 2 Selection of T...

Page 22: ...key to select FAX 3 Press the OK key 4 Press the or key to select Transmission 5 Press the OK key 6 Press the or key to select FAX Dialing Mode 7 Press the OK key 8 Press the or key to select Tone DTM...

Page 23: ...ion of the information to be printed you can select inside or outside of the page image being sent NOTE Normally the Local FAX Name is printed in the transmit terminal identification TTI However when...

Page 24: ...ame printed on in the transmit terminal identification NOTE To change the entry follow the same operation 1 Press the System Menu Counter key 2 Press the or key to select FAX 3 Press the OK key 4 Pres...

Page 25: ...When you register the Local FAX ID go to step 10 Local FAX Number Entry 6 Press the or key to select Local FAX Number 7 Press the OK key 8 Use the numeric keys to enter the local FAX number to be reg...

Page 26: ...to select Common Settings 3 Press the OK key 4 Press the or key to select Date Setting 5 Press the OK key 6 A login screen will appear Then enter the Login User Name and Login Password to log in 7 Pr...

Page 27: ...ss the OK key 16 Press the or key to select Date Time 17 Press the OK key 18 Press the or key to move the cursor position enter year month and day 19 Press the OK key 20 Press the or key to move the c...

Page 28: ...Preparation Before Use 2 8...

Page 29: ...is chapter explains the following basic operations Automatic Send 3 2 FAX Automatic Reception 3 9 Cancelling Communication 3 12 Using the Address Book 3 15 Using One touch Keys 3 26 Dialing the Same R...

Page 30: ...FTP transmission in a single transmission job Multi Sending Press the Send key to select the destinations For details refer to Sending in the Operation Guide for the machine Selection of Transmission...

Page 31: ...you perform an operation to allow continued scanning and after all the originals have been stored in memory the receiving system is dialed Direct Transmission When originals are placed in the document...

Page 32: ...cters Use or to move the cursor To correct the number press the Clear key to delete the digits one by one before reentering the number To delete all entered digits and return to the default screen pre...

Page 33: ...Refer to page 3 29 Key Description Sub Address To communicate using the sub address press this key For details refer to Sub Address Communication on page 4 29 Encrypted TX To send faxes using encrypti...

Page 34: ...ra Fine when sending originals with minute characters and lines more finely Typical character size 6 point example Resolution Resolution NOTE The default setting is 200 100 dpi Normal The higher the r...

Page 35: ...dpi Fine Selecting the Density 6 Adjusting the density when scanning originals 4 to 4 You can adjust the density using 9 levels 1 Press the Function Menu key 2 Press the or key to select Density 3 Pre...

Page 36: ...ey to select the job you want to cancel 2 Press Cancel the Left Select key 3 Press Yes the Left Select key This cancels the transmission NOTE Pressing the Stop key on the operation panel while origina...

Page 37: ...y change the reception method to Auto DRD For details refer to DRD Reception on page 6 11 Part that is operated Reception Method This machine allows the following five reception methods Auto Normal Au...

Page 38: ...tray with the print side facing downward Up to 150 sheets of plain paper 80 g m can be held on the top tray However the number of sheets varies with the condition of the paper to be used IMPORTANT Whe...

Page 39: ...inals that have been sent in the image memory When the machine returns to the printable state printing starts During memory reception FAX Reception Printing Jobs are displayed on Printing Jobs of the...

Page 40: ...y transmission to cancel communication after it has started following the completed scanning of originals use the following procedure NOTE If user management is set to On the administrator or the user...

Page 41: ...OK key 8 Press Yes the Left Select key Communication is canceled Or communication starts if sending the job immediately Cancelling Direct Transmission During direct transmission to cancel communicatio...

Page 42: ...onnects the line in communication Cancelling Polling Transmissions To cancel a polling transmission delete the polling transmission original saved in the polling box For information on how to delete t...

Page 43: ...ations as a unit Contact Registration fax Up to 200 destinations can be registered Destination name fax number sub address communication encryption transmission start speed and ECM communication can b...

Page 44: ...ilable number out of 250 numbers 200 for individuals and 50 for groups 14 Press the OK key 15 Press the or key to select Contact Name 16 Press Edit the Right Select key 17 Use the numeric keys to ente...

Page 45: ...2 Press Detail the Right Select key and then use the or key to select Sub Address If you do not use Sub Address proceed to step 28 23 Press Edit the Right Select key 24 Use the numeric keys to enter t...

Page 46: ...33 Press the OK key NOTE Register the encryption key in advance For details refer to Registering an Encryption Key on page 6 22 34 Press the or key to select On or Off 35 Press the OK key Proceed to t...

Page 47: ...signated at one time Up to 50 groups can be registered NOTE Group registration requires destinations that have been registered as contact registration Perform the necessary contact registration in adv...

Page 48: ...Right Select key 13 Use the numeric keys to enter any address number between 001 and 250 NOTE An address number is an identification number for each destination You can select any available number ou...

Page 49: ...select Group Member 20 Press Edit the Right Select key 21 Press Menu the Right Select key 22 Press the or key to select Add Member 23 Press the OK key 24 Press the or key to select the destination ind...

Page 50: ...he or key to select Select 29 Press the OK key 30 To add more destinations repeat steps 21 to 29 31 Press the Back key 32 Use the or key to check if the group was set correctly 33 Press the OK key The...

Page 51: ...red in the destination list Searching for a Destination You can search for a destination registered in the Address Book 1 In the basic screen for sending press the Address Book key 2 Press the or key...

Page 52: ...ess Book 5 Press the OK key 6 Press the or key to select the destination or group to edit 7 Press Menu the Right Select key 8 When editing the destination of a contact registration 1 Press the or key...

Page 53: ...ration contents is reflected on the Address Book Printing Address List You can print the list of destinations registered in the Address Book You can sort the list in the order of names or address numb...

Page 54: ...tered 1 Press the One touch key that you want to register and hold it 2 seconds 2 Press the or key to select the number to which you want to register the destination Numbers 12 to 22 are the One touch...

Page 55: ...In the destination entry screen press the One touch key where the destination is registered When recalling from One touch keys 12 to 22 press the Shift Lock key to turn on the lamp next to the keys a...

Page 56: ...u want to edit Numbers 12 to 22 are the One touch key numbers when the Shift Lock key is pressed 3 Press the OK key 4 When changing the destination to another destination 1 Press the or key to select...

Page 57: ...system does not respond when you have tried to send a fax When you want to send the fax to the same receiving system press the Address Recall Pause key and you can call the receiving system you dialed...

Page 58: ...FAX Operation Basic 3 30...

Page 59: ...y Transmission 4 6 Interrupt Send 4 7 Chain Dial 4 8 Manual Send 4 10 Manual Reception 4 11 Remote Switch Function 4 13 Printing Forwarding Received Documents Memory Forwarding 4 15 Sub Address Commun...

Page 60: ...ansmission before the specified time Refer to Cancelling and Sending Delayed Transmissions Queued on page 3 13 You can change destinations of a delayed transmission any time before the specified trans...

Page 61: ...Checking Scheduled Job You can check the details of a scheduled job NOTE For cancelling memory transmission or sending a scheduled job immediately refer to Cancelling and Sending Delayed Transmission...

Page 62: ...destinations For details refer to Sending in the Operation Guide for the machine 1 Press the FAX key 2 Place the originals 3 Select the destination Enter the fax number 1 Use the numeric keys to ente...

Page 63: ...You can select destinations using a combination of direct entry the Address Book and One touch keys 4 After selecting all the destinations press the Start key Transmission begins NOTE When On is sele...

Page 64: ...f Transmission Method on page 3 2 You can use other functions such as broadcast transmission Together with delayed transmission up to 30 transmissions can be scheduled 1 Press the FAX key 2 Place the...

Page 65: ...Menu key 4 Press the or key to select FAX Direct TX 5 Press the OK key 6 Press the or key to select On 7 Press the OK key 8 Set the destination and press the Start key The panel display will switch to...

Page 66: ...212 using the numeric keys 4 Press Chain the Left Select key 5 Enter the fax number to connect to the chain number Use the numeric keys to enter a fax number 1 212 is already entered and then enter t...

Page 67: ...is automatically added to the destination Select fax number from One touch key Select the destination from One touch keys The chain number 212 is automatically added to the destinations 6 Press the S...

Page 68: ...you hear the fax tone the telephone line has connected to the receiving system Press the Start key Transmission begins Using a Telephone to Send When you want to talk to the person at the receiving s...

Page 69: ...eception To change to manual mode refer to Receiving Mode on page 6 17 Receiving after Confirming Connection to the Sending System You can receive originals after confirming by sound that the telephon...

Page 70: ...ne signals use the telephone to start the reception of originals with the remote switch function Refer to Remote Switch Function on page 4 13 When you hear a voice from the receiving system The teleph...

Page 71: ...commercially available product to the machine However even if it is a tone signal sending telephone set this function may not be used satisfactorily depending on the type of telephone set For details...

Page 72: ...tion 1 The connected telephone set makes a ringing tone 2 Lift the handset of the telephone 3 When you hear the fax tone from the handset enter the two digit remote switch dial number using the dial b...

Page 73: ...ne forwarding destination can be specified When forwarding is set to On all received documents will be forwarded to the specified destination Type of Forwarding Destination You can forward the documen...

Page 74: ...dure below to register a forwarding destination 1 Press the System Menu Counter key 2 Press the or key to select FAX 3 Press the OK key 4 Press the or key to select Reception 5 Press the OK key 6 Pres...

Page 75: ...6 Press the OK key 7 Press the or key to select the destination 8 Press the OK key Entering Forwarding Destination Directly 1 Press the or key to select Address Entry 2 Press the OK key 3 Press the or...

Page 76: ...hange or delete registration contents 1 Press the System Menu Counter key 2 Press the or key to select FAX 3 Press the OK key 4 Press the or key to select Reception 5 Press the OK key 6 Press the or k...

Page 77: ...destination is deleted 14 Press Exit the Right Select key Forwarding Time Setting Register the start time and end time between which forwarding is enabled 1 Press the System Menu Counter key 2 Press t...

Page 78: ...e end time 15 Press the OK key NOTE Enter the time on the 24 hours system File Format Setting for Each Requirement If you are sending the file as an E mail attachment or transferring it to a folder SM...

Page 79: ...l When adding information you can select either Sender Name or Sender 1 Press the System Menu Counter key 2 Press the or key to select FAX 3 Press the OK key 4 Press the or key to select Reception 5 P...

Page 80: ...to select Forward Settings 7 Press the OK key 8 Press the or key to select FTP Encrypted TX 9 Press the OK key 10 Press the or key to select On or Off 11 Press the OK key Print Setting You can set whe...

Page 81: ...u can append information such as the date time and the job number or fax number 1 Press the System Menu Counter key 2 Press the or key to select FAX 3 Press the OK key 4 Press the or key to select Rec...

Page 82: ...riginals are forwarded with folder SMB transmission and folder FTP transmission 11 Press the OK key 12 When Not Appending Information to Document Name 1 Press the or key to select None 2 Press the OK...

Page 83: ...privileges is shown below Upper case and lower case letters are distinguished case sensitive Accessing Embedded Web Server RX 1 Launch your Web browser 2 In the address or location bar enter the mach...

Page 84: ...ure the schedule for the specified rule 1 Schedule Select All Day or Preset Time 2 Start Time End Time You can configure the setting when you select Preset Time as Schedule Specify the time table from...

Page 85: ...ord Connection Test Click Test button to confirm the connection to the folder 5 FAX Click FAX button to open the FAX page FAX Number Enter the fax number Sub Address Enter the sub address Password Ent...

Page 86: ...om the drop down list 7 File Separation Select Each Page or Off 8 E mail Subject Additional Info Select the additional information from the dropdown list 9 FTP Encryption TX Select On to use the FTP e...

Page 87: ...rious kind of functional communication When registering a sub address and sub address password in the Address Book and One touch keys you can omit their entry before transmission For details refer to...

Page 88: ...c keys NOTE You can use up to 20 digits including the numbers from 0 to 9 space and characters to enter a sub address 7 Press the OK key and enter the sub address password using the numeric keys NOTE...

Page 89: ...efore transmission in the Operation Guide for the machine 10 Press the Start key Transmission begins NOTE When On is selected in Destination Check before Send a destination confirmation screen is disp...

Page 90: ...ect Sub Address Box and press the OK key 4 Press the or key to select Detail Edit and press the OK key 5 Press Menu the Right Select key 6 Press the or key to select Add Box and press the OK key 7 Use...

Page 91: ...user name 1 Press the or key to select Local User Network User or None 2 When selecting Local User press the or key to select user name form the Local User List When selecting Network User use the nu...

Page 92: ...n and press the OK key NOTE You must enter a box password in the following situations If user login is disabled If user login is enabled but the Sub Address Box has been selected by another user when...

Page 93: ...tarts Deleting Originals after Printing from a Sub Address Box To automatically delete the originals printed form the Sub Address Box use the following operation 1 Follow steps 1 to 4 in Printing Orig...

Page 94: ...You can also use this procedure to rename files 1 Follow steps 1 to 5 in Printing Originals from a Sub Address Box on page 4 34 2 Press the or key to select the document press Menu the Left Select ke...

Page 95: ...TE The list can be printed when user login has been enabled and the machine is logged in with administrator privileges 1 Press the System Menu Counter key 2 Press the or key to select Document Box and...

Page 96: ...rements to be registered are set press the Program key and hold it 2 seconds The program is registered to the key When you press a number where a program is already registered proceed to the next step...

Page 97: ...anced 4 39 4 NOTE When On is selected in Destination Check before Send a destination confirmation screen is displayed when you press the Start key For details refer to Confirmation Screen of Destinati...

Page 98: ...il you delete them You can use polling transmission with the same originals as many times as you wish Refer to page 4 40 NOTE You can store up to 10 originals for polling transmission You can also add...

Page 99: ...Select the size of originals to be scanned Be sure to select the original s size when using custom size originals Original Image Select image quality Scan Resolution Chooses the level of detail used f...

Page 100: ...originals are scanned and stored in the Polling box Job Finish Notice Sends a notice by an e mail when a transmission is complete Density Adjusts the density used for scanning originals Duplex Select...

Page 101: ...Board Reception If the recipient s machine has a sub address bulletin board function you can use sub addresses to communicate with that machine even if it is a third party machine IMPORTANT The recip...

Page 102: ...s using a combination of numeric keys input and Address Book or One touch keys selection When On is selected in Entry Check for New Destination a confirmation screen is displayed for the entered FAX n...

Page 103: ...selection from the Address Book containing registered sub addresses When On is selected in Entry Check for New Destination a confirmation screen is displayed for the entered FAX number Re enter the sa...

Page 104: ...l 3 Press the OK key 7 Press the OK key 8 Press the or key to select Print 9 Press the OK key 10 Press the Start key Printing starts Deleting Originals in a Polling Box Use this procedure to delete an...

Page 105: ...age 4 45 2 Press Menu the Left Select key 3 Press the or key to select Detail Edit 4 Use the or key to check the details of the selected original 5 When you have finished checking the details press th...

Page 106: ...g NOTE For details refer to the machine s Operation Guide Item Description Registration of User Register user access privileges Login User Name and Login Password Enable Disable User accounting Enable...

Page 107: ...s Box Encrypted transmission Manual send when dialed from this machine to the receiving system Polling transmission Network FAX transmission Transmission from the document box IMPORTANT You can use Ma...

Page 108: ...enter the login user name NOTE For details on character entry refer to Specifications Fax function on Appendix 6 5 Press the OK key 6 Press the or key to select Login Password 7 Press the OK key 8 Use...

Page 109: ...job accounting have been enabled the screen for entering a Login User Name and Login Password is displayed 1 Use the numeric keys to enter Account ID and press the OK key NOTE You can check the number...

Page 110: ...end of the original is the top To use the two sided originals select the orientation of the originals Selection of Original Image Select Original Image Continuous Scan When you cannot place multi pag...

Page 111: ...FAX Operation Advanced 4 53 4 Job Finish Notice This function is used to inform when the transmission of e mail is completed...

Page 112: ...FAX Operation Advanced 4 54...

Page 113: ...heck fax transmission results and functional registration status Various Tools for Checking Transmission Results and Registration Status 5 2 Checking FAX Job History 5 3 Printing Administrative Report...

Page 114: ...ime 5 3 Send result report Receiptresult report Report printing Latest send or receipt result Automatic printout after every sending or receiving operation No Print Output or Error Only is also option...

Page 115: ...to check reception results Send Job Log to check transmission results or Store Job Log to check results of storage in Sub Address Boxes Polling Boxes and USB memory 3 Press the OK key 4 Press the or...

Page 116: ...nformation is available Page and Copy Number of pages in the printing page and copies Original Pages Number of pages in the original Color B W Color mode used during scanning Sender Info Transmission...

Page 117: ...nfirm whether the fax was sent successfully You can also print the transmitted image in the send result report 1 Press the System Menu Counter key 2 Press the or key to select Report 3 Press the OK ke...

Page 118: ...ge for attachment of the transmitted image FAX RX Result Reports Each time you receive a fax you can print a report to confirm whether the fax was received successfully NOTE Fax receipt can also be no...

Page 119: ...ult report when the job is canceled before being sent 1 Press the System Menu Counter key 2 Press the or key to select Report 3 Press the OK key 4 Press the or key to select Result Rpt Set 5 Press the...

Page 120: ...report is printed out automatically after every 50 faxes sent or received Printing Activity Reports The latest 50 sent or received fax data are printed as a report 1 Press the Status Job Cancel key 2...

Page 121: ...received 1 Press the System Menu Counter key 2 Press the or key to select Report 3 Press the OK key 4 Press the or key to select Admin Rpt Set 5 Press the OK key 6 Press the or key to select Outgoing...

Page 122: ...Local FAX Number Local FAX Name fax line setting etc You can print it out as necessary 1 Press the System Menu Counter key 2 Press the or key to select Report 3 Press the OK key 4 Press the or key to...

Page 123: ...provided for every fax If the setting is Error SubAddress E mail notification is only provided when an error occurs or the received original is forwarded to Sub Address Boxes 1 Press the System Menu...

Page 124: ...1 Press the or key to select Address Entry 2 Press the OK key 3 Use the numeric keys to enter the address you want to register as the report destination Up to 128 digits can be entered NOTE For detai...

Page 125: ...low to confirm the destinations 1 Press the or key to confirm every destination To confirm a destination select the destination and press the OK key and then select Detail and press the OK key To dele...

Page 126: ...Checking Transmission Results and Registration Status 5 14...

Page 127: ...ibiting FAX Printing at Specified Times Unusable Time 6 10 DRD Reception 6 11 Retry Times 6 13 ECM TX 6 13 TX Start Speed 6 13 Media Type for Print Output 6 14 Rings 6 16 Receiving Mode 6 17 Reception...

Page 128: ...s not respond Flow of reception NOTE At the end of the conversation you can also manually receive the originals Refer to Manual Reception on page 4 11 FAX FAX Telephone When the other party has sent o...

Page 129: ...the ringing tone rings Refer to Rings on page 6 16 2 When the call is from a telephone 1 The machine makes a ringing tone urging the user to respond Lift the handset of the telephone within 30 seconds...

Page 130: ...er to use FAX Answering Machine Auto Switch Reception it is necessary to connect an answering machine equipped telephone set commercially available product to the machine For details such as respondin...

Page 131: ...he machine enters a status the same as manual reception Refer to Manual Reception on page 4 11 2 The answering machine responds When the call is from a telephone but the user is absent The answering m...

Page 132: ...Setup and Registration 6 6 FAX Country Code To use this menu consult your dealer or service representative...

Page 133: ...n page 4 48 2 Press the or key to select Common Settings 3 Press the OK key 4 Move to the screen where you want to configure a setting Follow the procedure in the explanation of the setting To set Con...

Page 134: ...g an encrypted transmission page 6 25 Duplex Print Output page 6 27 ECM RX page 6 28 RX Start Speed page 6 29 Configuring settings from TX RX Restrict Transmission Restriction page 6 30 Registering ch...

Page 135: ...On Hook key such as in memory transmission Part that is operated 1 Refer to Basic Operation Procedure on page 6 7 2 Press the or key to select Sound 3 Press the OK key 4 Press the or key to select FA...

Page 136: ...ress the or key to select Timer Setting 3 Press the OK key If user management or account management is enabled the login screen will appear For the login procedure refer to Account Management on page...

Page 137: ...only possible if you subscribe to the Distinctive Ring Pattern service provided by your telephone company Contact your telephone company for further information on the Distinctive Ring Pattern service...

Page 138: ...determined ring pattern When the call is from a telephone Lift the handset and speak with the other party When the conversation is over fax reception can be initiated manually When the call is from a...

Page 139: ...check for errors as they communicate preventing distortion of the image due to noise on the line and other conditions NOTE When there is a large amount of noise on the line communication may take slig...

Page 140: ...u do not specify any paper type select All Media Type 5 Press the OK key Setting the cassette for the print output of received faxes By specifying the media type faxes can be received on the correspon...

Page 141: ...s 10 Press the or key to select Cassette 1 Type Cassette 2 Type or Cassette 3 Type 11 Press the OK key 12 Press the or key to select the desired paper type 13 Press the OK key The previous screen reap...

Page 142: ...and Auto FAX TEL NOTE The number of ringing times can be set to between 1 and 15 times for Rings Normal and Rings TAD and 0 and 15 times for Rings FAX TEL For Rings FAX TEL this change is possible wi...

Page 143: ...11 Select the mode appropriate for the way the machine is used NOTE DRD reception mode is available for some countries 1 Refer to Basic Operation Procedure on page 6 7 2 Press the or key to select RX...

Page 144: ...a different time zone NOTE When the received data is printed on multiple pages the reception date time is printed on the fist page only It is not printed on the pages that follow When the received fax...

Page 145: ...or A5 size original this function prints 2 pages of the original at a time on one Letter or A4 size sheet of paper 1 Refer to Basic Operation Procedure on page 6 7 2 Press the or key to select 2 in 1...

Page 146: ...ived the pages are printed in a batch after all pages are received If Off is set each page is printed as it is received 1 Refer to Basic Operation Procedure on page 6 7 2 Press the or key to select Ba...

Page 147: ...ame 16 digit encryption key When the encryption key differs between the sending system and the receiving system the encryption cannot be conducted Therefore the sending system and the receiving system...

Page 148: ...Operation Procedure on page 6 7 2 Press the or key to select Encryption Key 3 Press the OK key 4 Press the or key to select an unregistered encryption key and then press Menu the Right Select key 5 P...

Page 149: ...l 2 Press the OK key Proceed to step 5 Deleting the encryption key 1 Press the or key to select Delete 2 Press the OK key 3 Press Yes the Left Select key This deletes the encryption key 5 Repeat steps...

Page 150: ...system Refer to Registering an Encryption Key on page 6 22 When an encryption key has already been registered go to the next step 2 Press the FAX key 3 Place the originals 4 Use the numeric keys to en...

Page 151: ...n On is selected in Destination Check before Send a destination confirmation screen is displayed when you press the Start key For details refer to Confirmation Screen of Destinations on page 5 13 Oper...

Page 152: ...7 Press the or key to select the desired encryption key number 8 Press the OK key 9 The sending system conducts encrypted transmission When encryption communication is conducted normally the machine d...

Page 153: ...of data are the same width they can be printed out on both sides of paper having the same width as the data 1 Refer to Basic Operation Procedure on page 6 7 2 Press the or key to select Duplex Printin...

Page 154: ...check for errors as they communicate preventing distortion of the image due to noise on the line and other conditions NOTE When there is a large amount of noise on the line communication may take slig...

Page 155: ...received correctly In that case set a lower RX Start Speed Normally this should be used with the default setting 1 Refer to Basic Operation Procedure on page 6 7 2 Press the or key to select RX Start...

Page 156: ...on Establishing Requirements Send Restrictions Register Permitted FAX numbers or Permitted ID numbers Refer to Registering Permit FAX No on page 6 31 or Registering Permit ID No on page 6 36 Send rest...

Page 157: ...quisites Reception Rejection Requirements Reception Rejection Register Reject FAX numbers Refer to Registering Reject FAX No on page 6 34 Reception restriction settings are specified in Reject List in...

Page 158: ...by one before reentering the number To delete all entered digits and return to the default screen press the Reset key 8 Press the OK key 9 When registering other Permit FAX numbers repeat steps 4 to 8...

Page 159: ...o delete the digits one by one before reentering the number To delete all entered digits and return to the default screen press the Reset key 4 Press the OK key Proceed to step 5 Deleting Permit FAX N...

Page 160: ...be entered NOTE Press the Address Recall Pause key to insert a pause between two digits Press the or key to move the cursor To correct the number press the Clear key to delete the digits one by one be...

Page 161: ...ered NOTE Press the Address Recall Pause key to insert a pause between two digits Press the or key to move the cursor To correct the number press the Clear key to delete the digits one by one before r...

Page 162: ...ID numbers can be registered 1 Refer to Basic Operation Procedure on page 6 7 2 Press the or key to select Permit ID List 3 Press the OK key 4 Press Menu the Right Select key 5 Press the or key to sel...

Page 163: ...ing Permit ID No on page 6 36 2 Press the or key to select the Permit ID No to be changed or deleted 3 Press Menu the Right Select key 4 Changing Permit ID No 1 Press the or key to select Detail Edit...

Page 164: ...the Address Book To change the sending restriction follow the steps below 1 Refer to Basic Operation Procedure on page 6 7 2 Press the or key to select TX Restriction 3 Press the OK key 4 Press the or...

Page 165: ...ect reception restriction To not use the reception restriction select Off To restrict the other parties only to the ones registered in Permit FAX No and Permit ID No as well as the ones registered in...

Page 166: ...egistration 6 40 4 Press the or key to select the reception restriction number To permit reception select Permit To prohibit reception select Prohibit 5 Press the OK key UnknownNumber RX a b 2 Prohibi...

Page 167: ...restricted PBX Setting 1 Refer to Basic Operation Procedure on page 6 7 2 Press the or key to select FAX Call Set 3 Press the OK key 4 Press the or key to select Exchange Select 5 Press the OK key 6 P...

Page 168: ...service representative and register a Predetermined ID on the machine For more information contact your Service Representative or Authorized Service Center 1 Refer to Basic Operation Procedure on page...

Page 169: ...to use Network FAX Please also read the Network FAX Driver Operation Guide Online Manual contained in the included DVD which describes how to operate your PC to send a fax using Network FAX and make v...

Page 170: ...mission is available Operation is as simple as printing Flow of Network FAX Sending Network FAX sending is performed in the following sequence Flow of Network FAX Receiving Network FAX receiving is pe...

Page 171: ...About Network FAX 7 3 7 NOTE The memory forwarding function allows not only reception by the networked PC but also forwarding of the received fax by e mail or forwarding to another fax machine...

Page 172: ...ls refer to the Network FAX Driver Operation Guide contained in the included DVD Network FAX Driver Operation Guide The Network FAX Driver Operation Guide Online Manual is contained in the included DV...

Page 173: ...his chapter explains how to deal with problems Indicators During Sending Receiving Operation 8 2 Responding to an ATTENTION Indicator Flashes 8 2 Precautions When Turning Power OFF 8 3 Error Messages...

Page 174: ...message is not indicated on the Message Display when Status Job Cancel is pressed or the ATTENTION indicator flashes check the following Symptom Checkpoints Corrective Actions Reference Page Cannot s...

Page 175: ...h is turned off Before turning off the main power switch press the Energy Saver key on the operation panel Make sure that the Memory indicator is off before turning off the main power switch CAUTION T...

Page 176: ...and plug it in again If the message still appears note the error code Turn the main power switch off and unplug the power cord Call your service representative Polling box limit exceeded Job is cance...

Page 177: ...icated cassette or MP tray out of paper Add paper of the same size as indicated When the type of printing paper is specified the necessary paper types are also displayed To use another paper source se...

Page 178: ...istrations correct both at sender and recipient Double check the registrations both at sender and recipient 6 21 Cannot use the remote switching function Is a pulse line used Some phones may transmit...

Page 179: ...m memory forwarding Is memory forwarding set to On Check the memory forwarding setting 4 15 Cannot output from a Sub Address Box Is the box password been set Enter the correct box password 4 29 Cannot...

Page 180: ...Troubleshooting 8 8...

Page 181: ...ry Method Appendix 2 Menu List Appendix 7 Specifications Fax function Appendix 6 Received FAX Sizes and Paper Priority Inch Model Appendix 10 Received FAX Sizes and Paper Priority Metric Model Appendi...

Page 182: ...e character to the left of it is deleted 3 Back Key Press this key to return to the screen from which you invoked the character entry screen 4 Cursor Keys Use these to select the entry position or sel...

Page 183: ...creen press Text the Right Select key to select the type of characters you want to enter Each time you press Text the Right Select key the character type switches as follows ABC 123 Symbol ABC NOTE By...

Page 184: ...c Symbol d e f D E F 3 Numeric 3 Alphabetic Symbol g h i G H I 4 Numeric 4 Alphabetic Symbol j k l J K L 5 Numeric 5 Alphabetic Symbol m n o M N O 6 Numeric 6 Alphabetic Symbol p q r s P Q R S 7 Numer...

Page 185: ...the Symbols screen Use cursor keys to select the symbol you want to enter and then press the OK key Entry When Select Character Is Selected in Login Operation Settings In the login screen that appear...

Page 186: ...1 64 356 mm Automatic Document Feed Max 50 sheets Scanner Resolution Horizontal Vertical 200 100 dpi Normal 8 dot mm 3 85 line mm 200 200 dpi Fine 8 dot mm 7 7 line mm 200 400 dpi Super Fine 8 dot mm...

Page 187: ...age 3 6 Orig Orientation page 4 41 page 4 52 Continuous Scan page 4 41 page 4 52 File Name Entry page 4 23 JobFinish Notice page 4 53 FAX Delayed TX page 4 2 FAX Direct TX page 3 2 page 4 7 FAX RX Pol...

Page 188: ...Date Time page 2 6 Time Zone page 2 6 Summer Time page 2 6 Timer Setting Unusable Time page 6 10 FAX TX RX Common Encryption Key page 6 22 Transmission TTI page 2 3 Local FAX Name page 2 3 Local FAX I...

Page 189: ...RX Restrict TX Restriction page 6 38 RX Restriction page 6 39 Permit No List page 6 31 Permit ID List page 6 36 Reject No List page 6 34 UnknownNumber RX page 6 39 Document Box Sub Address Box page 4...

Page 190: ...r LG Legal When a paper type is selected in Media Type a received fax is printed using the matching paper source Refer to page 6 14 Even if All Media Types is selected paper types such as transparency...

Page 191: ...lio When a paper type is selected in Media Type a received fax is printed using the matching paper source Refer to page 6 14 Even if All Media Types is selected paper types such as transparency cannot...

Page 192: ...e sender machine although the line connection was established U00601 U00690 Communication was stopped due to the machine failure Send or receive again U00700 Communication was stopped due to failure o...

Page 193: ...ther party s fax machine Check with the other party U03200 Sub address bulletin board reception was attempted and the other party s machine is an our brand model but the specified sub address box cont...

Page 194: ...100 Recipient machine is not equipped with a sub address box function or the sub address does not match U04200 Encrypted transmission was canceled because the specified box is not registered U04300 En...

Page 195: ...ause there is no more free space in the memory of the recipient machine Check with the recipient U19000 Memory reception was stopped because there is no more free space in the memory of this machine C...

Page 196: ...Appendix 16...

Page 197: ...rmation Screen of Destinations 5 13 Confirming and Deleting Registration Contents of Encryption Key 6 22 Continuous Scan 4 52 D Date 2 6 Delayed Transmission 4 2 Cancel 3 13 Immediate Transmission 3 1...

Page 198: ...1 1 PBX 6 41 Permit Fax No Change Deletion 6 32 Registration 6 31 Permit ID No Change Deletion 6 37 Registration 6 36 Placing Originals 3 4 Polling Communication 4 40 Checking 4 47 Deleting Originals...

Page 199: ...leting Originals after Printing from a Sub Address Box 4 35 Deleting Originals from a Sub Address Box 4 36 How to Change 4 33 How to Delete 4 33 How to Register 4 32 Printing Originals from Sub Addres...

Page 200: ...Index 4...

Page 201: ......

Page 202: ...2PWGEEN500 First edition 2013 11...

Reviews: