11
ARGO U
SER
M
ANUAL
When a screen time-out occurs, a screen is presented that asks the user if more time is needed. If the user chooses
NO, the Customer Welcome screen will be presented. If YES is chosen, the user is returned to the function that
was active prior to the time-out. If the user does not make a selection within an additional 30-second countdown
period, the terminal will automatically go to the Customer Welcome screen.
The terminal operates as a menu driven system. Messages and menu options presented on the LCD display
screen guide the user’s actions. The desired menu option is selected by pressing one of the keys located to the
left and right of the display. For the purpose of security, many screens time-out after a preset time interval,
usually 30 seconds. The time-out length may vary depending on the function being performed.
From the top menu, you can either:
1. Enter the terminal system management area by pressing the key next to
M
ANAGEMENT
F
UNCTIONS
.
Note: You will have to enter an appropriate password to view the Management Functions menu.
Management Functions may also be entered by pressing and holding the CTRL key and then depressing
the number 1 key and releasing both.
2. Activate the terminal to perform customer transactions by pressing the key next to
C
USTOMER
T
RANSACTIONS
.
Note: On fully touch screen models, just press the displayed buttons to select your preferred option.
Ensure all procedures in the
ARGO Installation Manual
have been accomplished. The unit should be off, with
the power cord and communications cable connected. Power on the unit by pressing the power switch on
the power supply to the ON position. Shortly after the unit is turned on, the top menu will be displayed. An
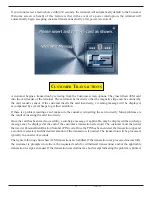
example top menu is shown below.
M
ENU
-B
ASED
O
PERATION
Summary of Contents for ARGO RL1713
Page 5: ...SECTION 1 INTRODUCTION ...
Page 11: ...SECTION 2 BASIC OPERATION ...
Page 20: ...16 ARGO USER MANUAL 7 ARGO with printer and topper ...
Page 21: ...SCDU HCDU MiniMech SDD NMD50 SECTION 3 CASSETTE CLOSE CASH REPLENISHMENT ...
Page 33: ...ARGO USER MANUAL 29 12 1 ARGO Deep cabinet ...
Page 34: ...12 1 ARGO with topper SECTION 4 GENERAL MAINTENANCE ...
Page 40: ...12 1 ARGO with printer No topper SECTION 5 SETUP BASICS ...
Page 54: ... 33 1 62 7 5 16 5 0 17 203 1 0 66 21 67 7 0 176 ...
Page 58: ... 33 1 55 17 6 59 67 7 0 17 ...
Page 65: ... 33 1 7 6 3 17 17 21 7 1 ...
Page 66: ... 33 1 7521 2 6 1 77 5 675 7 2 7 6 1 2 7 ...
Page 72: ... 33 1 0 1 2 6 ...
Page 74: ...SUPPLEMENT A T5 AND T7 PCI EPP BATTERY REPLACEMENT PROCEDURES SA 1 ...
Page 77: ...SA 4 THIS PAGE INTENTIONALLY LEFT BLANK ...
Page 78: ...SUPPLEMENT B KEY MANAGEMENT PROCEDURES T5 PCI EPP T7 PCI EPP ...


