background image

30

33. Specifications

Technical Specifications 

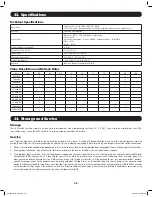
Resolution

Target Server – Up to 1600 x 1200 @ 85Hz

Client Computer – Recommended - resolution should be higher than on Target Server

Security

128-bit SSL encryption

Connections

Ethernet – RJ45 – 10/100 Mbit/sec autosensing

Serial – RJ45
Local KVM connection – Screen HDD15, Keyboard./Mouse – MiniDIN6

Flash – RJ11
Server – RJ45

Weight (with unit packaging)

6.9 lbs.

Dimensions (H x D x W) 

1.7 x 17 x 9 in.

Power input

100 – 240 VAC 50 / 60 Hz

Operating temperature

0°C to 40°C / 32° to 104°F

Storage temperature

-25°C to 60°C / -13°F to 140°F

Humidity

80% non condensing relative humidity

Hz 

56 

60

65

66

70 

72

73

75

76

85

86

640x480

x

x

x

x

x

x

720x400

x

x

800x600

x

x

x

x

x

x

1024x768

x

x

x

x

x

x

x

1152x864

x

1152x900

x

x

1280x720

x

1280x768

x

x

1280x960

x

x

1280x1024

x

x

x

x

x

1600x1200

x

x

x

x

x

34. Storage and Service

Storage

The KVM switch must be stored in a clean, secure environment with a temperature less than 40° C (104° F) and a relative humidity less than 90% 

(non-condensing). Store the KVM switch in its original shipping container if possible.

Service

Your Tripp Lite product is covered by the warranty described in this manual. A variety of Extended Warranty and On-Site Service Programs are also 
available from Tripp Lite. For more information on service, visit www.tripplite.com/support. Before returning your product for service, follow these steps:
1.   Review the installation and operation procedures in this manual to insure that the service problem does not originate from a misreading of the instructions.
2.  If the problem continues, do not contact or return the product to the dealer. Instead, visit www.tripplite.com/support.
3.  If the problem requires service, visit www.tripplite.com/support and click the Product Returns link. From here you can request a Returned Material 

Authorization (RMA) number, which is required for service. This simple on-line form will ask for your unit’s model and serial numbers, along with 
other general purchaser information. The RMA number, along with shipping instructions will be emailed to you. Any damages (direct, indirect, 
special or consequential) to the product incurred during shipment to Tripp Lite or an authorized Tripp Lite service center is not covered under 
warranty. Products shipped to Tripp Lite or an authorized Tripp Lite service center must have transportation charges prepaid. Mark the RMA number 
on the outside of the package. If the product is within its warranty period, enclose a copy of your sales receipt. Return the product for service using 

an insured carrier to the address given to you when you request the RMA.

Video Resolution and Refresh Rates

201204111 93-2769.indd   30

8/2/2012   10:16:06 AM

Summary of Contents for NetCommander B072-008-1

Page 1: ...ultiple KVM Switches 6 9 Initial Settings Default IP Address 6 10 Web Configuration Interface 7 11 Logging into the Web Configuration Interface 7 12 Device 9 13 Administration User Settings 9 14 Switch Configuration 10 15 User Targets 10 16 Security 11 17 SNMP 12 18 Device Upgrade 13 19 Safe Mode Page 14 20 Factory Restore 15 21 Security SSL Certificate 15 22 Save 15 23 Reload 15 24 Device Reboot ...

Page 2: ... Failure to comply may invalidate the warranty and cause property damage and or personal injury Installation Warnings Install the KVM switch in a controlled indoor environment away from moisture temperature extremes flammable liquids and gasses conductive contaminants dust and direct sunlight Operate the KVM switch at indoor temperatures between 32 F and 104 F 0 C and 40 C When connecting the KVM ...

Page 3: ...s with a HD15 VGA port All major operating systems Computers Remotely Accessing KVM Supports Windows and 32 bit Linux operating systems Windows operating systems can use any 32 bit browser 64 bit browsers are not supported 32 bit Linux operating systems can use Firefox 32 bit Firefox 64 bit is not supported Note 1 Mac computers can be connected to the KVM but they can only be accessed via the loca...

Page 4: ... Suppressor Power Distribution Unit PDU or Uninterruptible Power Supply UPS 2 On Off Switch Turn the power to the KVM switch on off using this switch 3 Console Ports Connect a VGA monitor and PS 2 keyboard and mouse to the KVM here 4 Flash Port Connect the included RJ11 to DB9 cable to the KVM here when performing an upgrade to the KVM s mainboard and local OSD firmware The firmware for the KVM s ...

Page 5: ...ing connected to the SIU 2 Connect the SIU s VGA connector to the computer s VGA port 3 Connect the SIU s PS 2 keyboard connector to the computer s PS 2 keyboard port 4 Connect the SIU s PS 2 mouse connector to the computer s PS 2 mouse port 5 Connect one end of a Cat5e patch cable to the SIU s RJ45 port and the other end to the KVM switch s RJ45 port Note the Cat5e cable should be no longer than ...

Page 6: ...irst and second level KVMs and between the second level KVMs and connected computers must not add up to more than 100 ft 3 Connect the VGA and PS 2 connectors on the B078 101 PS2 to the console ports of a B072 008 1 or B072 016 1 KVM switch 4 Open the B072 016 1 IP local OSD and navigate to the PORTS SETTINGS page of the F2 SETTINGS menu Highlight the port that you just connected the second level ...

Page 7: ...pts from appearing every time you log on 4 When the installation is complete the username and password screen appears 5 Enter in your username and password as given to you by your system administrator and select from the drop down menu beneath the username and password fields whether you want to access the Web Configuration Interface or to Remotely Access the connected computers Click the Enter ke...

Page 8: ...ximize When selected the Configuration interface is maximized This function can also be performed by clicking the Maximize button directly underneath the Window Menu 11 Logging into the Web Configuration Interface Continued Help Menu The Help Menu includes only one item About About When selected the About screen appears which provides you with information pertaining to the KVM s IP firmware 201204...

Page 9: ...016 1 IP is not connected to a network with a DHCP server it will boot up with the default IP address 192 168 0 155 Uncheck this box to set a static IP address for the KVM This checkbox is checked by default MAC Address The MAC address of the KVM is displayed here The MAC address can also be found on the sticker on the underside of the KVM IP Address Subnet Mask and Default Gateway Enter in the de...

Page 10: ...hts which gives them the ability to undo any changes to their port access settings made by another administrator To assign port access rights to an account follow the steps below Note If an account is given access to a port that has a second level KVM cascaded from it they will have access to each port on that KVM Security settings for ports on a second level KVM must be set within its own OSD 1 S...

Page 11: ...High Security Policy 6 characters or more Cannot include the user name 8 characters or more must include at least 1 digit and 1 upper case letter and 1 special character as follows _ Cannot include the username Note The following special characters cannot be used in either the user name or password Check the box to enable the high security password policy Unchecked the standard security policy app...

Page 12: ...s by an administrator Remote access to the KVM is disabled until the administrator unblocks it Block User Account 1260 Reported when a user is blocked from accessing the KVM due to too many failed login attempts Successful User Login 2010 Reported when a user successfully logs into the Web Configuration Interface Login is not successful wrong user access level 2020 Reported when a user is denied a...

Page 13: ... B072 016 1 IP and save them on a computer not connected to the KVM switch 2 Login to the Web Configuration Interface and click on the Device button The current IP firmware version is displayed in the center of the page 3 Click the Browse button and navigate to and select the file you just downloaded 4 Once the new firmware upgrade file is selected click the Start Upgrade button Upon completion cl...

Page 14: ...ame and password and are unable to log into the KVM Safe Mode allows you to restore the KVM to its factory default settings To restore the factory settings follow the instructions below 1 From the Safe Mode home screen click on the Restore Factory Settings link A prompt appears asking if you want to proceed 2 Click the Restore button to proceed A second prompt will appear warning you that network ...

Page 15: ...will clear the network settings information Warning Once reset the data cannot be retrieved To restore factory settings 1 Click the Factory Restore button 2 Check the box if you want to preserve Network settings 3 Click Restore Device settings are now restored to their defaults 21 Security SSL Certificate Click on the SSL Certificate button at the top of the screen to pull up the screen that allow...

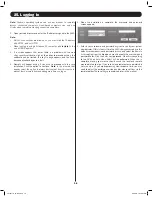
Page 16: ...he prompts that appear select the option to always trust content from this source to prevent these prompts from appearing every time you log on 4 When the installation is complete the username and password screen appears 5 Enter in your username and password as given to you by your system administrator if this is the first time the KVM is being accessed use the default username admin and password ...

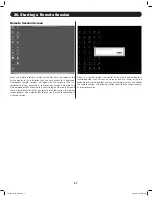
Page 17: ... allows up to 5 users to login at the same time and share a remote session When you login to a shared session the remote screen appears with a prompt that informs you that you re connected to a shared session When in a shared session the control of the mouse and keyboard is transferred from user to user As soon as one user stops using the keyboard and mouse another user can immediately jump in and...

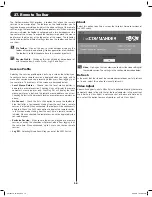
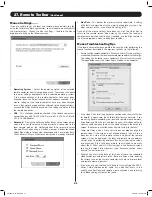
Page 18: ... display the local mouse pointer as a dot and the remote mouse pointer as an arrow Checking Default will display both local and remote mouse pointers as arrows On Connect Check the Auto Hide option to cause the toolbar to hide itself after a few seconds starting from the next time a remote session is initiated When unchecked the toolbar will be continuously displayed Check the Full Screen option t...

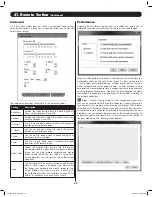
Page 19: ...yboard and mouse response time will be Note If the video noise level is above zero the Calibration function See Calibrate on page 20 for details in the Mouse drop down may not work 27 Remote Toolbar Continued Performance Selecting the Performance option pulls up a screen that allows you to determine the amount of color that is displayed in the remote video When the Fixed performance mode is checke...

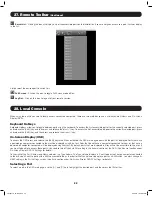
Page 20: ...n allows you to Calibrate and Align the local and remote mouse pointers automatically as well as to manually adjust the mouse settings The following sections explain these features and also provide general tips for synchronizing the local and remote mice Calibrate For remote computers running Windows NT4 98 or 2000 selecting the Calibrate feature will automatically detect the remote mouse speed se...

Page 21: ...use drop down menu to bring them together Mouse Troubleshooting Tips If the local and remote mouse pointers do not align after performing the mouse functions described in the previous sections try the following Ensure that the remote computer s Enhanced Pointer Precision setting is unchecked If checked the local and remote mouse pointers will not align This setting can be found in your computer s ...

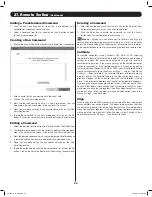
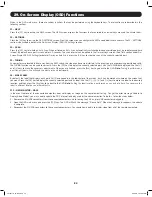
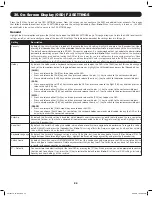
Page 22: ...elease the Shift key twice When activated the OSD main page opens with the port list displayed Ports that have a powered on computer connected to them will be displayed using Blue text Ports that do not have a computer connected to them or that have a powered off computer connected will be displayed using Gray text By default ports that are displayed in Gray will not be accessible to the user If y...

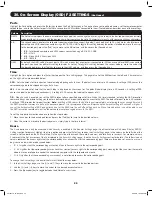
Page 23: ...rt with the TUNING bar displayed Use the and keys to make the necessary adjustments When you are finished press the Esc key to go back to the OSD Note Tuning is performed on a port by port basis You will need to adjust each port individually F6 MOVE LABEL By default the label that displays each ports Port Name appears in the top center of the screen but it can be moved anywhere on the screen that ...

Page 24: ... or press and release the Right Ctrl key and then press and release the Left Ctrl key Press and release either Ctrl key and then press and release the plus key to switch to the next accessible port Press and release either Ctrl key and then press and release the minus key to switch to the previous accessible port CLF11 Press and release either Ctrl key and then press and release the F11 key to ope...

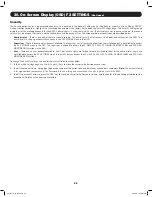
Page 25: ...cation command brings up a prompt asking you to enter a password which is required to regain access to the KVM The default timeout value is 30 seconds A setting of 999 disables the timeout function Note A setting of 000 causes the KVM to logout immediately not allowing the user enough time to hit the OSD invocation command to pull up the password prompt It is recommended that you always keep the t...

Page 26: ...stallation but is not allowed to access the F2 SETTINGS menu in the OSD The supervisor is allowed to access the F1 HELP F4 SCAN F5 TUNING F6 MOVE LABEL and F10 NEW MONITOR DDC functions in the OSD User There are six user accounts available Users port access rights are limited to those assigned to them by the administrator Users are not allowed to access the F2 SETTINGS menu in the OSD but can acce...

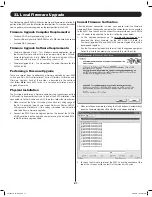
Page 27: ...nstallation Not connected via Cat5e 6 cable and a SIU To do this follow the steps below 1 Make sure that the Serial Port setting in the General Settings page of the OSD is enabled See General under On Screen Display OSD F2 Settings section for details If this setting is disabled you will not be able to perform a firmware upgrade 2 Connect the RJ11 Firmware Upgrade port on the back of the KVM to a ...

Page 28: ...he top of the screen and select the Com Port option Select the com port of the upgrade computer that the Firmware Upgrade Cable is connected to and click OK 2 Open the File drop down menu at the top of the screen and select the Open option Navigate to and select the firmware upgrade file you downloaded from the Tripp Lite website 3 Check the checkbox at the top of the screen next to the text NetCo...

Page 29: ...ly resume the firmware update by opening the folder that contains the firmware update file and continue from there 2 If the electricity fails while the Server Interface Unit firmware is updating a Not Responding or Upgrade Error message will appear Restart the upgrade from the beginning Monitor Screen Failure In the event that one of the connected computers does not display an image on the console...

Page 30: ... Tripp Lite For more information on service visit www tripplite com support Before returning your product for service follow these steps 1 Review the installation and operation procedures in this manual to insure that the service problem does not originate from a misreading of the instructions 2 If the problem continues do not contact or return the product to the dealer Instead visit www tripplite...

Page 31: ...T OF THE USE OF THIS PRODUCT EVEN IF ADVISED OF THE POSSIBILITY OF SUCH DAMAGE Specifically TRIPP LITE is not liable for any costs such as lost profits or revenue loss of equipment loss of use of equipment loss of software loss of data costs of substitutes claims by third parties or otherwise WARNING The individual user should take care to determine prior to use whether this device is suitable ade...

Page 32: ...32 1111 W 35th Street Chicago IL 60609 USA www tripplite com support 201204111 93 2769 Rev D 201204111 93 2769 indd 32 8 2 2012 10 16 07 AM ...

Reviews: