Tripp Lite Cat5 Smart KVM Extender Quick Start Manual Download Page 5

QUICK START GUIDE

4

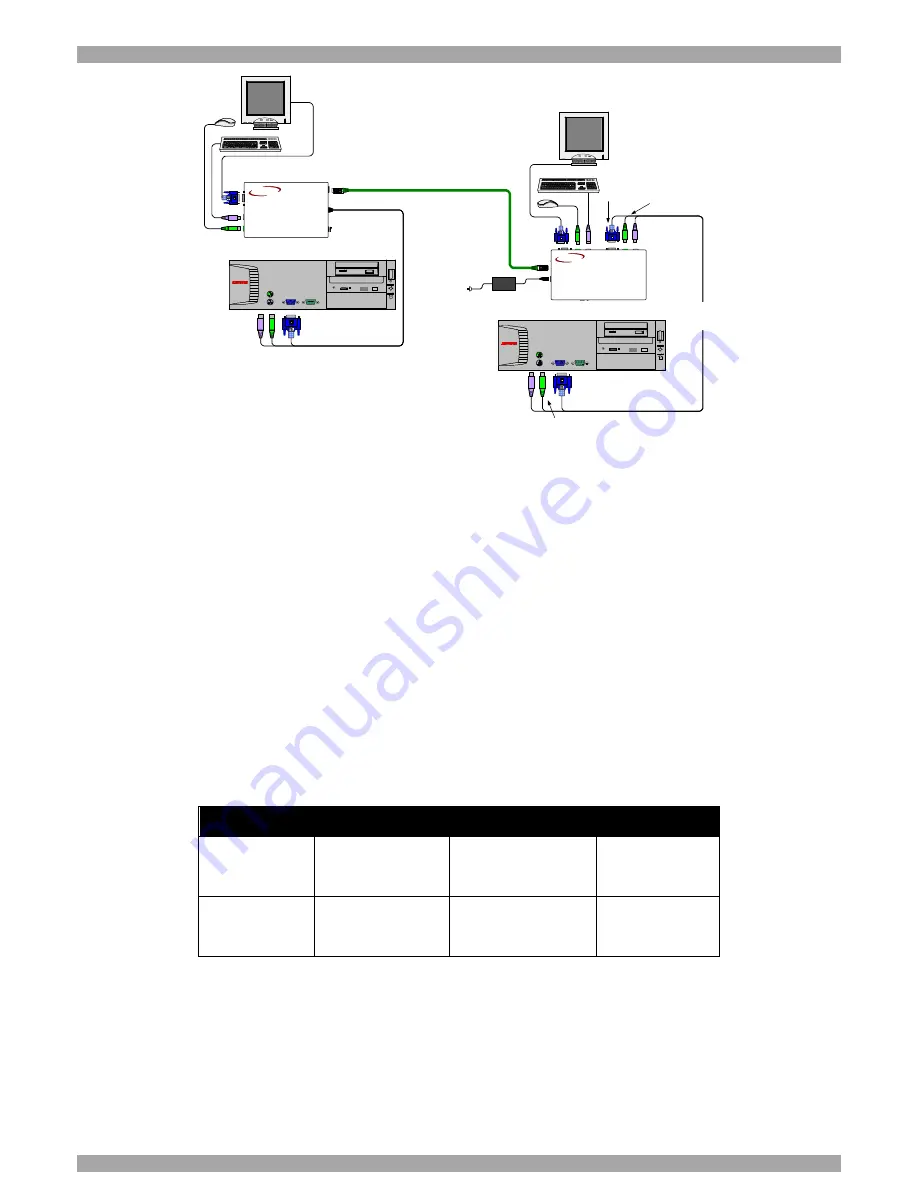
Figure 8 2-port KVM Switch

The option in Figure 8 can also work with only 1 user workstation connected at the Receiver.

There is another configuration diagram on the last page of this Guide, and more on the
Marketing & Documentation CD.

10.

Operating the KVM Extender

Once the system is connected there are 2 ways to switch between the 2 computers / KVM
workstations.

At the Receiver, press the Select button

Or

At the keyboard, press

Shift

followed by + or

-

.

Control LEDs

Control LED

On

Blinking

Off

Receiver

Receiver controls
the Transmitter
computer

Transmitter controls
its own computer

Working at
Receiver
computer

Transmitter

Receiver controls
the Transmitter
computer

N/A

Working at
Transmitter
computer

Adjusting the picture

When the Transmitter computer is controlled from the Receiver, you can adjust the picture
quality using a small flat screwdriver to turn the Picture adjuster located on the Receiver’s rear
panel. See Figure 4.

CAT5

S M A RT

Extender

RECEIVER

MINICOM

www .minico m.com

CAT5

SM A R T

Extender

TRANSMITTER

MINICOM

www .minicom.com

6

V

D

C

SD

DESKPRO

SD

P110

Computer

Transmitter

Receiver

CAT5 FTP cable
Up to 110m / 360ft

SD

P 110

User 1

User 2

3 in 1
CPU
cable

SD

D ESKPR O

To Video card

To
Keyboard
port

To Mouse port

To Computer
Monitor port

To Computer
Keyboard port

To Computer
Mouse port

Computer

Summary of Contents for Cat5 Smart KVM Extender

Page 1: ...following functions Extends KVM control over a computer up to a distance of 110m 360ft Gives 2 users at 2 workstations control of 1 computer A 2 port KVM switch for 1 or 2 users Throughout this guide...

Page 2: ...eiver rear panel Figure 4 Receiver side panel SYSTEM CPU Built in KVM cables System cable 6VDC Green Control LED Mouse Monitor Keyboard Side A Side B Yellow Power LED Power connector SELECT POWER CONT...

Page 3: ...upply Connect the Receiver to the power supply with the Power adapter and cord provided The Transmitter receives its power from the connected computer and does not generally need an external power sup...

Page 4: ...ter The connections are the same as in Figure 7 with the addition of the 3 in 1 CPU cable that connects a 2nd computer to the Receiver CAT5 S M A R T Extender RECEIVER MINICOM www minicom com CAT5 S M...

Page 5: ...nsmitter controls its own computer Working at Receiver computer Transmitter Receiver controls the Transmitter computer N A Working at Transmitter computer Adjusting the picture When the Transmitter co...

Page 6: ...n disable the lock control function as explained on page 6 11 KVM Extender Settings mode Enter the Settings mode to Change the hotkey Change the Timeout period Enable disable lock control Make advance...

Page 7: ...e the KVM Extender automatically operates with the computer and mouse types connected to it Replacing a computer When a computer is replaced with a different computer type while the KVM Extender is in...

Page 8: ...a different mouse type as opposed to a different mouse of the same type while the KVM Extender is in use From the Receiver location 1 Press and hold the Select button for more than 5 seconds 2 Releas...

Reviews: