Page 5
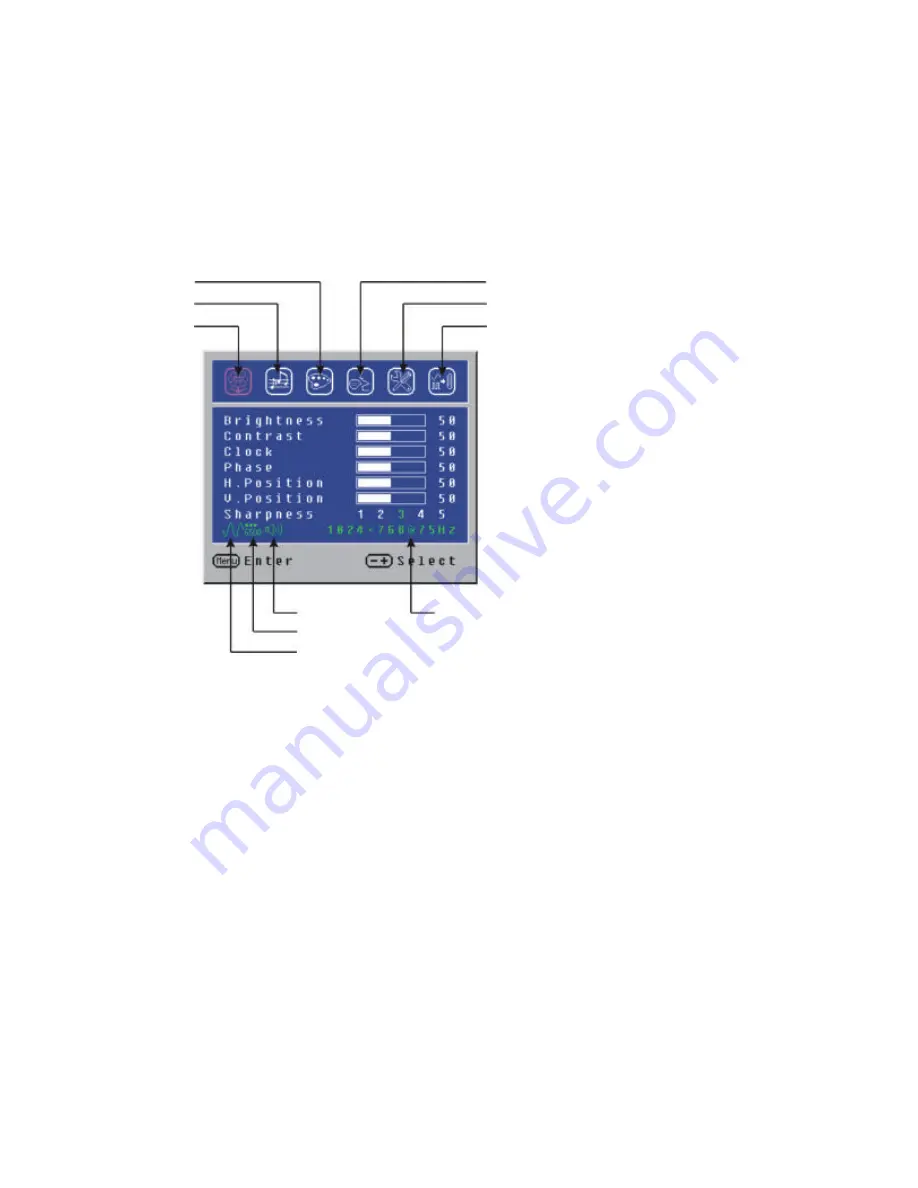
HOW TO USE THE OSD (ON SCREEN DISPLAY)
The OSD function allows the user to easily adjust the display to the desired requirements. The OSD menu includes a
main menu and sub-menus.
OPERATING PROCEDURE
Use the buttons on the right side control panel to adjust the OSD (see Operating the Monitor).
TO MAKE OSD ADJUSTMENTS:
1. Power on the LCD Monitor.
2. Press “MENU” button to pop up the OSD menu.
3. Press “+” or “-” button to select menu item.
4. Press “MENU” button to select sub-menu.
5. Press “+” or “-” button to select sub-menu item.
6. Press “EXIT” button when finished adjusting and accept the user setting.
7. Press “Auto” button to process auto tune function.
ADDITIONAL INFORMATION ABOUT THE ON SCREEN-DISPLAY
•
The OSD disappears (times-out) several seconds after you stop pressing the buttons while performing an
adjustment. This function can be adjusted up to 60 seconds allowing the user more time. This adjustment is
Input Source Selection
(optional)
Source Resolution & Frequency
Status
Language
Settings
Image Adjustment
Volume Adjustment
Color Temp. Selection
Color Temp. Status
Input Source Status
Current Audio Status


