Transforming Technologies Ohm Metrics SRM330 Instruction Manual Download Page 5


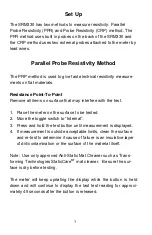
Set Up 


The SRM330 has two methods to measure resistivity: Parallel 
Probe Resistivity (PPR) and Probe Resistivity (CRP) method. The 
PPR method uses built in probes on the back of the SRM330 and 
the CRP method uses two external probes attached to the meter by 
lead wires. 


Parallel Probe Resistivity Method 


The PRP method is used to give fast electrical resistivity measure-
ments on flat materials.  
 

Resistance Point-To-Point 

Remove all items on surface that may interfere with the test. 
 
1.  Place the meter on the surface to be tested. 
2. 

Move the toggle switch to “Internal”.


3.  Press and hold the test button until measurement is displayed. 
4.  If measurement is outside acceptable limits, clean the surface 

and re-test to determine if cause of failure is an insulative layer 
of dirt/contamination or the surface of the material itself.  

 
Note:  Use only approved Anti-Static Mat Cleaner such as Trans-
forming Technologies StaticCare

MT

 mat cleaner.  Be sure the sur-

face is dry before testing. 
 
The  meter  will  keep  updating  the  display  while  the  button  is  held 
down  and  will  continue  to  display  the  last  test  reading  for  approxi-
mately 45 seconds after the button is released. 


Summary of Contents for Ohm Metrics SRM330

Page 1: ...Instruction Manual Continuous Workstation Monitors Model SRM330 Ohm Metrics...

Page 2: ...Ohm MetricsTM 2 2 Operation Power Option 2 Set Up 2 Parallel Probe Resistivity Testing 3 Probe Resistivity Testing 4 Resistance Between Two Points RTT 4 Surface to Ground Resistance RTG 5 3 Specificat...

Page 3: ...s of pres sure necessary for some measurements Suitable for factory audits and test lab evaluations Features include 10v and 100v range voltage selection Two Press Test lightweight travel probes Built...

Page 4: ...splayed in Ohms and is read as 10 X 1 2 decade where X is the range illuminated on the checker D Test Button Pres and hold un til the readout displays a meas urement E Battery compartment Remove cover...

Page 5: ...est 1 Place the meter on the surface to be tested 2 Move the toggle switch to Internal 3 Press and hold the test button until measurement is displayed 4 If measurement is outside acceptable limits cle...

Page 6: ...ntended test surface and press down on the spring loaded probes Have a 2nd person press the test button and hold both the probes and the button until a the measurements are displayed The SRM330 can be...

Page 7: ...a ground point on the material surface and specific positions on the material being tested This procedure complies with the EOS ESD S4 1 standard 1 Meter set up with both test leads connected to the...

Page 8: ...Model SRM330 All new products are guaranteed to be free from defects in material and workmanship for a period of one 1 year from the date of shipment Liability is limited to servicing after evaluatin...

Reviews: