background image

Table of Contents 

Introduction

......................................................................................1


Features

............................................................................................2


System Requirements

.....................................................................2


  General Use................................................................................................................... 2


  Writing Data................................................................................................................... 3


  Power ............................................................................................................................. 3


  Reminders ..................................................................................................................... 4


Product Overview

.............................................................................5


Basic Operation

................................................................................6


  Plugging in the CD/DVD Writer.................................................................................... 6


  Inserting a Disc ............................................................................................................. 6


  Ejecting a Disc .............................................................................................................. 9


Disconnecting from a Computer

..................................................11


Software Download

........................................................................11


Troubleshooting

.............................................................................13


System Requirements

...................................................................14


Ordering Information

.....................................................................14


Recycling & Environmental Considerations

...............................15


Two-year Limited Warranty

...........................................................16


Summary of Contents for TS8XDVDS

Page 1: ...User s Manual Slim Portable CD DVD Writer TS8XDVDS Version 1 1...

Page 2: ...inders 4 Product Overview 5 Basic Operation 6 Plugging in the CD DVD Writer 6 Inserting a Disc 6 Ejecting a Disc 9 Disconnecting from a Computer 11 Software Download 11 Troubleshooting 13 System Requi...

Page 3: ...ftware or backing up your files folders documents photos music and videos when using a compact notebook computer or netbook In addition the CD DVD Writer comes with a full version of CyberLink s extre...

Page 4: ...refully Please ensure that you connect the USB cable to the CD DVD Writer and your computer correctly small end CD DVD Writer large end PC General Use During operation avoid exposing your CD DVD write...

Page 5: ...computer please check that the computer has the relevant USB drivers If you are unsure about how to check this please consult the computer or motherboard User s Manual for USB driver information Power...

Page 6: ...d all ends of the USB cable and still have power related problems while reading writing data we recommend that you purchase a Transcend USB Power Adapter TS PA2A to provide the power necessary to oper...

Page 7: ...5 Product Overview A Disc Tray B Read Write Activity Indicator C Eject Button D Emergency Eject E Anti slip Rubber Feet F USB Connector...

Page 8: ...he CD DVD Writer is successfully connected to a computer a new drive with a newly assigned drive letter will appear in the My Computer window and a Removable Hardware icon will appear on the Windows S...

Page 9: ...7 2 Gently pull the disc tray out until it stops 3 Place a CD or DVD onto the tray...

Page 10: ...8 4 Using two or more fingers press down on the center of the disc until it snaps into place 5 Push the disc tray back into the CD DVD Writer When completely closed the LED indicator will flash...

Page 11: ...9 Ejecting a Disc 1 Press the Eject Button on the front of the CD DVD Writer to release the disc tray 2 Gently pull the disc tray out until it stops...

Page 12: ...10 3 Place your thumb on the spindle and use your other fingers to gently pry the disc upwards until it pops free...

Page 13: ...s CyberLink Power2Go LE Version and CyberLink MediaShow trial version Note CyberLink Power2Go and MediaShow can only be installed in Windows XP Vista 7 8 Make sure that the DVDS is connected to your c...

Page 14: ...ty of CD and DVD formats CyberLink Power2Go also includes several handy disc utilities and an express mode that makes burning convenient and easy CyberLink MediaShow MediaShow is a useful tool for com...

Page 15: ...USB port however the power supplied by the USB port on some older computers is below the 5V DC required to power the CD DVD Writer Please make sure to connect the USB cable to both USB ports on your c...

Page 16: ...a CD DVD cleaning solution Writing to a Blank Disc Fails In most cases this problem is a result of trying to write to poor quality recordable media For best results please use only retail packaged nam...

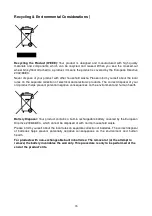
Page 17: ...correct disposal of your old product helps prevent potential negative consequences on the environment and human health Battery Disposal Your product contains a built in rechargeable battery covered b...

Page 18: ...ng prolonged exposure to humidity acts of nature improper installation including connection to incompatible equipment or problems with electrical power including undervoltage overvoltage or power supp...

Reviews: