POSITIONING THE HEAT BAFFLE:
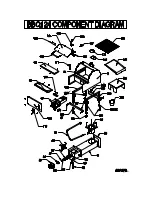
Position The Heat Baffle (214) directly over the Firepot (69) with the long legs pointing
downward. The notched leg of the Heat Baffle (214) fits over the Burner Assembly (40)
and into the Heat Baffle Support (103) found on the top of the Burner Assembly (40).
POSITIONING THE GREASE DRAIN PAN:
RECOMMENDATION for ease of clean-up: Line the Grease Drain Pan (217) with
heavy-duty aluminum foil. Be sure the edges and ends of the foil are tight against
the bottom of the Grease Drain Pan (217).
Position the Grease Drain Pan (217) so that the Short Lip end hooks over the Grease
Drain Pan Support (23). The Long Lip end should rest in the V-Shaped Grease Drain
located inside the Grill on the right.
POSITIONING THE PORCELAIN GRILL:
Position the Porcelain Grill (221) on the Grill Supports that run the length of the
cooking area.
HANGING THE GREASE BUCKET:
Locate the Grease Drain Tube, extending below the Grill on the right end.
Hang the Grease Bucket (208) on the Bucket Hook.
INSTALLING THE CHIMNEY CAP ASSEMBLY:
After making sure that the Flue Trim (169) is in place over the Flue Pipe, screw the
Chimney Cap Assembly (172) into the Bracket in the top of the Flue Pipe.
Hand tighten.
BBQ124 USED AS A BUILT-IN GRILL:
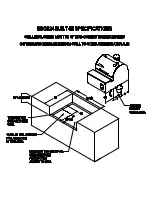
The following diagram provides you with some help if you choose to use your BBQ124 as a
built-in unit. Please note that the bottom of the enclosure must be open to allow access to
the Grill. Support for the Grill on the right side needs to allow clearance for the Grease
Drain Tube and the Grease Bucket (208).


