12
Slim Duct type (RAV-SM
∗∗
∗∗
∗∗
∗∗
∗∗
4SDT
∗∗∗∗∗
)
No.
1
2
3
Procedure
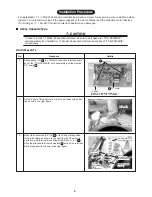
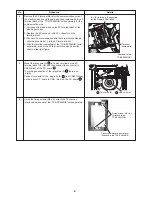
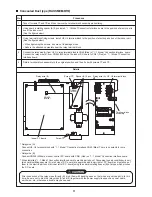
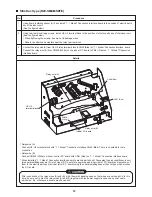
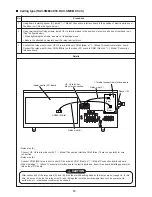
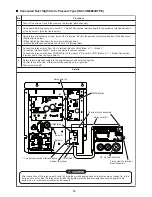
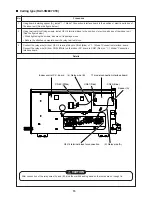
Using board installing spacer (A) 3 pcs install “1 : 1 Model” Connection Interface board to the position of electric parts
box of the indoor unit.
(See the figure below.)
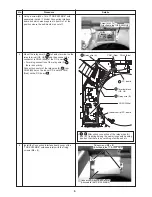
Using terminal block fixing screws, install U3, U4 terminal block to the position of electric parts box of the indoor unit.
(See the figure below.)
• When tightening the screws, be sure not to damage wires.
• Adhere the attached nameplate near the relay terminal block.
Connect the relay wire (A) from U3, U4 relay terminal block to CN40 (Blue) of “1 : 1 Model” Connection Interface board.
Connect the relay wire (B) from CN050 (White) on the indoor P.C. board to CN51 (Red) on “1 : 1 Model” Connection
Interface board.
Details
* Relay wire (A)
Connect U3, U4 terminal block with “1 : 1 Model” Connection Interface CN40 (Blue). There is no polarity for wire
connection.
• Relay wire (B)
Connect CN050 (White) on indoor control P.C. board with CN51 (Red) on “1 : 1 Model” Connection Interface board.
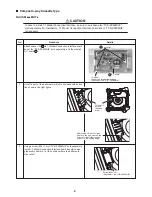
* When installing “1 : 1 Model” Connection Interface board to electric parts box of Concealed type air conditioner, insert
two board installing spacers (A) into holes of P.C. board (at upper side and lower right of P.C. board) and install one of
them to the electric parts box (at lower left of P.C. board) using the board installing spacer (B) of a type which pinches
the P.C. board.
CAUTION
After connection of the relay wires (A) and (B), bind them with banding band so that wires are not caught in. In this
time, be sure not to bind the relay wires (A) and (B) together with the power supply lines such as power cable,
earth wire, etc.; otherwise a trouble may be caused.
Relay wire (A)
Relay wire (B)
Indoor P.C. board
U3, U4
terminal block
CN51 (Red)
CN40 (Blue)
CN050
(White)

