background image

Bef

ore Using

6

7

IMPORTANT SAFETY INSTRUCTIONS  (Continued)

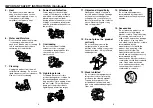
16. Damage Requiring Service

Unplug this product from the wall
outlet and refer servicing to
qualified service personnel under
the following conditions:

a) When the power-supply cord or

plug is damaged.

b) If liquid has been spilled, or

objects have fallen into the
product.

c) If the product has been exposed to

rain or water.

d) If the product does not operate

normally by following the operating
instructions.  Adjust only those
controls that are covered by the
operating instructions as an
improper adjustment of other
controls may result in damage and
will often require extensive work by
a qualified technician to restore
the product to its normal
operation.

e) If the product has been dropped or

damaged in any way.

f) When the product exhibits a

distinct change in performance -
this indicates a need for service.

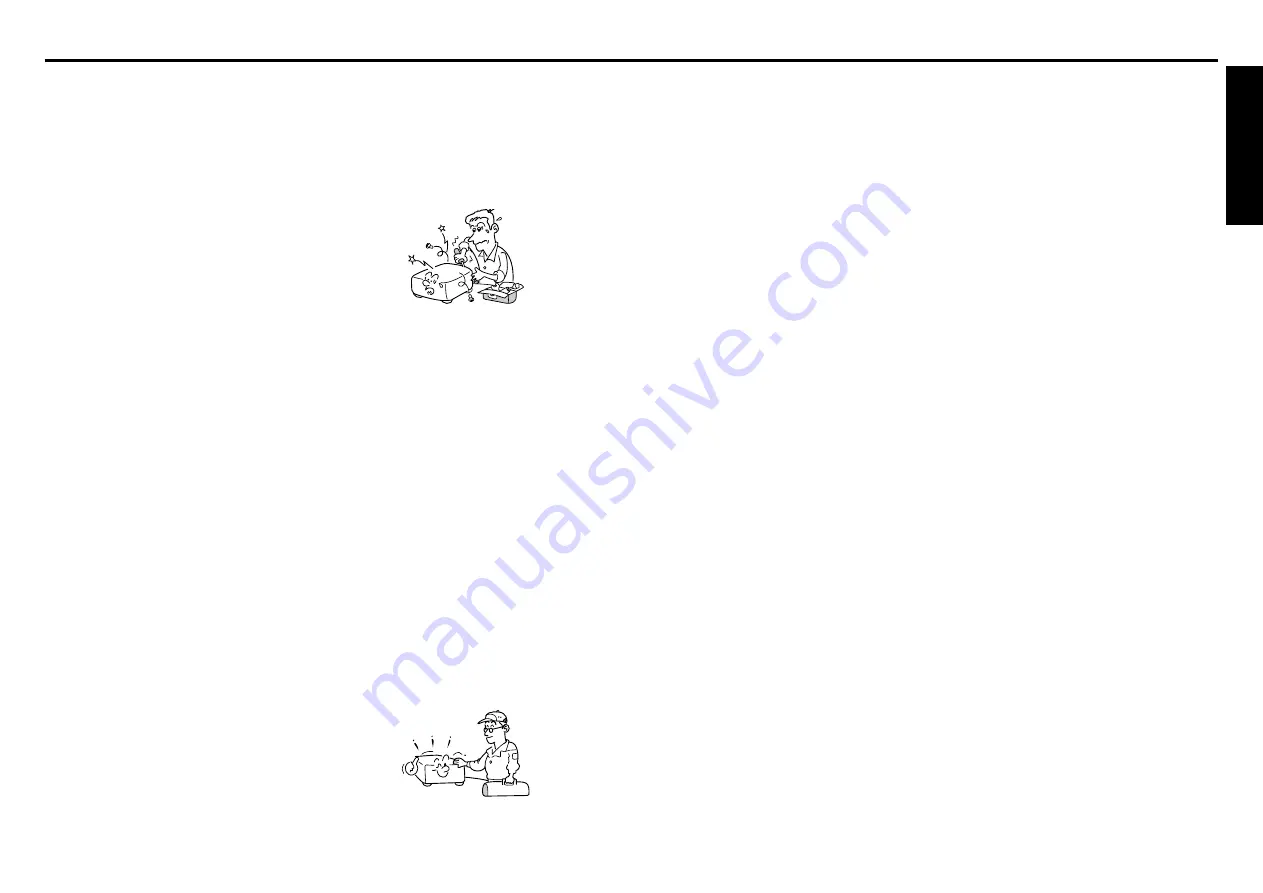
17. If glass components,

including lens and lamp,
should break, contact your
dealer for repair service.

This product incorporates glass
components, including a lens and
a lamp.  If such parts should
break, please handle with care to
avoid injury and contact your
dealer for repair service.  The
broken pieces of glass may cause
to injury.  In the unlikely event of
the lamp rupturing, thoroughly
clean the area around the
projector and discard any edible
items placed in that area.

18. Servicing

Do not attempt to service this
product yourself as opening or
removing covers may expose you
to dangerous voltage or other
hazards.  Refer all servicing to
qualified service personnel.

19. Replacement Parts

When replacement parts are
required, be sure the service
technician has used replacement
parts specified by the
manufacturer or have the same
characteristics as the original part.
Unauthorized substitutions may
result in fire, electric shock, or
other hazards.
(Replacement of the lamp only
should be made by users.)

20. Safety Check

Upon completion of any service or
repairs to this product, ask the
service technician to perform
safety checks to determine that
the product is in proper operating
condition.

21. Do not leave thermal-paper

documents or easily
deformed items on top of
the unit or near the air
exhaust for long periods of
time.

The heat from the unit could erase
the information on the thermal
paper, or cause deformation or
warping.

22. When using a wireless

LAN PC card 

(Models

equipped with PC card slot):

Do not use near people
with heart pacemakers

Do not use near electronic
medical equipment, or in
hospitals or other medical
institutions

Do not use inside aircraft
or in places where the
wireless LAN card could
interfere with
electromagnetic signals.

The electromagnetic interference
could cause a malfunction,
resulting in an accident.

23. If the use of a wireless

LAN PC card interferes
with another device’s
electromagnetic signals,
cease use immediately.

(Models equipped with PC card
slot)

The electromagnetic interference
could cause a malfunction,
resulting in an accident.

24. Do not get your hands

between the camera arm
and the main unit when
setting the camera arm
back in its original
position. 

(Models equipped

with document camera)

To avoid injury, be careful not to
get your hands caught when
setting the camera arm back in its
original position.
Families with children should be
particularly careful.

25. Do not carry by the camera

arm.

 (Models equipped with

document camera)

Do not carry the projector by the
camera arm. Doing so can result
in damage or injury.

26. Do not move the projector

while the arm is still erect.

(Models equipped with
document camera)

Always store the arm back in
position when moving the
projector.  Otherwise injury or
damage may result.

27. Do not look into the arm

light while it is lit.

 (Models

equipped with document
camera)

The strong light may cause
damage to your eyes or sight.

28. Do not carry the projector

by having the terminal
cover parts or the PC card
cover part

Doing so, the projector may fall if
that cover comes off, and injury or
damage may result.

Summary of Contents for T400 - Gigabeat 4 GB Digital Player

Page 1: ...ANUAL 3LCD DATA PROJECTOR TLP T700 XGA High Brightness With PC Card Slot TLP T701 XGA High Brightness With PC Card Slot Document Camera TLP T600 XGA High Brightness TLP T601 XGA High Brightness With Document Camera TLP T500 XGA With PC Card Slot TLP T501 XGA With PC Card Slot Document Camera TLP T400 XGA TLP T401 XGA With Document Camera TLP S200 SVGA TLP S201 SVGA With Document Camera ...

Page 2: ...in which case the user may be required to take adequate measures CAUTION Laser beam is emitted when the laser button of the remote control is pressed Do not look from the front of the remote control Do not face toward a person or to a mirror CAUTION PLEASE READ AND OBSERVE ALL WARNINGS AND INSTRUCTIONS GIVEN IN THIS OWNER S MANUAL AND THOSE MARKED ON THE UNIT RETAIN THIS BOOKLET FOR FUTURE REFEREN...

Page 3: ...RUCTIONS Continued 11 Object and Liquid Entry Never push objects of any kind into this product through openings as they may touch dangerous voltage points or short out parts that could result in a fire or electric shock Never spill liquid of any kind on the product 12 Do not place the product vertically Do not use the product in the upright position to project the pictures at the ceiling or any ot...

Page 4: ...y Check Upon completion of any service or repairs to this product ask the service technician to perform safety checks to determine that the product is in proper operating condition 21 Do not leave thermal paper documents or easily deformed items on top of the unit or near the air exhaust for long periods of time The heat from the unit could erase the information on the thermal paper or cause defor...

Page 5: ...ou ever have to ship your LCD projector For maximum protection repack the set as it was originally packed at the factory Moisture Condensation Never operate this unit immediately after moving it from a cold location to a warm location When the unit is exposed to such a change in temperature moisture may condense on the crucial internal parts To prevent the unit from possible damage do not use the ...

Page 6: ... before touching the PC card to rid your body of static electricity This PC card is a radio product Concerning the regulations applied in each country area please refer to Information to the user supplied LCD Panel The life of the LCD panel is limited Take care over the points below so as to use the panel for years To prolong the life of this panel never fail to turn the power off when the panel i...

Page 7: ...on a computer via the projector 37 Operating the projector 38 Projecting images stored in a memory PC card 40 Memory PC cards 40 JPEG files 41 Projecting images stored in a memory PC card 41 CONTENTS Using the document camera 44 Preparation of the document camera 44 Image projection with the document camera 44 Using the overlay function 46 Locking the white balance 46 Correcting illuminated defect...

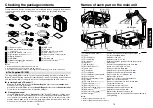
Page 8: ... equipped with document camera Names of each part on the main unit Notes 1 Included with models equipped with PC card slot 2 Included with models not equipped with PC card slot 3 The shape and number of power cords supplied vary depending on the product destination The Supplied CD ROM The supplied CD ROM contains an owner s manual including information omitted in the Owner s manual Getting started...

Page 9: ...r Lights when white balance locked p 47 5 STORE IMAGE button See note 1 Stores camera images onto a memory PC card p 50 6 CAMERA GAIN button Adjusts camera gain p 45 7 CAMERA button Switches between camera input and previous input p 45 Notes 1 Models equipped with PC card slot Names of each part on the PC card slot Models equipped with PC card slot Removing the PC card slot cover Press on the circ...

Page 10: ... plus and minus ends of the batteries properly e Replace the battery cover 2 1 Operating the remote control Point the remote control toward the projector s infrared remote sensor and press a button on the remote control Operating the projector from the front Operating the projector from the rear Dry cell batteries Remove batteries from remote control when not using for extended periods If the remo...

Page 11: ...de Functions as a down button Used to go forward on Microsoft PowerPoint slides etc PJ Mode Begins memory card slide display PC Mode Functions as an up button Used to go back on Microsoft PowerPoint slides etc PJ Mode Functions as a MENU ENTER button PC Mode Functions as the right mouse button R CLIK Pressing displays a laser pointer regardless of the mode Pressing one of these buttons automatical...

Page 12: ...his chapter if the model you purchased includes a PC card slot The attached wireless LAN PC card enables you to connect the projector wirelessly with a personal computer that supports IEEE802 11b based wireless LAN Please note that communication between all the computers based on IEEE802 11b and this projector is not guaranteed p 33 You can also use a commercially available memory card to project ...

Page 13: ...KEYSTONE MUTE AUTO SET FREEZE INPUT R CLICK PJ MODE LASER VOL VOL MENU ENTER RESIZE OFF ON STANDBY INPUT FAN TEMP LAMP ON VOL VOL AUTO KEYSTONE MENU AUTO SET Control panel Remote Control Please read this chapter if the model you purchased includes a PC card slot If you will use the supplied wireless LAN PC card function install the application on the supplied CD ROM onto your computer System Requi...

Page 14: ...s operation is no longer valid after the message disappears 2 Press the ON STANDBY button again The screen turns off but the internal cooling fan continues to operate for a short while Then the projector goes into standby mode When cooling lamp During internal cooling After cooling complete FAN TEMP LAMP ON FAN TEMP LAMP ON A FAN TEMP LAMP ON B C Green Green Orange Flashing Green Off Orange Off Of...

Page 15: ...he placement angle and the height of the projected image can be adjusted by the foot adjuster q Lift up the front of the projector until it is at the desired angle then press the foot adjuster release button The foot adjuster extends Release the button to lock the position w Turn the foot adjuster to fine tune the angle e To adjust the horizontal angle use the tilt adjuster To stow the foot adjust...

Page 16: ...garbled while the enlarged area is being moved Remote Control ON STANDBY AUTO KEYSTONE MUTE AUTO SET FREEZE INPUT R CLICK PJ MODE LASER VOL VOL MENU ENTER RESIZE OFF Remote Control q w r e ON STANDBY AUTO KEYSTONE MUTE AUTO SET FREEZE INPUT R CLICK PJ MODE LASER VOL VOL MENU ENTER RESIZE OFF ON STANDBY INPUT FAN TEMP LAMP ON VOL VOL AUTO KEYSTONE MENU AUTO SET ON STANDBY AUTO KEYSTONE MUTE AUTO SE...

Page 17: ...mation is being displayed dismisses the display Using handy features Continued Using the wireless LAN PC card Please read this chapter if the model you purchased includes a PC card slot Functions The following functions are available via wireless communications when the wireless LAN PC card and dedicated Wireless Utility software p 24 included with this projector are used Note Toshiba does not gua...

Page 18: ...llowing settings referring to How to use the menu p 52 and The PC card setting menu p 54 Communication mode Your projector is set to Ad Hoc in the factory See How to Use the Projector Configuration Tool p 59 if you would like to set the mode to Infrastructure This menu item is used only for channel confirmation and the mode change from Infrastructure to Ad Hoc Channel This item cannot be changed c...

Page 19: ... desired application is not on the list launch it Note that if too many applications are running it will consume the computer s resources which could slow communication speed 5 Select the projector to be transmitted A list of the MAC addresses of the wireless LAN PC cards p 32 p 59 mounted on the projectors that are available for transmission appears When a projector name is set that name appears ...

Page 20: ...ess Utility and the Remote Control click on the button on the Wireless Utility window 5 Select the projector to be transmitted A list of the MAC addresses of the wireless LAN PC cards p 32 p 59 mounted on the projectors that are available for transmission appears If projector name has been set up already it is shown instead of the MAC address Select the checkbox of the projector to be transmitted ...

Page 21: ...ion and more It is not possible to reproduce animation effects such as those produced by Microsoft PowerPoint Memory PC cards PC card slot types The PC card slot installed on this projector is PC Card Standard TYPE II compliant Please use memory PC cards and conversion adapters compliant with this type of PC card slot Supported storage media types This projector supports the following types of ATA...

Page 22: ...to go to the previous page To open a folder move the orange frame over the desired folder and click on the remote control s button It is possible to navigate down up to 5 levels using the same procedure To return to the next level up click on the remote control s button 4 Displaying slides When a file is selected pressing the remote control s button displays a slide and the image of the selected f...

Page 23: ...ed 1 Set up arm 2 Extend arm 3 Rotate arm 4 Extend camera head 3 Press the CAMERA button and select camera input The input returns to the previous input when the CAMERA button is pressed again Camera input can also be selected by pressing the remote control or camera s INPUT button 4 Move the camera head up and down to adjust the image size ON STAND BY INPUT MENU AUTO SET FAN TEMP LAMP ON VOL VOL ...

Page 24: ...aphs the color balance may be disrupted depending on the color layout of the document etc If this happens the white balance can be locked using the procedure below 1 Lay down a piece of white paper and adjust so it fills the screen Adjust the camera head and arm so that the white paper fills the screen completely Screen Paper 2 Press the W BALANCE button The LOCK indicator lights The white balance...

Page 25: ...or Save to Disk If you only want to view the image taken with the document camera on the computer screen select Open a file To save the JPEG file sent from the projector to disk select Save to Disk r Select the projector on which the images were temporarily saved in step 2 A list of the MAC addresses of the wireless LAN PC cards p 32 p 59 mounted on the projectors that are available for communicat...

Page 26: ...raph resized or frozen images Saved files are saved with names in the range of pix001 jpg to pix999 jpg If there is already a file named pix999 jpg no more files can be saved The size of the file will vary depending on the image The number of files that can be saved depends on the size of the files and the capacity of the memory PC card Do not mount a write protected memory PC card into the projec...

Page 27: ...n next time 2 The Standby mode function is only available with models equipped with a PC card slot p 39 Notes Note that if Power on is set to Auto then if the power cord is plugged in when power is restored after a power outage the projector power will come on Even if Power on is set to Auto press the ON STANDBY button to turn off the power Unplugging the power cord to cut off the power will short...

Page 28: ...0 min Delete the selected file Folders cannot be deleted Enter execution mode Yes No Apply Description Item Input select mode Auto Demo Interval File deletion Using the menu Continued When the wireless LAN PC card is being used Manual Auto Switch to PC card input when the PC card is inserted Ad hoc Infrastructure This item cannot be changed currently This is function for the future Enter setting m...

Page 29: ...s torn consult with your dealer about replacing it with a new one Continuing to use a ripped filter will allow dust and dirt to get inside the projector Air filter cleaning Filter holder Air filter Air filter cover USB COMP Y PB MONITOR CONTROL 1 Air filter cover Vacuum nozzle Lens cleaning Clean the lens with a commercially available blower and or lens cleaner The lens is easily scratched so do n...

Page 30: ...race amounts of environmentally harmful inorganic mercury Be careful not to break used lamps and dispose it in accordance with local regulations Please read this chapter if the model you purchased includes a PC card slot This chapter briefly describes how to use supplied software applications other than the Wireless utility How to use the Projector Configuration Tool The Projector Configuration To...

Page 31: ...e like into JPEG files supported by the projector The JPEG files converted with this tool can be displayed by sending them using the wireless LAN PC card p 37 or saving them on a memory PC card p 41 Launching the JPEG Conversion Tool The window shown in the figure to the right appears on the computer screen Drag the Image Quality Settings slider to the left or right to set the image quality of the...

Page 32: ... the Conversion button b A confirmation dialog box opens Click Yes The computer begins to convert the file When it finishes a message appears informing you that a JPEG file has been created Making a presentation with converted JPEG files 1 Copy the folder created by the JPEG Conversion Tool or its contents onto a memory PC card 2 Use the steps 1 2 in Projecting images stored in a memory PC card p ...

Page 33: ...e lit Or Orange lit or flashing Red lit or flashing Red lit Orange flashing Red lit If you think something is wrong check the following before contacting customer service Please see Trouble indications p 64 as well If This Happens Check No power Power goes out during use No picture No audio Picture not displayed correctly Picture blurred Part of picture out of focus Image is dark Colors too light ...

Page 34: ... Continued Specifications List of general specifications Item Specification Consumption Power 240 W Weight TLP T700 T500 3 4 kg TLP T600 T400 S200 3 3 kg TLP T701 T501 4 1 kg TLP T601 T401 S201 4 0 kg Models without document imaging camera External Dimensions 298 97 249 mm W H D including protruding parts Models equipped with document imaging camera 298 97 313 mm W H D Cabinet material PC ABS resi...

Page 35: ...600 832 x 624 1024 x 768 1152 x 864 1280 x 960 1280 x 1024 1400 x 1050 1600 x 1200 1792 x 1344 1856 x 1392 1920 x 1440 Note Signals whose resolution exceeds the LCD panel s number of pixels p 67 will be compressed For this reason some information may be lost or image quality may be affected List of supported signals Y PB PR signals Signal format fh kHz fv Hz 480i 525i 60Hz 15 73 59 94 480p 525p 60...

Page 36: ...c characters supported 4 Replies Acknowledge ACK 06h No acknowledge NAK 15h If commands are to be sent consecutively wait for the response from the projector ACK or NAK before sending the next command Main Commands Note Contact your dealer for control cable and other commands Separately Sold Product Replacement Lamp Model TLPLW1 Note Design specifications etc subject to change without notice for i...

Reviews: