
9
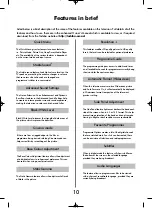
How to:
add new services using Auto tuning, select programme positions and information, use the sound
controls, select
DTV
,
ATV
and external equiment.
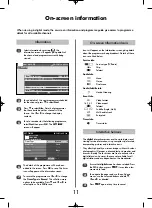
General information
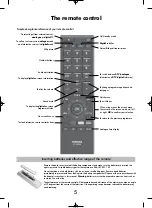
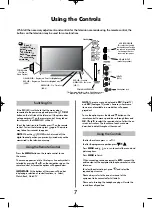
Volume
Press
j
—–
or
j
+
to adjust the volume.
Sound Mute
Press
k
once to turn the sound off and again to cancel.
Sound Controls
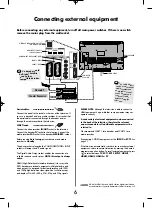
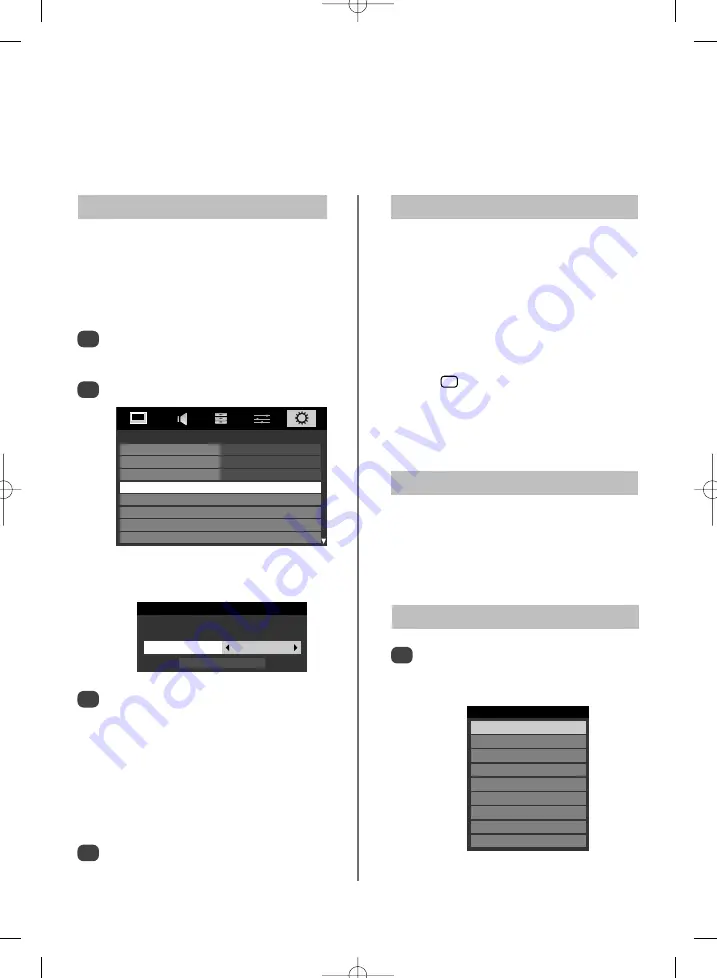
Input Selection
1
At any time by pressing
B
a list will appear on
screen showing modes and all stored external
equipment
.
Use
e
and
f
to highlight and
OK
to select.
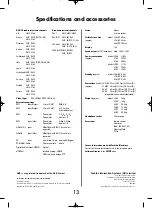
For explanation of inputs please see specification page.
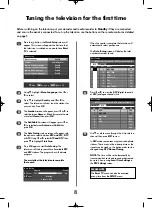
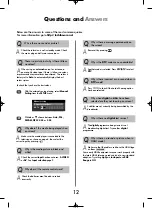
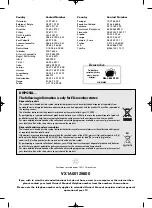
SETUP
Menu Language
English
Country
United Kingdom
Ant/Cable In
Antenna
Auto Tuning
ATV Manual Tuning
DTV Manual Tuning
DTV Settings
AV Connection
Use
z
or
x
to select
DTV
then press
e
to select
Start Scan
, press
OK
to start
Auto tuning
.
The television will start to search for all available
DTV
stations.
You must allow the television to complete
the search.
When the search is complete the
Auto Tuning
screen will display the services found.
Use
e
or
f
to move through the list to select a
channel then press
OK
to view.
Auto Tuning
1
2
Press
MENU
and use
z
or
x
to select
SETUP
.
Use
e
to highlight
Ant/Cable In
and then
z
or
x
to select
Antenna
or
Cable
.
Use
e
to highlight
Auto Tuning
. Press
OK
.
A screen will appear warning that previous
digital channels and settings will be deleted.
2
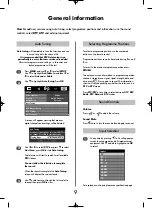
3
Auto tuning
will completely re-tune the television and can
be used to up date the channel list.
It is recommended that DTV Auto tuning is run
periodically to ensure that new services are added.
All current programmes and settings, i.e. favourites and
locked programmes, will be lost.
Auto Tuning
Previous settings will be lost! Press EXIT for
no change. Press OK to start Auto tune.
Tuning Mode DTV and ATV
Start Scan
To select a programme position use the numbered
buttons on the remote control.
Programme positions can also be selected using
P
P
and
P
Q
.
To revert to the previous programme position press
RETURN
.
To display on-screen information
i.e.
programme position,
channels, stereo/mono signal, signal strength, date and
time, press
. Press again to cancel. The information
shown will vary depending on whether the television is in
DTV
or
ATV
mode.
Press
ATV/DTV
at any time to select between
ATV
,
DTV
Radio
,
DTV Data
and
DTV
modes.
Selecting Programme Positions
i
+
Inputs
TV
B
1
B
2
B
3C
HDMI1
HDMI2
HDMI3
HDMI4
PC
Q
p
g


