35
Viewing
・
Listening
and Operation
Introduction
Set up
Recording
Others
34
Viewing
・
Listening
and Operation
Introduction
Set up
Recording
Others
NOTE
●
The single-view screen on the Camera Image screen is the same size as
that of images sent by the camera.
●
The Camera Image screen can freely enlarge or reduce sizes of windows.
●
Reducing the size of delivered images may omit the camera name and clock
indication, but these items can be displayed by enlarging the window.
●
Use the software "Independent JPEG Group's JPEG software" for JPEG
enlargement. "This software is based in part on the work of the independent
JPEG Group."
●
Administrator authorization is needed to install "Active-X control." Install
"Active-X control" after changing the personal computer setting to
"Administrator authorization."
● Browser setting when proxy server is used
In case a proxy server is used, setting of the browser to bypass the proxy
server during communication with the network camera is recommended.
1) Launch the browser.
2) Choose "Internet option" on the tool menu.
3) Click "Connect" tab.
4) Click "LAN Setting."
・ The screen for setting a local area network (LAN) will appear.
5) Check if the checkbox "Will use a proxy server" is checked..
・ If the checkbox is not ticked
The browser is not set to use a proxy server. Click "Cancel" and quit setting.
・ If the checkbox is checked.
Click "Detail setting." A proxy setup screen will appear.
6) Enter the IP addresses of the network cameras in the field marked "Do
not use the proxy server with addresses started with the following.
7) Click "OK."
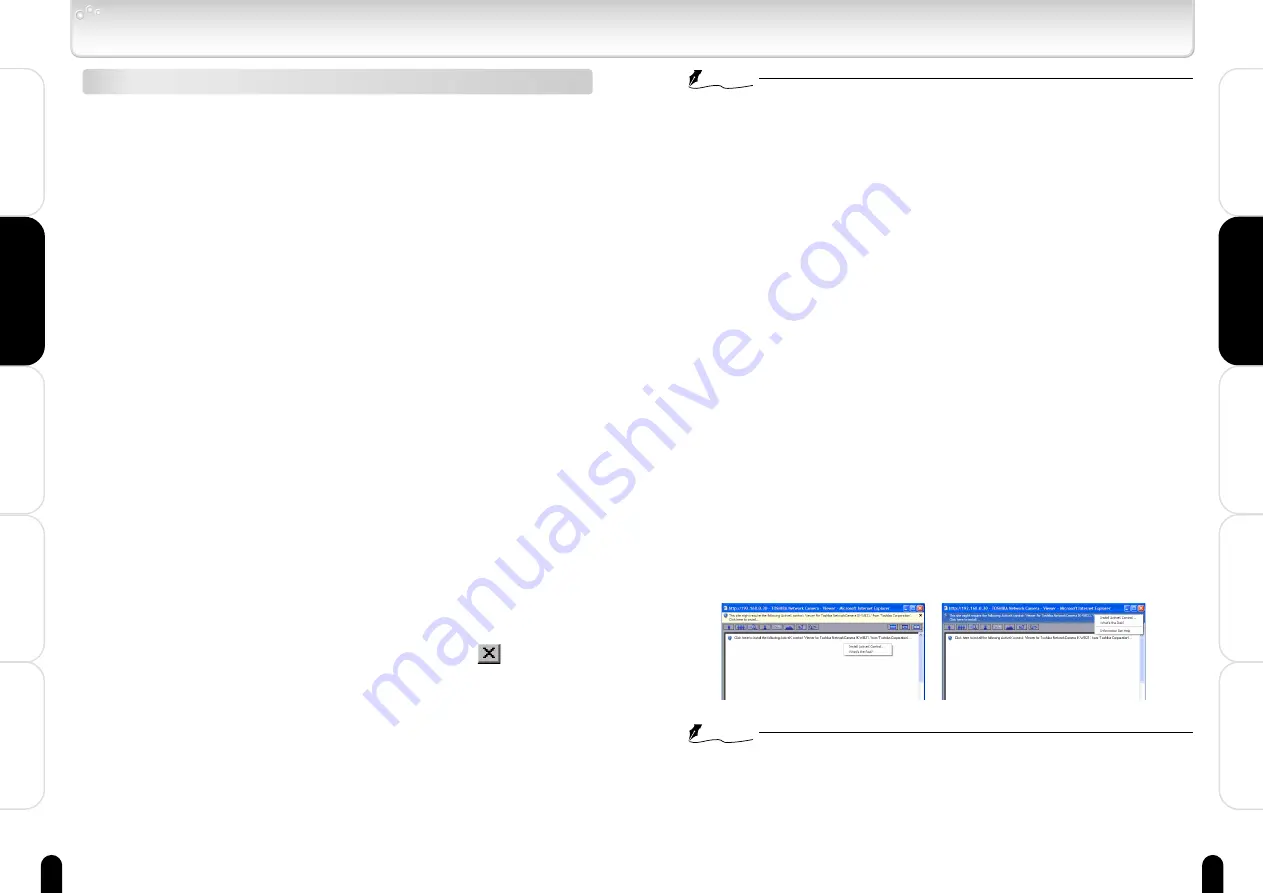
When Windows XP SP2 is used:
Click "Install" for "Active-X control."
NOTE
●
A proxy server protected by an intracompany firewall sometimes cannot be
connected to the network camera. Consult the network administrator so as
to avoid impacts on network camera operations.
●
Communication with the network cameras via a proxy server may cause
some problem. Install the network cameras after consulting the network
administrator.
●
Using the network cameras via a proxy server sometimes takes a long time
till images are displayed after log-in or reduces the frame rate of delivered
images.
Viewing and listening
Viewing images
Images of the network camera can be viewed through the Internet browser of
your personal computer.
● Preparations before displaying
・ Enable cookies
・ Set "Browser setting when proxy server is used" on page 35 when a proxy
server is used.
・ Change "security" in Internet options as follows.
1) Click "Internet Option" on the tool menu.
2) Click the Security tab.
3) Click the "Intranet" icon if the camera to be operated is inside the intranet,
clicking the "Internet" icon if the camera is on the Internet.
4) Click "Level customize."
5) Check the following radio buttons in the displayed list:
・ "Enable" for "ActiveX control and plug in execute"
・ "Enable" for "Execution of script of ActiveX control marked safe even
when script is executed"
・ "Enable" for "Download of signed ActiveX control"
6) Click "OK."
1
Log-in the camera.
・ Your browser will launch and the Camera Image screen for the
camera will pop up.
・ See "Administrator Log-in and User Log-in" on pages 30 and 31 for
the log-in method.
・ When the security warning screen (VeriSign) appears on the first
use of the system, click "Yes."
2
To close the camera image, click the
button in
the upper-right corner of the window.


