GD-1300 INSTALLATION PROCEDURE 3 - 1
[3] INSTALLATION PROCEDURE
<Before installation>
For improvement of workability, some description in this manual as
well as components and accessories may change without prior
notice. In this case, refer to the service manual.
Turn off the main switch of the copier and then remove the power
plug of the copier from the outlet.
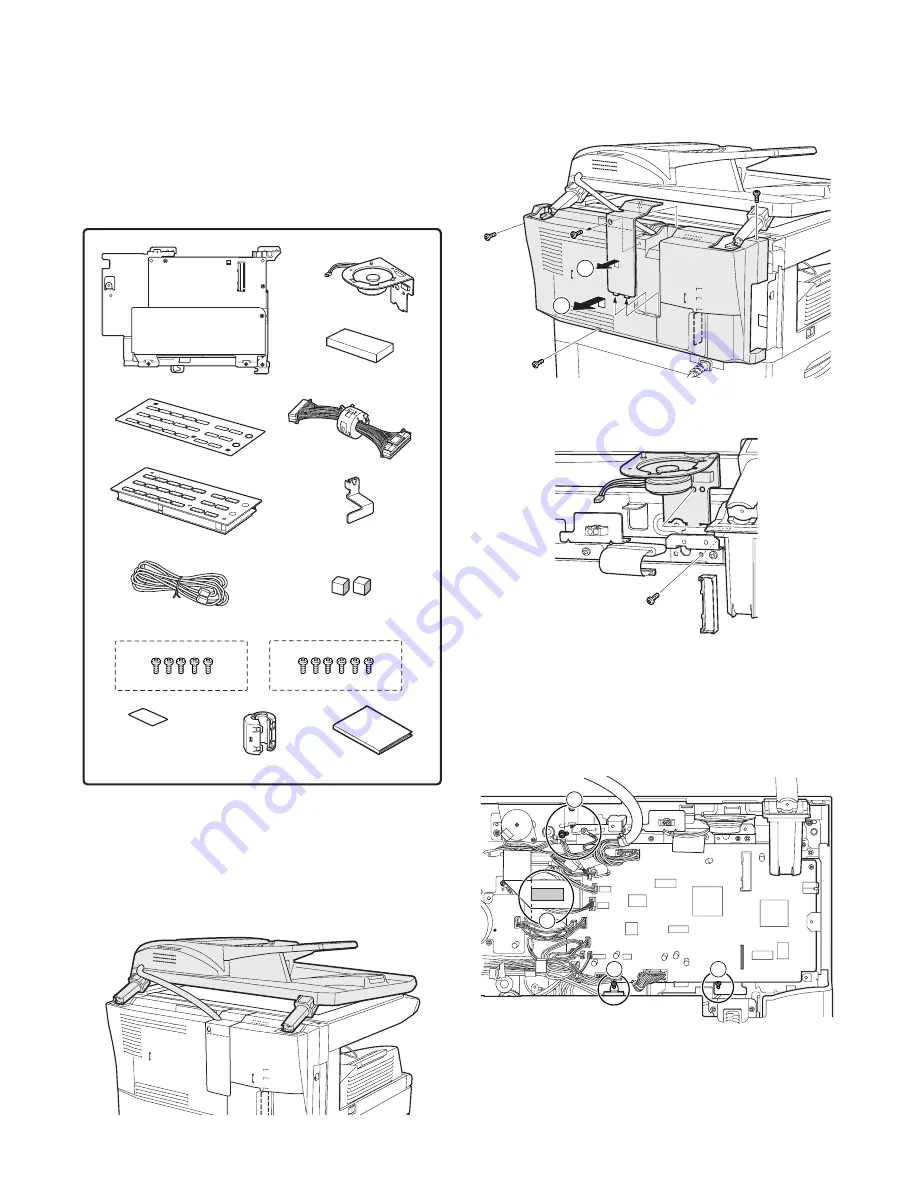
1. Parts included
Remove all pieces of fixing tape and fixing materials from the
finisher.
2. Installation procedure
(1) Detach the RADF or OC.
Detach the RADF or OC from the copier and softly place it on top
of the original table as shown below.
(2) Remove the rear cabinet.
1) Unscrew the screw and remove the rear cabinet shielding
plate. (Save the screw.)
2) Unscrew three screws and remove the rear cabinet. (Save the
screws.)
(3) Attach the speaker unit.
Attach the speaker unit using a supplied screw as shown below.
(4) Attach the FAX modem PWB.
1) When RADF is installed, unscrew the screw holding the RADF
ground terminal. (Save the screw.)
2) Insert two supplied screws and tighten them loosely as shown
below.
3) Attach the sponge around the bent portion of the FFC cable as
shown in the figure.
Cable: 1
Sponge: 1
FAX Modem PWB: 1
Key sheet: 1
FAX keyboard: 1
Ground angle: 1
Speaker unit: 1
Gasket: 2
Core: 1
Line cable: 1
Operation Manual: 1
Screws (M3x6): 5
For North America
Screws (M3x6): 6
For other than North America
North America
FCC label: 1
1
2
2
2
3
1


