background image

3

SCAN

22

C O N T E N T S

I N D E X

Scanning from a TWAIN-Compliant Application

(part 3)

7

Specify the scanning area and set the scan 
preferences.

For information on specifying the scan area and setting 
the scan preferences, see scanner driver Help.

Scanner Driver Settings

8

When you are ready to begin scanning, click the 
"Scan" button.

To cancel a scanning job after clicking the "Scan" 
button, press the [Esc] key on your keyboard.

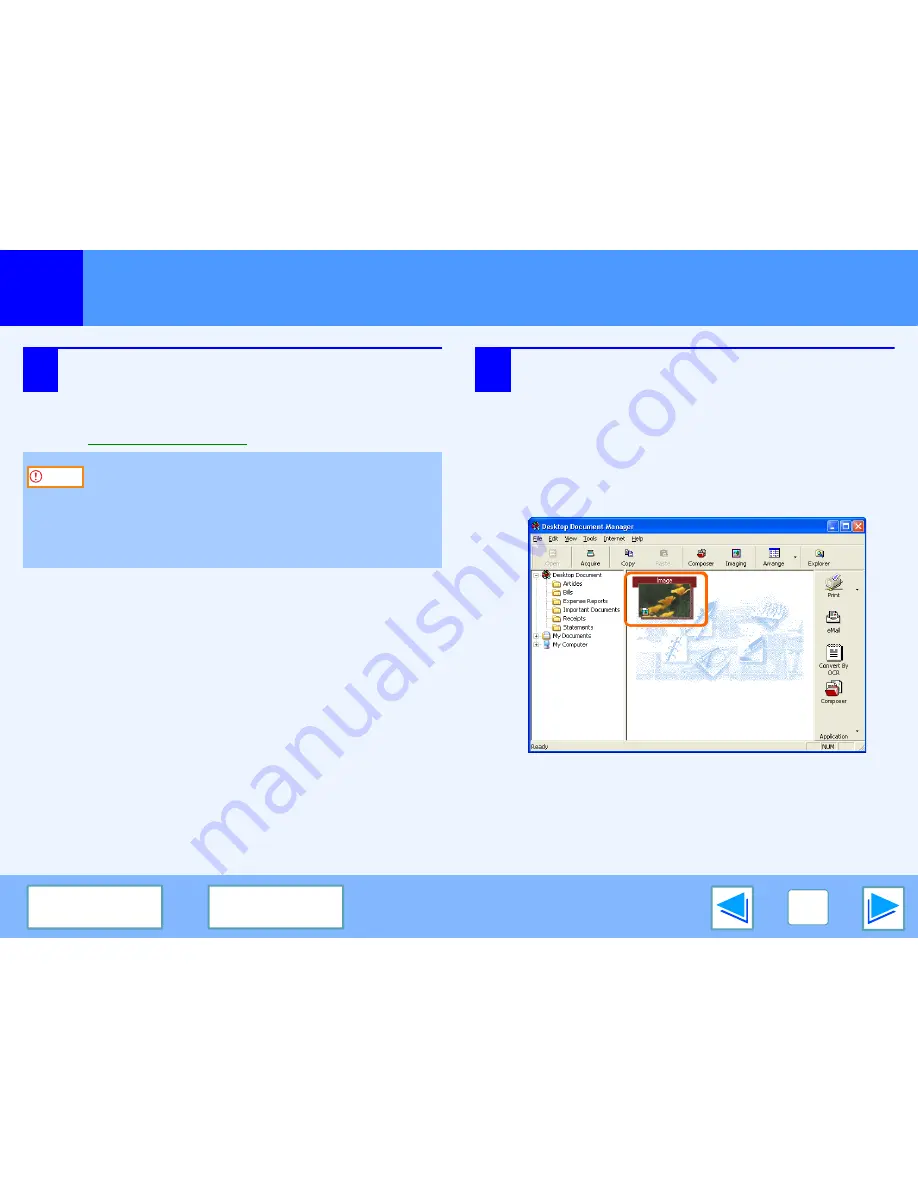
When you close the scanner driver after scanning, the 
image data will appear as a new file in Desktop 
Document Manager, as shown below.

Scanning a large area in full color at high resolution 
results in a large quantity of data and a prolonged 
scanning time. It is recommended that you set 
appropriate scanning preferences for the type of original 
being scanned, i.e., Web page (monitor), Photo, FAX, or 
OCR.

Caution

Summary of Contents for e-STUDIO203S

Page 1: ...e STUDIO203S 203SD Online Manual Start Start Click this Start button ...

Page 2: ...ctional Digital Systems Basic machine procedures adding paper replacing the toner cartridge removing misfeeds using peripheral devices Copier functions Scanning from the operation panel of the machine Specifications Where e STUDIOXXXX appears in this manual please substitute the name of your model for XXXX This manual refers to the Reversing Automatic Document Feeder as the RADF The screen images ...

Page 3: ... to jump directly to that section Takes you forward page by page Takes you back page by page Following Links This manual uses a link function that allows you to jump to a related page If you click green underlined text the related page will be displayed In the Contents and Index sections the linked areas are not underlined Example Contents To return to the previous page click the button on the men...

Page 4: ...Printing a Watermark 13 Outline of the Print Status Window 14 Sharing the Printer Using Windows Networking 15 Shared Printer Settings 16 Client Settings 17 Scanning Overview 19 Scanning from a TWAIN Compliant Application 20 Scanning from a WIA Compliant Application Windows XP Vista 25 Scanning from the Scanner and Camera Wizard Windows XP 27 Outline of Button Manager 30 Button Manager Settings 31 ...

Page 5: ...in Windows 98 Me to open the printer driver setup screen The printer driver setup screen will appear Windows 2000 does not have the Preferences button in this dialog box Select settings as needed on each of the tabs in the setup screen Printer Driver Settings Printing Multiple Pages on One Page Fitting the Printed Image to the Paper Printing a Watermark Two sided Printing Only for models that supp...

Page 6: ... will appear in the display Make sure that a checkmark appears in front of YES and press the ENTER key When Paper Source is set to Auto Select If Paper Source is set to Auto Select in the Paper tab of the printer driver setup screen and the correct size of paper for a print job is not loaded in the machine the printing procedure will vary depending on the FORCED OUTPUT setting in the user programs...

Page 7: ...click the Start button and select Settings 2 Click Printers and Other Hardware and then click Printers and Faxes On Windows Vista click Printer On Windows 2000 click Printers 3 Click the TOSHIBA e STUDIOXXXX printer driver icon and select Properties from the File menu On Windows Vista select Properties from the Organize menu 4 Click the Printing Preferences button in the General tab The printer dr...

Page 8: ...d print settings Drop down list Allows you to make a selection from a list of choices Image of paper trays The tray selected in Paper Selection in the Paper tab appears in blue You can also click on a tray to select it Check button Allows you to select one item from a list of options OK button Click this button to save your settings and exit the dialog box Cancel button Click this button to exit t...

Page 9: ...en the printer driver setup screen and select 2 Up or 4 Up for N Up Printing on the Main tab See Basic Printing for details on how to open the printer driver If you select the Border checkbox borderlines will be printed around each page The N Up Printing setting is not available when Fit To Paper Size is selected Fitting the Printed Image to the Paper N Up Border Border 2 Up 4 Up Note ...

Page 10: ...creen 2 Select the original size Letter of the print image in Paper Size 3 Check the Fit to Page box 4 Select the actual size of paper to be used for printing Invoice The size of the printed image will be automatically adjusted to match the paper loaded in the machine The Fit To Paper Size setting is not available when N Up Printing is selected Printing Multiple Pages on One Page Note Paper Size L...

Page 11: ... open the printer driver The following example shows the result when portrait data is printed on both sides of the paper Paper sizes that can be used for two sided printing are Letter Legal Folio Invoice A4 A5 B5 Foolscap and 16K When using two sided printing select a source other than Bypass Tray for the Paper Source in the Paper tab For two sided printing on Folio size paper Tray 1 or Tray 2 if ...

Page 12: ...inting on envelopes and other paper with flaps that can only be loaded in one orientation To use the feature select the image orientation in Image Orientation on the Paper tab and then select the Rotate 180 degrees checkbox See Basic Printing for details on how to open the printer driver Printing result Rotate 180 degrees Rotate 180 degrees ABCD ABCD ...

Page 13: ...nd follow the steps below See Basic Printing for details on how to open the printer driver How to Print a Watermark From the Watermark drop down list select the watermark that you wish to print for example CONFIDENTIAL and start printing You can enter text to create your own custom watermark For details on watermark settings view printer driver Help Printer Driver Settings Print sample ...

Page 14: ...in the status window to solve the problem Tab Click a tab to bring it to the front The Options tab allows you to select display options for the Print Status Window Document Name Shows the name of the document currently being printed Cancel Job button Printing can be canceled by clicking this button before the machine receives the job Help button Click this button to display the help file for the P...

Page 15: ...ta network environment Note that the Windows network environment must already be established Print server as explained here is a computer that is directly connected to the machine and a Client is any other computer that is connected to the same network Shared printer Client Client Client Print server Shared Printer Settings On the print server Client Settings ...

Page 16: ...ers and Other Hardware in the control panel and click Printers and Faxes On Windows Vista click Printer In operating systems other than Windows XP double click the printer icon 7 Click the TOSHIBA e STUDIOXXXX printer driver icon and select Sharing from the File menu On Windows Vista click Share from the tool bar 8 Establish the settings for sharing and click the OK button Client Settings If your ...

Page 17: ...Panel 2 Click Printers and Other Hardware and click Printers and Faxes 3 Click Add a printer in Printer Tasks The Add Printer Wizard will appear 4 Click the Next button This page provides steps for Windows XP Home Edition users only If your operating system is Windows 98 Me 2000 XP Professional Vista refer to the Operation Manual or the help file of your operating system Note ...

Page 18: ... and click the Next button 6 Select Browse for a printer and click the Next button 7 Select the printer to be shared in the network and click the Next button The contents of this window will vary depending on your network environment 8 Select settings in the Default Printer screen and click the Next button 9 Click the Finish button ...

Page 19: ... details see SETTING UP BUTTON MANAGER in the Operation Manual Scanning from a TWAIN 1 compliant or WIA 2 compliant application Scanning from the Scanner and Camera Wizard Windows XP Using the machine to begin scanning 3 Place the original in the scanning position For more information refer to NORMAL COPYING in the Operation Manual Start up a Twain compliant or WIA compliant application and select...

Page 20: ...anning refer to NORMAL COPYING in the Operation Manual 2 Start Desktop Document Manager and then click the File menu and select Select Scanner 3 Select TOSHIBA e STUDIO TWAIN T and click the Select button The method for accessing Select Scanner depends upon the application For more information refer to the manual or the help file of your application Note If you are using Windows XP Vista you can a...

Page 21: ...eview button The preview image will appear If you selected ADF Duplex Book or ADF Duplex Tablet in the Scanning Position menu select whether the orientation of the placed original is Right edge is fed first or Top edge is fed first Note If the angle of the image is not correct reset the original and click the Preview button again If the preview image is not oriented correctly click the Rotate butt...

Page 22: ...the Scan button To cancel a scanning job after clicking the Scan button press the Esc key on your keyboard When you close the scanner driver after scanning the image data will appear as a new file in Desktop Document Manager as shown below Scanning a large area in full color at high resolution results in a large quantity of data and a prolonged scanning time It is recommended that you set appropri...

Page 23: ...nning Mode menu Select Preset or Custom Settings for the scanning mode For details on the settings click the Help button in the preview screen to display Help Zoom Preview Checkbox When this is selected the selected part of the preview image will be enlarged when the Preview button is clicked To return to the regular view remove the checkmark Preview button Previews the document Scan button Click ...

Page 24: ...e original Upon scanning the image file is created in the orientation shown in the preview window Image Size button Click to open a dialog box that allows you to specify the scanning area by entering numbers Pixels mm or inches can be selected for the units of the numbers By initially specifying a scanning area numbers can be entered to change that area relative to the top left corner as a fixed o...

Page 25: ...plained in the following 1 Place the original that you wish to scan on the document glass RADF For information on setting an original for scanning refer to NORMAL COPYING in the Operation Manual 2 Start Paint and then click the File menu and select From Scanner or Camera The scan screen of the WIA driver will appear If you have WIA drivers for other devices installed in your computer the Select De...

Page 26: ...n button Scanning begins and the image is acquired into Paint Use Save in your application to specify a file name and folder for the scanned image and save the image To cancel a scanning job after clicking the Scan button click the Cancel button If you select Document Feeder for the Paper source and click the Preview button the top original in the RADF is previewed The previewed original is sent t...

Page 27: ...ompliant application 1 Place the original that you wish to scan on the document glass RADF For information on setting an original for scanning refer to NORMAL COPYING in the Operation Manual 2 Click the start button click Control Panel click Printers and Other Hardware and then click Scanners and Cameras 3 Click the TOSHIBA e STUDIOXXXX icon and then click Get pictures in Imaging Tasks The Scanner...

Page 28: ...eview button to display the preview image 6 Specify a group name format and folder for saving the image and then click the Next button JPG BMP TIF or PNG can be selected for the format To begin scanning click the Next button If you select Document Feeder for the Paper source and click the Preview button the top original in the RADF is previewed The previewed original is sent to the original exit a...

Page 29: ...ollowing screen will appear Select the next task that you wish to perform and then click the Next button If you are ready to end the session click Nothing I m finished working with these pictures 8 Click the Finish button The Scanner and Camera Wizard closes and the scanned image is saved in the specified folder ...

Page 30: ...ains scan settings for the scan menu Application Selection area Select the start up application here Show TWAIN setting screen when scanning Checkbox You can select whether or not the TWAIN screen is shown When the checkbox is selected the TWAIN screen appears when scanning is executed to let you adjust the scanning conditions Scan Setup area Set the scan conditions Menu Name button Set the menu n...

Page 31: ...Button Manager scan menu factory default If the Button Manager icon does not appear on the task bar click the start button select All Programs Programs in Windows 98 Me 2000 select TOSHIBA Button Manager T and then click Button Manager to start Button Manager Note When the Show TWAIN setting screen when scanning checkbox is selected the scan setting screen appears when scanning is executed to let ...

Page 32: ... the Menu Name button and enter the desired name After entering the name click the Apply button or the OK button in the setting screen The assigned names will appear in the machine display when you select a scan menu at the machine Example SC1 xxxxx 5 Click the OK button This completes the settings If a character that the machine cannot display is entered in the Menu Name is displayed on the machi...

Page 33: ...le readme txt is copied to your computer when the software is installed and can be found in the Program Files TOSHIBA eSTUDIO203S folder on the drive where you installed the software Problem Cause and solution Page The machine does not print The machine is not correctly connected to your computer Check both ends of the USB cable and make sure you have a solid connection Try a known good cable Oper...

Page 34: ...delete TOSHIBA e STUDIO203S Series MFP Driver and then reinstall it Operation Manual A copy job is in progress Wait until the copy job is finished The size of paper loaded in the tray is different from the paper size setting in the machine Make sure that the size of paper loaded in the tray and the machine s paper size setting agree Operation Manual The specified size of paper has not been loaded ...

Page 35: ...on Manual Paper is curled or damp Do not use curled or crimped paper Replace with dry copy paper During periods when the machine is not used for a long time remove the paper from the tray and store it in a dark place in a bag to prevent moisture absorption You did not set sufficient margins in the paper settings of your application The top and bottom of the paper may be dirty if the margins are se...

Page 36: ...eck the layout of the document margins and the paper size settings in the application you are using Also check if the print settings are specified correctly to suit the paper size Error indicator is lit or blinking See DISPLAY MESSAGES to check the meaning of the error indicator and error message in the display and take appropriate action Operation Manual Poor scanning quality The document glass o...

Page 37: ...Adjustment button on the Color tab of the Custom Settings screen Click the Brightness Contrast button to adjust the brightness and the contrast while viewing the scanned output image on the screen If you are scanning with a WIA compliant application or the Scanner and Camera Wizard click Adjust the quality of the scanned picture or the Custom settings button and adjust the brightness and contrast ...

Page 38: ...possible Make sure your application is TWAIN WIA compliant You have not specified all scanning preferences appropriately Scanning a large area in full color at high resolution results in a large amount of data and extended scanning times The scanning preferences should be set appropriately for the type of original to be scanned i e Web page monitor Photo FAX or OCR Scanner transfer speed is slow Y...

Page 39: ...driver setup screen If you wish to use the ROPM function set the print quality to Draft Notice Page The IMC memory full error had occurred a normal output was not able to be executed Please refer to the operation manual for the solution method The IMC memory is used to store print data when the ROPM function is used This memory is also used to store original image data in copy mode The percentage ...

Page 40: ...Border On Off Off Document Style 1 1 Sided 2 Sided Book 2 Sided Tablet 1 Sided User Settings Factory Defaults User Settings Setting Name Up to seven names 20 characters each Paper Paper Size A3 Fit To Page 2 A4 A5 A6 B4 Fit To Page 2 B5 Ledger Fit To Page 2 Letter Legal Executive Invoice Foolscap Folio COM10 Monarch DL C5 8K Fit To Page 2 16K Custom Paper Letter 3 Fit To Page On Off Off Image Orie...

Page 41: ...mal Photo Normal 2 Gradation Print On Off Off Image Adjustment Brightness 0 to 100 50 Contrast 0 to 100 50 Watermarks Watermark None TOP SECRET CONFIDENTIAL DRAFT ORIGINAL COPY None Text Size 6 to 300 200 Angle 90 to 90 45 Gray Scale 0 to 255 192 On First Page Only On Off Off Configuration Input Tray Options One tray Two trays One Tray ROPM On Off On ...

Page 42: ...of Button Manager 30 Outline of the Print Status Window 14 P Paper 40 Preview button Scanner and Camera Wizard 28 TWAIN driver 23 WIA driver 26 Preview Screen 24 Print 5 Print Status Window 14 Printer Driver Features 40 Printer Driver Settings 8 Printing a Watermark 13 R Rotate 180 degrees 12 Rotate button 24 S Scan 19 Scan button TWAIN driver 23 WIA driver 26 Scan Setup 30 Scanner and Camera Wiza...

Page 43: ...R080520F8800 TTEC OME08009500 ...

Reviews: