background image

5.INSTALLING PRINTER DRIVERS FOR UNIX/Linux

112    Setting Up the CUPS

Configuring UNIX/Linux printing using CUPS

You can configure the CUPS for LPR printing or IPP printing.

Installing the CUPS for LPR printing

The PPD must first be copied onto the local machine, the printer installed, and then the PPD configured. The printer is 
then installed and configured using CUPS via the browser. The PPD can be copied to the root directory and extracted. 
After extracting the PPD file, restart the CUPS daemon.

The PPD is placed in the “/usr/share/cups/model/Toshiba” directory (which will require root privileges and the 
Toshiba directory may need to be created). The PPD can be simply copied to the appropriate directory and the CUPS 
daemon re-started.

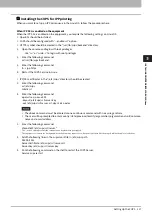
1

Insert the Install Disc into the disc drive.

2

Log on to the root account.

3

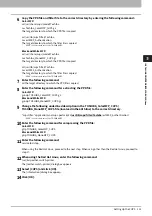
Copy the tar file into the root directory by entering the following command:

Color MFP:

cp TOSHIBA_ColorMFP_CUPS.tar

Black and White MFP:

cp TOSHIBA_MonoMFP_CUPS.tar

A tar file is included in the following folder in the Install Disc:

Color MFP

- “Admin/Color_Unix_Linux/CUPS/Usa/2-sided_default”

This PPD file enables to set 2-sided printing by default.

- “Admin/Color_Unix_Linux/CUPS/Usa/normal”

This PPD file enables to set 1-sided printing by default.

Black and White MFP

- “Admin/BW_Unix_Linux/CUPS/Usa/2-sided_default”

This PPD file enables to set 2-sided printing by default.

- “Admin/BW_Unix_Linux/CUPS/Usa/normal”

This PPD file enables to set 1-sided printing by default.

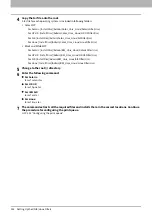
When this equipment is used in Europe or North America, install the PPD file enabling 2-sided printing by default.

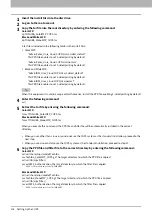
4

Enter the following command:

cd /

5

Extract the tar file by entering the following command:

Color MFP:

tar xvf TOSHIBA_ColorMFP_CUPS.tar

Black and White MFP:

tar xvf TOSHIBA_MonoMFP_CUPS.tar

When you execute this command, the PPD file and filter file will be automatically installed in the correct 
directory.

When you use other than Linux, or you do not use the CUPS system as the standard installation, proceed to the 
next step.

When you use Linux and also use the CUPS system as the standard installation, proceed to step 11.

Summary of Contents for E-STUDIO2000AC

Page 1: ...MULTIFUNCTIONAL DIGITAL COLOR SYSTEMS MULTIFUNCTIONAL DIGITAL SYSTEMS Software Installation Guide ...

Page 2: ... 2016 TOSHIBA TEC CORPORATION All rights reserved Under the copyright laws this manual cannot be reproduced in any form without prior written permission of TTEC ...

Page 3: ...ustration screens used in this manual are for paper in the A B format If you use paper in the LT format the display or the order of buttons in the illustrations may differ from that of your equipment Install Disc co packed with the equipment In this manual the discs for installing the software are generically described in Install Disc Trademarks For trademarks refer to the Safety Information Indic...

Page 4: ...roy all copies of Software You may terminate this license at any time by destroying Software and all copies DISCLAIMER OF WARRANTY Software is provided AS IS without warranty of any kind either express or implied including but not limited to the implied warranties of merchantability fitness for a particular purpose title and non infringement TTEC disclaims any warranty relating to the quality and ...

Page 5: ...er of TTEC concerned with a dispute arising from or relating to this Agreement the laws of the Country designated from time to time by the relevant Supplier of TTEC If any provision or portion of this License Agreement shall be found to be illegal invalid or unenforceable the remaining provisions or portions shall remain in full force and effect YOU ACKNOWLEDGE THAT YOU HAVE READ THIS LICENSE AGRE...

Page 6: ...6 END USER SOFTWARE LICENSE AGREEMENT ...

Page 7: ...MP V3 is configured for your TOSHIBA MFP 31 Chapter 3 INSTALLING PRINTER DRIVERS FOR WINDOWS Before Installation 34 Type of printer drivers 34 System requirements 34 About installation procedure 35 Installing the Printer Drivers 36 Installing the printer drivers by using Software Installer 37 Installing the printer drivers by using the individual installers 46 Installing the printer drivers from T...

Page 8: ... and utilities 132 System requirements 132 Installing Scan Driver and Utilities 133 Installing the scan driver and utilities using the installer 133 Installing WIA driver to Windows computer 135 Uninstalling Scan Driver and Utilities 138 Chapter 7 INSTALLING NETWORK FAX UTILITIES Windows Before Installation 140 Type of network fax utilities 140 System requirements 140 Installing Network Fax Utilit...

Page 9: ...CONTENTS 9 Chapter 10 CAUTIONS AND RELATED MESSAGES REGARDING INSTALLATION Windows Cautions before installation 158 Messages that may appear in installation 159 Cautions after installation 160 INDEX 161 ...

Page 10: ...10 CONTENTS ...

Page 11: ... 12 For Mac OS 14 For UNIX Linux 14 Contents of Installer 16 Precautions for Using Firewall Software 17 Downloading Software From TopAccess 18 Downloading installer for Windows 18 Downloading Mac OS PPD files 20 Downloading UNIX Linux filters 21 Setting Up NetWare Print Server 22 Setting up the Novell iPrint 22 ...

Page 12: ...2 bit edition Install Disc Client Drivers PS 32bit For the Windows computer 64 bit edition Install Disc Client Drivers PS 64bit Universal XPS printer drivers The setup files for installing the Universal XPS printer driver for each language version are included in the following folder They allow you to install the driver on Windows Vista or later For the Windows computer 32 bit edition Install Disc...

Page 13: ...e included in the following folder For Windows computer 32 bit edition Install Disc Client RS 32bit For Windows computer 64 bit edition Install Disc Client RS 64bit TWAIN drivers The setup files for installing the TWAIN driver are included in the following folder For Windows computer 32 bit edition Install Disc Client TWAIN 32bit For Windows computer 64 bit edition Install Disc Client TWAIN 64bit ...

Page 14: ...Filter Usa Black and White MFP Install Disc Admin BW_Unix_Linux SolarisFilter Usa HP UX filter The tar file for HP UX ver 11iv3 is included in the following folder Choose the appropriate file depending on the model to be used Color MFP Install Disc Admin Color_Unix_Linux HP UXFilter Usa Black and White MFP Install Disc Admin BW_Unix_Linux HP UXFilter Usa IBM AIX filter The tar file for IBM AIX 7 x...

Page 15: ...o set 2 sided printing by default Install Disc Admin Color_Unix_Linux CUPS Usa normal This PPD file enables to set 1 sided printing by default Black and White MFP Install Disc Admin BW_Unix_Linux CUPS Usa 2 sided_default This PPD file enables to set 2 sided printing by default Install Disc Admin BW_Unix_Linux CUPS Usa normal This PPD file enables to set 1 sided printing by default When this equipm...

Page 16: ...erform scanning the originals set in the equipment remotely from a client computer and acquire the image into the TWAIN compliant application WIA driver Scanning function This software allows you to perform scanning the originals set in the equipment remotely from a client computer and acquire the image into the WIA compliant application N W Fax driver Printing function The N W Fax driver enables ...

Page 17: ... communications and the execution files are given as follows Use this information for the exception setting of the firewall software Individual installer setup exe Software Installer Setup exe Printer driver N W FAX driver printui exe File Downloader ESFileDL exe AddressBook Viewer ABVExe exe for 32 bit edition ABVExe6 exe for 64 bit edition Backup Restore Utility ESeFBKRT exe For a TWAIN driver R...

Page 18: ...owing software can be downloaded from TopAccess Installer for Windows P 18 Downloading installer for Windows Mac OS PPD files P 20 Downloading Mac OS PPD files UNIX Linux filters P 21 Downloading UNIX Linux filters For instructions on how to start up the TopAccess or upload software to the equipment refer to the TopAccess Guide Downloading installer for Windows 1 In TopAccess click the Install Sof...

Page 19: ... click WebInstaller exe select Run as administrator and enter the Administrator password The names of folders that include WebInstaller exe are as follows ABV32 contains the installer for AddressBook Viewer for Windows 32 bit edition OSs ABV64 contains the installer for AddressBook Viewer for Windows 64 bit edition OSs FD contains the installer for File Downloader RS32 contains the installer for R...

Page 20: ...k that you want to download TOSHIBA_xxxxxMFP dmg gz Click this link to download the PPD file for Mac OS X 10 6 8 or later If Color is applied to the portion marked with xxxxx of the file name the file is intended for the color MFPs If Mono is applied to there the file is intended for the black and white MFPs Choose either Color or Mono depending on the model to be used 4 Download the PPD file of y...

Page 21: ...ss click the Install Software link at the bottom of the screen 2 Click the Unix Filters link The software components list is displayed 3 Click the UNIX Linux filter link that you want to install 4 Download the UNIX Linux tar file containing the UNIX Linux filters on your desktop by following the prompts ...

Page 22: ...NDPS Manager and NDPS Printer must be created The Novell iManager must be installed For more information about installing the Novell iManager see the documentation for the Novell iManager that is provided by Novell Inc In order to set up the iPrint system the network administrator must do the following 1 Installing Novell iPrint P 22 Installing Novell iPrint 2 Enabling the DNS on the Printer Servi...

Page 23: ...or more information see the documentation for the Novell iManager that is provided by Novell Inc 1 Enter the URL https IP address nps iManager html into the address bar of your browser to launch iManager 2 Enter the user name password and Tree to log in to Novell iManager 3 Click iPrint in Roles and Tasks and click Manage Printer 4 Select the printer that you created for the equipment 5 Click OK 6...

Page 24: ... Type list and then click Next The dialog box for configuring Novell Gateway appears 3 Enter the IP address of this equipment in Host IP address specify PORT_PASSTHROUGH in LPR Printer name and then click Next The dialog box for selecting the driver appears 4 The screen telling you that the printer has been created normally appears Select the printer drivers to be installed in the Printer Drivers ...

Page 25: ...2 RECOMMENDED INSTALLATION This chapter describes the recommended installation of the Installer Procedure for Recommended Installation 26 Precautions for Changing the SNMP Settings 30 ...

Page 26: ...og onto Windows with the Administrator account this enables the installation and uninstallation of client software 1 Insert the Install Disc into the disc drive If Software Installer does not automatically start use the Explorer to open the e STUDIO folder in the Install Disc and double click Setup exe 2 Select I agree to the terms of the License Agreement and click Next To change the display lang...

Page 27: ...llation 27 RECOMMENDED INSTALLATION 4 Confirm the list of the software to install and click Install If the following message appears click Continue See step 7 or later in the following section to continue the installation P 41 If your TOSHIBA MFP is not found ...

Page 28: ...other than private default is set for the SNMP community name for your TOSHIBA MFP 2 Change the SNMP community name 3 Click OK When you change the SNMP community name see the following page P 30 Precautions for Changing the SNMP Settings When SNMP V3 is used 1 Click V3 2 When a user ID file is used for authentication click Browse to specify the file When user authentication information is used for...

Page 29: ...his equipment on the list and then click OK The TCP IP port is created 6 The installation starts 7 When the installation is complete click Finish The main menu is displayed The Installer may ask you to restart your computer If it does select Yes I want to restart my computer now and click Finish to restart your computer 8 Click Exit When a message Do you want to close TOSHIBA e STUDIO Software Ins...

Page 30: ... help consult the administrator When SNMP V1 and V2 are configured for your TOSHIBA MFP When the TCP IP port is used the SNMP community names must be the same in the following 3 settings 1 Your TOSHIBA MFP Example Read Community public and Read Write Community private are set 2 SNMP Settings dialog box The Read Write Community names must be the same in your TOSHIBA MFP and the SNMP Settings dialog...

Page 31: ... Settings tab is set to 1 If it is 0 no communication can be made with the device When the SMB port is used the Read Write Community names must be the same in your TOSHIBA MFP and the SNMP Settings dialog box The SNMP settings also must be the same in your TOSHIBA MFP and the applications TWAIN driver File Downloader and AddressBook Viewer included in the Install Disc If the settings are different...

Page 32: ...r Information must be the same in your TOSHIBA MFP and the SNMP Settings dialog box The SNMP settings also must be the same in your TOSHIBA MFP and the applications TWAIN driver File Downloader and AddressBook Viewer included in the Install Disc If the settings are different the applications will be unavailable ...

Page 33: ...e Installer 37 Installing the printer drivers by using the individual installers 46 Installing the printer drivers from TopAccess 52 Installing the printer drivers from the equipment s shared folder 54 Other Installations 56 Raw TCP LPR printing Add Printer installation from file 56 USB printing 62 IPP printing 67 Novell iPrint 72 Web Service Print 73 Copying the PPD File for Windows 79 Uninstalli...

Page 34: ...tScript Universal XPS printer driver This printer driver is suitable for printing from an application developed exclusively for Windows Vista such as Windows Presentation Foundation WPF The Universal Printer 2 driver allows you to use both PCL and PS3 by shifting PDL Page Description Language It also allows you to print documents on other equipment of the e STUDIO series For details refer to the P...

Page 35: ...used to set up the printer However SMB printing is not suitable for printing a large amount of documents P 36 Installing the Printer Drivers SMB printing assumes a small network If you can use Windows Vista or later Windows Server 2008 or later as a print server it is recommended to set up for printing via Windows print server Internet printing If you print to this equipment over the Internet you ...

Page 36: ...rs The individual installers Setup exe are contained in the Install Disc which enable you to install the Universal Printer 2 driver Universal PS3 printer driver and Universal XPS printer driver individually Use this option to install only the preferred printer driver P 46 Installing the printer drivers by using the individual installers Installing the printer drivers from TopAccess If the Universa...

Page 37: ...disc drive If Software Installer does not automatically start use the Explorer to open the e STUDIO folder in the Install Disc and double click Setup exe 2 Select I agree to the terms of the License Agreement and click Next To change the display language select the desired language from the Select Language box 3 Click Printer Driver or Custom Install Printer Driver This option allows you to instal...

Page 38: ...nstall and click Install When you want to verify and or change the SNMP settings to find the target TOSHIBA MFPs see step 4 in the following section P 26 Procedure for Recommended Installation 6 Configure the printer port The procedure for configuring the printer port varies depending on the connection Go to the steps suited to your connection P 39 Raw TCP LPR printing P 45 SMB printing ...

Page 39: ... to configure the Raw TCP LPR port If this equipment is not discovered over the network after the installation is started a dialog box indicating this appears Follow the procedure below to continue the configuration To search this equipment over the network again click Retry Confirm the SNMP settings specified in the SNMP Settings dialog box To select a temporary local port and then configure the ...

Page 40: ...port is created Searching may take a while depending on the Windows OS or network environment 8 Confirm that the installation is completed and then click Finish The Installer may ask you to restart your computer If it does select Yes I want to restart my computer now and click Finish to restart your computer 9 Click Exit When a message appears asking whether to finish the installer click Yes ...

Page 41: ...ort and then select LPT1 Then click OK 8 Confirm that the installation is completed and then click Finish The Installer may ask you to restart your computer If it does select Yes I want to restart my computer now and click Finish to restart your computer 9 Click Exit When a message appears asking whether to finish the installer click Yes 10Open the printers folder Right click Start then click Cont...

Page 42: ... Windows Server 2012 or later Select the installed printer driver and right click to make the menu appear then click Printer properties When using Windows Vista Windows Server 2008 Select the installed printer driver Click Organize and then Properties 12Click the Ports tab and click Add Port 13Select Standard TCP IP Port and click New Port 14Click Next ...

Page 43: ... name of this equipment provided from DNS or WINS in the Printer Name or IP Address box In the Port Name box the port name is automatically entered according to the IP address or DNS name entered in the Printer Name or IP Address box Enter the IPv6 address in the Printer Name or IP Address box when the MFP is connected in an IPv6 network If the following screen appears select Standard and click Ne...

Page 44: ...int to the following port s list When the LPD Print setting is enabled you can also configure LPR printing When you want to configure LPR printing follow the procedure below 1 Click Configure Port 2 Select LPR at the Protocol group enter print in the Queue Name box at the LPR Settings group and then click OK 19Click OK to save the setting ...

Page 45: ...scovered over the network after the installation is started a dialog box indicating this appears Click Continue to continue the configuration 7 Enter a network path shown below in Selected printer port IP address or host name print 8 Click OK 9 Confirm that the installation is completed and then click Finish The Installer may ask you to restart your computer If it does select Yes I want to restart...

Page 46: ...he Install Disc into the disc drive Software Installer may launch automatically In this case click Exit to close it and continue the operation 2 Open the folder containing the set up program and double click Setup exe The set up programs for installing the printer drivers are contained in the following folders Universal Printer 2 driver Install Disc Client Drivers UNI Universal PS3 printer driver ...

Page 47: ...WINDOWS 5 Select I accept the terms in the license agreement and click Next The Select Port screen is displayed 6 Configure the printer port The procedure for configuring the printer port varies depending on the connection Go to the steps suited to your connection P 48 Raw TCP LPR printing P 51 SMB printing ...

Page 48: ...e SNMP settings specified in the SNMP Settings dialog box To select a temporary local port and then configure the Raw TCP LPR port click Continue Then follow the procedure as described in the following page P 50 If your TOSHIBA MFP is not found If you know the IP address of this equipment you can specify a printer port with the direct entry from the keyboard In step 7 enter a network path shown be...

Page 49: ...Drivers 49 INSTALLING PRINTER DRIVERS FOR WINDOWS 9 Confirm that the installation is completed and then click Finish The Installer may ask you to restart your computer If it does select Yes I want to restart my computer now and click Finish to restart your computer ...

Page 50: ...work after the installation is started a dialog box indicating this appears Click Continue to continue the configuration 7 Select Use the following port and then select LPT1 Then click OK 8 Click Install 9 Confirm that the installation is completed and then click Finish The Installer may ask you to restart your computer If it does select Yes I want to restart my computer now and click Finish to re...

Page 51: ...rned ON If this equipment is not discovered over the network after the installation is started a dialog box indicating this appears Click Continue to continue the configuration 7 Enter a network path shown below in Selected printer port IP address or host name print 8 Click OK 9 Click Install 10Confirm that the installation is completed and then click Finish The Installer may ask you to restart yo...

Page 52: ...k is installed in the equipment The SMB protocol is enabled and the file share function is not restricted For details ask your administrator To perform installation you must log onto Windows with the Administrator account 1 In TopAccess click the Install Software link at the bottom of the screen 2 Click the file name link for installing the preferred printer driver The installation begins and the ...

Page 53: ...he printer driver has been installed normally when SNMP V3 is configured for your TOSHIBA MFP For instructions on how to check the SNMP settings refer to SNMP Settings in the following section P 26 Procedure for Recommended Installation When the equipment is connected in an IPv4 network the installation is now complete When the equipment is connected in an IPv6 network configure the printer port m...

Page 54: ...ard disk is installed in the equipment The SMB protocol is enabled and the print share function is not restricted For details ask your administrator To perform installation you must log onto Windows with the Administrator account 1 Use the Explorer to open the equipment s shared folder MFP Local 2 Open the folder containing the preferred printer driver 3 Double click Setup exe The installation beg...

Page 55: ...he printer driver has been installed normally when SNMP V3 is configured for your TOSHIBA MFP For instructions on how to check the SNMP settings refer to SNMP Settings in the following section P 26 Procedure for Recommended Installation When the equipment is connected in an IPv4 network the installation is now complete When the equipment is connected in an IPv6 network configure the printer port m...

Page 56: ... describes how to set up the printer drivers for Raw TCP LPR printing by using Add Printer Wizard Before installing the printer driver check with your system administrator to make sure of the following This equipment is connected to the network and turned on The TCP IP setting is correct on this equipment and your computer To perform installation you must log onto Windows with the Administrator ac...

Page 57: ...NDOWS Other Installations 57 INSTALLING PRINTER DRIVERS FOR WINDOWS 3 Click Next When you are using Windows Vista Windows 7 Windows 8 1 Windows Server 2008 Windows Server 2012 the following screen is displayed Select Add a local printer ...

Page 58: ...IP address or hostname and click Next When you are using Windows Vista Windows 7 Windows 8 1 Windows Server 2008 Windows Server 2012 the following screen is displayed Select Create a new port and select Standard TCP IP Port Then click Next 5 Enter the appropriate Hostname or IP address and click Next ...

Page 59: ...INDOWS 6 Click Have Disk 7 Click Browse The Locate File dialog box appears 8 Insert the Install Disc into the disc driver of the computer When you insert the Install Disc into the disc drive Software Installer may launch automatically In this case click Exit to close it and continue the operation ...

Page 60: ...2 driver Install Disc Client Drivers UNI 32bit Universal PS3 printer driver Install Disc Client Drivers PS 32bit Universal XPS printer driver Install Disc Client Drivers XPS 32bit For the Windows computer 64 bit edition Universal Printer 2 driver Install Disc Client Drivers UNI 64bit Universal PS3 printer driver Install Disc Client Drivers PS 64bit Universal XPS printer driver Install Disc Client ...

Page 61: ...Other Installations 61 INSTALLING PRINTER DRIVERS FOR WINDOWS 12Confirm or change the Printer name and click Next 13Select whether or not to share the printer to other network users and click Next 14Click Finish The printer driver is installed ...

Page 62: ...SHIBA Universal Printer2 in Devices and Printers and select the Start printing after last page is spooled check box in the Advanced tab Windows 7 or later Windows Server 2012 or later You can install a printer driver for USB printing in Windows 7 or later Windows Server 2012 or later by using Software Installer contained in the Install Disc To perform installation you must log onto Windows with th...

Page 63: ...al Printer 2 driver When you select it proceed to step 7 Custom Install This option allows you to select the printer drivers and utilities which you want to install When you select it proceed to step 6 6 Select the software items which you want to install and then click Next 7 Confirm the list of the software to install and click Install 8 Since the result message of the detection is displayed cli...

Page 64: ...bers Then click OK 10Confirm that the installation is completed and then click Finish The Installer may ask you to restart your computer If it does select Yes I want to restart my computer now and click Finish to restart your computer 11 Click Exit When a message appears asking whether to finish the installer click Yes ...

Page 65: ...tallation and uninstallation of client software 1 Power on this equipment and your computer 2 Connect the USB cable to this equipment and your computer The Found New Hardware dialog box appears 3 Click Locate and install driver software recommended When the confirmation dialog box for online search is displayed click Don t search online 4 Insert the Install Disc into the disc drive When you insert...

Page 66: ... folder Universal Printer 2 driver Install Disc Client Drivers UNI 32bit Universal PS3 printer driver Install Disc Client Drivers PS 32bit Universal XPS printer driver Install Disc Client Drivers XPS 32bit When using the Windows computer 64 bit edition select the following folder Universal Printer 2 driver Install Disc Client Drivers UNI 64bit Universal PS3 printer driver Install Disc Client Drive...

Page 67: ...m installation corresponding to your Windows computer To perform installation you must log onto Windows with the Administrator account The certificate must be installed on both MFP and Windows Vista to perform IPP SSL printing from Windows Vista For instructions on how to install the certificate refer to TopAccess Guide 1 Open the printers folder Right click Start then click Control Panel View dev...

Page 68: ... IP address Example Print Server Name Mfp 05212774 http Mfp 05212774 631 Print When you connect from the Internet enter the FQDN of this equipment provided from DNS instead of IP address Example URL mfp_05212774 toshibatec com http mfp_05212774 toshibatec com 631 Print P for Print in the IPP URL must be capitalized The IPP port can be created by entering print non capitalized in the IPP URL but th...

Page 69: ...bled the dialog box to enter a user name and password appears If this dialog box appears enter the user name and password and click OK For the user name and password ask your administrator 7 Click Have Disk 8 Click Browse The Locate File dialog box appears 9 Insert the Install Disc into the disc drive When you insert the Install Disc into the disc drive Software Installer may launch automatically ...

Page 70: ... Windows computer 64 bit edition select the following folder Universal Printer 2 driver Install Disc Client Drivers UNI 64bit Universal PS3 printer driver Install Disc Client Drivers PS 64bit 11Click OK 12Select the printer driver and click OK When the Windows Security dialog box is displayed click Install this driver software anyway to continue the installation 13Click Next If the Printer Sharing...

Page 71: ...3 INSTALLING PRINTER DRIVERS FOR WINDOWS Other Installations 71 INSTALLING PRINTER DRIVERS FOR WINDOWS 14Click Finish The printer driver is installed ...

Page 72: ... the documentation for the Novell iPrint that is provided by Novell Inc The certificate is required to login during the Novell iPrint installation when the SSL security is enabled on the NetWare print server 1 Start your web browser and enter the following URL in the address bar http IP address or DNS for NDPS Manager ipp If you do not know the IP address or DNS for NDPS Manager ask your network a...

Page 73: ...er 2012 or later To perform installation you must log onto Windows with the Administrator account To begin the installation you must first install the printer driver to your computer For instructions on how to install it to your computer see the following page P 36 Installing the Printer Drivers 1 Open the Network screen Click Start File Explorer Network For Windows 8 1 Windows Server 2012 click t...

Page 74: ...ons of the multifunction devices are displayed in the Network screen 4 Open the Devices and Printers folder Right click Start then click Control Panel View devices and printers For Windows 8 1 Windows Server 2012 right click in the lower left of the screen then click Control Panel Devices and Printers For Windows 7 click Start Devices and Printers 5 Click Add a device ...

Page 75: ...TER DRIVERS FOR WINDOWS Other Installations 75 INSTALLING PRINTER DRIVERS FOR WINDOWS 6 Select the icon of the multifunction device of the equipment and click Next The installation begins 7 The installation is completed ...

Page 76: ...n Go to step 4 if the Network discovery is enabled Go to the next step if the Network discovery is disabled 2 Click Network discovery and file sharing is turned off Network computers and devices are not visible Click to change Then select Turn on network discovery and file sharing 3 Click Yes turn on network discovery and file sharing for all public networks Connected computers and icons of the mu...

Page 77: ...then click Install You can display only the multifunction devices by checking Multifunction Devices on the Category box PnPX Device Association is displayed on the task bar 5 Click PnPX Device Association on the task bar The Found New Hardware dialog box appears 6 Click Locate and install driver software recommended When the confirmation dialog box for online search is displayed click Don t search...

Page 78: ...rive and then click Next When you insert the Install Disc into the disc drive Software Installer may launch automatically In this case click Exit to close it and continue the operation 9 Select the printer driver to be installed and then click Next When the Windows Security dialog box is displayed click Install this driver software anyway to continue the installation 10Click Close to complete the ...

Page 79: ...matically In this case click Exit to close it 2 Open the following folder that contains the PPD file for Windows Install Disc Client Drivers WinPPD 2 sided_default This PPD file enables to set 2 sided printing by default Install Disc Client Drivers WinPPD normal This PPD file enables to set 1 sided printing by default When this equipment is used in Europe or North America use the PPD file enabling...

Page 80: ...uninstallation you must log onto Windows with the Administrator account 1 Open the Devices and Printers folder Right click Start then click Control Panel View devices and printers For Windows 8 1 Windows Server 2012 right click in the lower left of the screen then click Control Panel Devices and Printers For Windows 7 click Start Devices and Printers 2 Right click on the printer to be deleted and ...

Page 81: ...PRINTER DRIVERS FOR WINDOWS 4 Display the Drivers tab and click Change Driver Settings 5 Select the printer driver to be deleted and click Remove 6 Select Remove driver and driver package and click OK 7 Click Yes 8 Click Delete 9 Click OK 10Close the Print Server Properties dialog box ...

Page 82: ...l and click Printer under Hardware and Sound to open the Printers folder 2 Right click on the printer to be deleted and select Delete from the menu displayed When the confirmation dialog box for deletion is displayed click Yes 3 Right click in the blank area in the Printers window and click Run as administrator and then Server Properties in the menu displayed 4 Display the Drivers tab and select t...

Page 83: ...3 INSTALLING PRINTER DRIVERS FOR WINDOWS Uninstalling Printer Drivers 83 INSTALLING PRINTER DRIVERS FOR WINDOWS 7 Click Delete 8 Click OK 9 Close the Print Server Properties dialog box ...

Page 84: ...3 INSTALLING PRINTER DRIVERS FOR WINDOWS 84 Uninstalling Printer Drivers ...

Page 85: ...ctions on how to install client software for Mac OS About the Installation 86 About client software for Mac OS 86 System requirements 86 Installing the Printer on Mac OS 87 Installing the Mac OS PPD file 87 Configuring the printer 90 Uninstalling the Mac OS PPD File 97 ...

Page 86: ...t client software for Mac OS PostScript Printer Description file The Mac OS PPD PostScript Printer Description file contains information about controller specific features The PPD files and plug ins are provided for Mac OS 10 6 8 or later System requirements To install the printer drivers on a Mac computer the following environment is required Display resolution 1024 x 768 dots or more OS Mac OS X...

Page 87: ...rope or North America install the PPD file enabling 2 sided printing by default 3 Copy the GZIP file TOSHIBA_xxxxxMFP dmg gz to the desktop If Color is applied to the portion marked with xxxxx of the file name the file is intended for the color MFPs If Mono is applied to there the file is intended for the black and white MFPs Choose either Color or Mono depending on the model to be used 4 Double c...

Page 88: ...4 INSTALLING PRINTER DRIVERS FOR MAC OS 88 Installing the Printer on Mac OS 8 Click Continue 9 Click Agree ...

Page 89: ...INTER DRIVERS FOR MAC OS 10Click Install or Upgrade The Select a Destination dialog box appears by clicking Change Install Location Select the boot disk for Mac OS X and click Continue 11Enter the name and password and click Install Software It starts copying the PPD files for each language ...

Page 90: ...r in the System Folder you can configure the printer The equipment supports the following Mac OS Printing Services LPR printing P 90 Configuring LPR printing IPP printing P 92 Configuring IPP printing Bonjour printing P 94 Configuring Bonjour printing These Mac OS Printing Services are available when the equipment and your computer are connected over TCP IP network Configuring LPR printing 1 Open ...

Page 91: ...x the name that is entered in the Address box is automatically displayed Even when you enter the IP address or DNS name of this equipment in the Address box the correct PPD file is not selected in the Use box Therefore select Other in the Use box and select the PPD file TOSHIBA_xxxxxMFP_X7 gz from the Library Printers PPDs Contents Resources folder The xxxxx part of the file name is replaced in Co...

Page 92: ... Printer on Mac OS 5 Set the following options For setting items refer to the following section P 96 Option setting list 6 Click OK The printer is added to the Printer List Configuring IPP printing 1 Open System Preferences and click Printers Scanners 2 Click ...

Page 93: ...is automatically displayed Even when you enter the IP address or DNS name of this equipment in the Address box the correct PPD file is not selected in the Use box Therefore select Other in the Use box and select the PPD file TOSHIBA_xxxxxMFP_X7 gz from the Library Printers PPDs Contents Resources folder The xxxxx part of the file name is replaced in Color or Mono depending on the installed PPD fil...

Page 94: ...e box the device name that you selected in the list is automatically displayed Even when you select the equipment from the list the correct PPD file is not selected in the Use box Therefore select Other in the Use box and select the PPD file TOSHIBA_xxxxxMFP_X7 gz from the Library Printers PPDs Contents Resources folder The xxxxx part of the file name is replaced in Color or Mono depending on the ...

Page 95: ...MAC OS Installing the Printer on Mac OS 95 INSTALLING PRINTER DRIVERS FOR MAC OS 5 Set the following options For setting items refer to the following section P 96 Option setting list 6 Click OK The printer is added to the Printer List ...

Page 96: ...inisher or Saddle Stitch Finisher and Hole Punch unit are installed Job Separator Select this when the Job Separator is installed Inner Finisher 2 Trays Select this when the Inner Finisher 2 Trays is installed Drawers Drawer 1 Select this when the drawer 1 is installed Drawer 1 LCF Select this when the drawer 1 and LCF are installed Drawer 1 Drawer 3 Select this when the drawer 1 and 3 are install...

Page 97: ...install the Mac OS PPD file delete the PPD file in the following folder Library Printers PPDs Contents Resources TOSHIBA_xxxxxMFP_X7 gz Library Printers toshiba filter Library Printers toshiba Icons Library Printers toshiba PDEs The xxxxx part of the file name is replaced in Color or Mono depending on the installed PPD file ...

Page 98: ...4 INSTALLING PRINTER DRIVERS FOR MAC OS 98 Uninstalling the Mac OS PPD File ...

Page 99: ...oftware for UNIX Linux Setting Up the UNIX Linux Filters 100 About UNIX Linux filters 100 System requirements 101 Precautions for using user authentication 101 Configuring UNIX Linux printing using UNIX Linux filters 101 Setting Up the CUPS 111 About CUPS 111 Configuring UNIX Linux printing using CUPS 112 ...

Page 100: ...ptap estcolorBackend For a Color MFP and its AIX filter estbwBackend For a Black and White MFP and its AIX filter This is an executable program that is called by the AIX qdaemon It receives the arguments from the qdaemon interrogates it for copy information etc then calls the queues copy of net_estcolor net_estbw to run the print This program will be installed in opt toshiba tap bin estcoloradd Fo...

Page 101: ... ABC Abc abc are treated as a different login name in the UNIX Linux system but as the same login name in the equipment Configuring UNIX Linux printing using UNIX Linux filters When you want to configure the UNIX Linux printing using the UNIX Linux filters install the UNIX Linux filters and configure the LPR queue Installing the UNIX Linux filters UNIX Linux Filters are provided as tar files for e...

Page 102: ...x LinuxFilter Usa Black and White MFP For Solaris Install Disc Admin BW_Unix_Linux SolarisFilter Usa For HP UX Install Disc Admin BW_Unix_Linux HP UXFilter Usa For AIX Install Disc Admin BW_Unix_Linux AIXFilter Usa For Linux Install Disc Admin BW_Unix_Linux LinuxFilter Usa 5 Change to the root directory 6 Enter the following command For Solaris tar xvf solaris tar For HP UX tar xvf hpux tar For IB...

Page 103: ...a configuration file that has the destination IP address or host name Use the configuration file to change print queue parameters The lpadmin command saves a printer interface file as the print queue name and the configuration file is stored in a file named queue name conf The interface file and configuration file is saved in following directory Solaris etc lp interfaces HP UX etc lp interface IBM...

Page 104: ...ss 5 Save the file 6 Enter the following command to change the working directory cd etc lp interfaces 7 Enter the following command chmod x queue name conf 8 Enter the following command chown lp lp queue name conf 9 Enter the following command Color MFP lpadmin p queue name v dev null I any i usr lib lp model net_estcolor Black and White MFP lpadmin p queue name v dev null I any i usr lib lp model...

Page 105: ... outputted on the screen turn the scheduler OFF Enter the following command usr sbin lpshut dev null 2 1 12Enter the following command Color MFP usr sbin lpadmin p queue name v dev null mnet_estcolor orm queue name orpprint ob3 Black and White MFP usr sbin lpadmin p queue name v dev null mnet_estbw orm queue name orpprint ob3 13Enter the following command usr sbin accept queue name 14Enter the fol...

Page 106: ...ueue manually on Linux 1 Enter the following command ls opt toshiba tap interface 2 If the above directory does not exist enter the following command mkdir opt toshiba tap interface 3 Log on to the root account 4 Open your UNIX Linux editor 5 Create the following file opt toshiba tap interface queue name conf 6 Add a line as below in the queue name conf dest IP address 7 Save the file 8 Enter the ...

Page 107: ...ing Up the UNIX Linux Filters 107 INSTALLING PRINTER DRIVERS FOR UNIX Linux 11If the above file exists enter the following command opt toshiba tap bin printconf_import a queue name IP_ADDRESS rm opt toshiba tap bin flag_ queue name 12Restart your lpd ...

Page 108: ...directory Solaris etc lp interfaces HP UX etc lp interface IBM AIX opt toshiba tap filter Linux opt toshiba tap interface For example to change the default orientation to Landscape add the following line orient LANDSCAPE Deleting the print queue There are two ways to delete the print queue one is deleting a print queue using estcolorrm estbwrm and the other is deleting a print queue manually witho...

Page 109: ...ually on Solaris 1 Log on to the root account 2 Enter the following command lpadmin x queue name 3 Enter the following command rm etc lp interfaces queue name conf Deleting a print queue manually on HP UX 1 Log on to the root account 2 Enter the following command ps ef grep lpsched grep iv grep dev null 2 1 3 Enter the following command echo 4 If 0 outputted on the screen turn the scheduler OFF En...

Page 110: ...ter the following command rmque q queue name Deleting a print queue manually on Linux 1 Log on to the root account 2 Enter the following command rm opt toshiba tap interface queue name 3 Enter the following command rm opt toshiba tap interface queue name conf 4 Enter the following command opt toshiba tap bin modPrintcap d queue name 5 Enter the following command ls opt toshiba tap bin flag_ queue ...

Page 111: ...od of the CUPS printer driver for the equipment The behavior of the printer driver presented in this specification is consistent with CUPS v1 1 15 The driver may appear and or operate slightly differently in different versions In the CUPS environment use a PostScript Printer Description PPD file not a printer driver to configure the printing The PPD file is included in this package Implementation ...

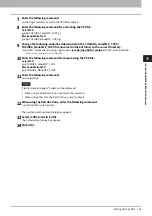
Page 112: ...TOSHIBA_MonoMFP_CUPS tar A tar file is included in the following folder in the Install Disc Color MFP Admin Color_Unix_Linux CUPS Usa 2 sided_default This PPD file enables to set 2 sided printing by default Admin Color_Unix_Linux CUPS Usa normal This PPD file enables to set 1 sided printing by default Black and White MFP Admin BW_Unix_Linux CUPS Usa 2 sided_default This PPD file enables to set 2 s...

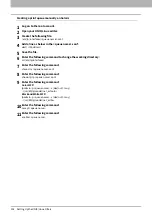
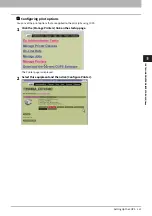
Page 113: ... the target directory to which the PPD file is copied 8 Enter the following command for extracting the PPD file Color MFP gunzip TOSHIBA_ColorMFP_CUPS gz Black and White MFP gunzip TOSHIBA_MonoMFP_CUPS gz 9 Change the following underlined description in the TOSHIBA_ColorMFP_CUPS TOSHIBA_MonoMFP_CUPS file involved in the 60th line to the correct directory cupsFilter application vnd cups postscript ...

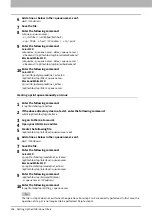
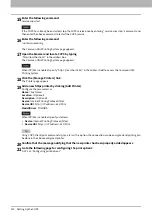
Page 114: ...nfig The Common UNIX Printing System page appears Skip to step 18 17Open the browser and locate CUPS by typing http localhost 631 in the address box The Common UNIX Printing System page appears 18Click the Manage Printers link The Printer page is displayed 19Click Add Printer The Admin page is displayed 20Enter the printer name location and description of the printer in each box and click Continue...

Page 115: ...ux 21Select LPD LPR Host or Printer in the Device box and click Continue 22Enter lpd IP address Print in the Device URI box and click Continue Make sure to capitalize the P in Print for the device URI 23Select TOSHIBA in the Make box and click Continue If you do not see TOSHIBA in the Make list restart CUPS ...

Page 116: ...ting Up the CUPS 24Select the PPD in the Model list and click Continue 25Confirm that the message notifying that the new printer has been properly added appears 26Go to the following page for configuring the print options P 121 Configuring print options ...

Page 117: ...ficates in the etc cups directory should be created 1 Enter the following command cd etc cups mkdir ssl 2 Enter the following command openssl req new x509 keyout etc cups ssl server key out etc cups ssl server crt days 365 nodes The above command must be entered as one continuous command with no carriage returns The user will be prompted to enter country state province locality organization organi...

Page 118: ...command cd 5 Extract the tar file by entering the following command Color MFP tar xvf TOSHIBA_ColorMFP_CUPS tar Black and White MFP tar xvf TOSHIBA_MonoMFP_CUPS tar When you execute this command the PPD file and filter file will be automatically installed in the correct directory When you use other than Linux or you do not use the CUPS system as the standard installation proceed to the next step W...

Page 119: ...ry cupsFilter application vnd cups postscript 0 usr lib cups filter Toshiba estXXXX_Authentication XXXX is the model name of the TOSHIBA MFP 10Enter the following command for compressing the PPD file Color MFP gzip TOSHIBA_ColorMFP_CUPS Black and White MFP gzip TOSHIBA_MonoMFP_CUPS 11Enter the following command service lpd stop If lpd is already stopped Failed will be displayed When using the Red ...

Page 120: ...to access the Common UNIX Printing System 18Click the Manage Printers link The Printer page appears 19Add a new https printer by clicking Add Printer Configure the parameters as Name Any Name Location Optional Description Optional Device Internet Printing Protocol http Device URI http IP address 631 Print Model Driver TOSHIBA When IPP SSL is enabled specify as follows Device Internet Printing Prot...

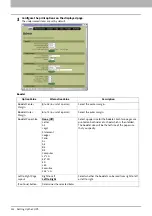
Page 121: ...ING PRINTER DRIVERS FOR UNIX Linux Configuring print options You can set the print options that are applied to the print jobs using CUPS 1 Click the Manage Printers link on the startup page The Printer page is displayed 2 Select this equipment and then click Configure Printer ...

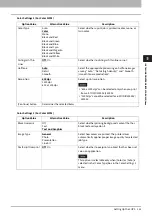
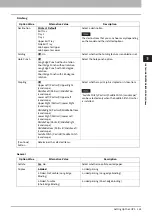
Page 122: ...it of 6 points Select the outer margin Booklet Paper Size None Off Letter A4 Legal Statement Ledger Folio A3 A5 B4 B5 Computer 13 LG 8 5 SQ 8K 16K Executive 13 5 LG Select a paper size for the booklet Each two pages are printed on both sides of a sheet which is then folded The booklet size will be the half size of the paper size that you specify Left to Right Page Layout Right to Left Left to Righ...

Page 123: ...oth smooth tone reproduction Resolution 600 dpi 1200 dpi 600 x 1200 dpi Select a print resolution 600 x 1200 dpi can be selected only when you print from e STUDIO2000AC 2500AC 1200 dpi cannot be selected for e STUDIO2000AC 2500AC Continue button Determines the selected items Option Value Alternative Value Description Black Overprint Off Text Text and Graphics Select whether printing background con...

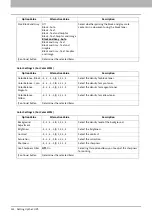
Page 124: ...ck toner Color Balance Cyan 4 3 2 1 0 1 2 3 4 Select the density for cyan toner Color Balance Magenta 4 3 2 1 0 1 2 3 4 Select the density for magenta toner Color Balance Yellow 4 3 2 1 0 1 2 3 4 Select the density for yellow toner Continue button Determines the selected items Option Value Alternative Value Description Background Adjustment 4 3 2 1 0 1 2 3 4 Select the density level of the backgro...

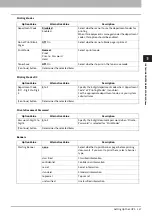
Page 125: ... Off Upper Left Portrait Upper Right Landscape Middle Left Portrait Middle Top Landscape Lower Left Portrait Upper Left Landscape Upper Right Portrait Lower Right Landscape Middle Right Portrait Middle Bottom Landscape Lower Right Portrait Lower Left Landscape Middle Top Portrait Middle Right Landscape Middle Bottom Portrait Middle Left Landscape Saddle Stitch Portrait Saddle Stitch Landscape Sele...

Page 126: ...Thick 1 Thick 2 Thick 3 Thick 4 OHP sheet Thin Select the paper source Continue button Determines the selected items Option Value Alternative Value Description Model Selection TOSHIBA e STUDIO5005ACSeries TOSHIBA e STUDIO5008A Series TOSHIBA e STUDIO7506AC Series TOSHIBA e STUDIO8508A Series Drawers Drawer 1 Drawer 1 LCF Drawer 1 Drawer 2 Drawer 1 2 LCF Select an optional drawer Finisher Not Insta...

Page 127: ... Option Value Alternative Value Description Department Code DC Digit 1 to Digit 5 0 to 9 Specify the 5 digit department code when Department Code of Printing Modes is enabled For the appropriate department code ask your system administrator Continue button Determines the selected items Option Value Alternative Value Description Password Digit 1 to Digit 5 0 to 9 Specify the 5 digit document passwo...

Page 128: ...fidential Confidential information secret Secret information standard Standard information topsecret Top secret unclassified Unclassified information Continue button Determines the selected items Option Value Alternative Value Description PS Binary Protocol None TBCP Select whether to process print data in a binary format using PostScript and using TBCP protocol Continue button Determines the sele...

Page 129: ...LING PRINTER DRIVERS FOR UNIX Linux Modifying printer You can modify a printer that you have created 1 Click the Manage Printers link on the startup page The Printer page is displayed 2 Click Modify Printer 3 Modify the location and description in each box and click Continue ...

Page 130: ...eated carry out the following procedure 1 Click the Manage Printers link on the startup page The Printer page is displayed 2 Click Delete Printer When a message appears asking to remove the printer click Continue The printer is deleted 3 Delete the PPD file TOSHIBA_ColorMFP_CUPS gz from the usr share cups model Toshiba directory ...

Page 131: ...ver and scan utilities Before Installation 132 Type of scan driver and utilities 132 System requirements 132 Installing Scan Driver and Utilities 133 Installing the scan driver and utilities using the installer 133 Installing WIA driver to Windows computer 135 Uninstalling Scan Driver and Utilities 138 ...

Page 132: ... to import the scanned images into your WIA compliant application System requirements To install the scan driver and utilities on a Windows computer the following is required Display resolution 1024 x 768 dots or more Display color High Color 16 bit or higher is recommended CPU Pentium 133 MHz minimum Pentium 266 MHz or faster recommended OS Windows Vista Service Pack 2 or later Windows Server 200...

Page 133: ...ollowing page P 135 Installing WIA driver to Windows computer To perform installation you must log onto Windows with the Administrator account this enables the installation and uninstallation of client software 1 Insert the Install Disc into the disc drive If Software Installer does not automatically start use the Explorer to open the e STUDIO folder in the Install Disc and double click Setup exe ...

Page 134: ...g Scan Driver and Utilities The Installer may ask you to restart your computer If it does select Yes I want to restart my computer now and click Finish to restart your computer 6 Click Exit When a message appears asking whether to finish the installer click Yes ...

Page 135: ... Experience from Server Manager of Administrative Tools Select Windows Image Acquisition WIA from Services of Administrative Tools and change the Startup Type from Disabled to Automatic Select PnP X IP Bus Enumerator from Services of Administrative Tools and change the Startup Type from Disabled to Automatic For Windows Server 2012 Install Desktop Experience from Server Manager of Administrative T...

Page 136: ...ices are displayed in the Network screen 4 Open the printers folder Right click Start then click Control Panel View devices and printers For Windows 8 1 Windows Server 2012 right click in the lower left of the screen then click Control Panel Devices and Printers For Windows 7 click Start Devices and Printers For Windows Vista Windows Server 2008 click Start Control Panel Hardware and Sound Printer...

Page 137: ...f the multifunction device of the equipment and click Next When you are using Windows 7 or later Windows Server 2012 or later the installation begins When you are using Windows Vista or Windows Server 2008 PnPX Device Association is displayed on the task bar After clicking PnPX Device Association the installation begins 7 The installation is completed ...

Page 138: ...Open the Network folder as well as the installation procedure Then right click on this equipment and click Uninstall Then the uninstallation is performed When you are using Windows 8 1 or later Windows Server 2012 or later Open the Devices and Printers folder right click on this equipment and then select Remove device from the menu displayed Uninstalling TOSHIBA Office Scan Add In You can uninstal...

Page 139: ...the network fax utilities Before Installation 140 Type of network fax utilities 140 System requirements 140 Installing Network Fax Utilities 141 Installing Web Service Print 142 Uninstalling the Network Fax Software 143 Uninstalling N W Fax driver 143 Uninstalling AddressBook Viewer 143 ...

Page 140: ...ted on the cover pages AddressBook Viewer With the AddressBook Viewer you can easily add or modify fax recipient names fax numbers and E mail addresses to the Address Book This utility allows you to manage recipients of the fax select and display fax recipients from the Address Book as well as recipient fax numbers and other contact information Additionally AddressBook Viewer allows you to import ...

Page 141: ...n the Install Disc and double click Setup exe 2 Select I agree to the terms of the License Agreement and click Next To change the display language select the desired language from the Select Language box 3 Click Fax Driver 4 Confirm the list of the software to install and click Install When you want to verify and or change the SNMP settings to find the target TOSHIBA MFPs see step 4 in the followi...

Page 142: ...ll a N W Fax driver in Windows Vista or later Windows Server 2008 or later using the WSD Web Services on Devices protocol Since the installation procedure is the same as for printer drivers it is omitted When performing installation see the following page P 73 Web Service Print ...

Page 143: ...river You can uninstall a N W Fax driver Since the uninstallation procedure is the same as for printer drivers it is omitted When performing uninstallation see the following page P 80 Uninstalling Printer Drivers Uninstalling AddressBook Viewer You can uninstall AddressBook Viewer using Uninstall a program function in Control Panel For instructions on how to uninstall them refer to the following s...

Page 144: ...7 INSTALLING NETWORK FAX UTILITIES Windows 144 Uninstalling the Network Fax Software ...

Page 145: ... Windows This chapter describes the installation of the e Filing Backup Restore Utility Before Installation 146 System requirements 146 Installing e Filing Backup Restore Utility 147 Uninstalling e Filing Backup Restore Utility 149 ...

Page 146: ...commended CPU Pentium 133 MHz minimum Pentium 266 MHz or faster recommended Memory The required memory size for OS OS Windows Vista Service Pack 2 or later Windows Server 2008 Service Pack 2 or later Required software Internet Explorer 9 0 or later Microsoft Edge Firefox 38 or later Chrome 45 or later The e Filing Backup Restore Utility is not supported by 64 bit editions of the operating systems ...

Page 147: ...n by temporarily changing the user account following the procedure below Open the Admin e FilingUtility folder in the Install Disc and then double click Setup exe When the User Account Control dialog box is displayed enter an administrator password and then click Yes OK 1 Insert the Install Disc into the disc drive When you insert the Install Disc into the disc drive Software Installer may launch ...

Page 148: ...Select I accept the terms in the license agreement and click Next 6 Click Next 7 Click Install 8 Click Finish The installation is completed The Installer may ask you to restart your computer If it does select Yes I want to restart my computer now and click Finish to restart your computer ...

Page 149: ... Utility 149 0 Uninstalling e Filing Backup Restore Utility You can uninstall e Filing Backup Restore Utility using the Uninstall a program function in Control Panel For instructions on how to uninstall them refer to the following section P 152 Uninstalling Client Software ...

Page 150: ...8 INSTALLING e Filing UTILITY Windows 150 Uninstalling e Filing Backup Restore Utility ...

Page 151: ...9 INSTALLATION MAINTENANCE This chapter describes how to uninstall and repair the client software using the set up program Uninstalling Client Software 152 Repairing Client Software 154 ...

Page 152: ...m uninstallation you must log onto Windows with the Administrator account this enables the installation and uninstallation of client software 1 Open the Uninstall a program folder Right click Start then click Control Panel Uninstall a program For Windows 8 1 Windows Server 2012 from the setting charm click Control Panel Uninstall a program For Windows Vista Windows 7 Windows Server 2008 click Star...

Page 153: ...53 INSTALLATION MAINTENANCE 4 Click Yes to delete the setting files Deleting files starts If you want to reinstall the client software later click No to have the setting files remain You can restore the data and settings when you reinstall the client software ...

Page 154: ...air and double click the setup exe icon To repair TWAIN Driver for Windows computer 32 bit edition locate Install Disc Client TWAIN 32bit To repair TWAIN Driver for Windows computer 64 bit edition locate Install Disc Client TWAIN 64bit To repair File Downloader locate Install Disc Client FD To repair Remote Scan Diver for Windows computer 32 bit edition locate Install Disc Client RS 32bit To repai...

Page 155: ...9 INSTALLATION MAINTENANCE Repairing Client Software 155 INSTALLATION MAINTENANCE 7 Click Finish to close the wizard ...

Page 156: ...9 INSTALLATION MAINTENANCE 156 Repairing Client Software ...

Page 157: ...EGARDING INSTALLATION Windows This chapter describes how to uninstall and repair the client software using the set up program Cautions before installation 158 Messages that may appear in installation 159 Cautions after installation 160 ...

Page 158: ...aller by temporarily changing the user account following the procedure below Open the e STUDIO folder in the Install Disc and then double click Setup exe When the User Account Control dialog box is displayed enter an administrator password and then click Yes OK If Windows Vista or later Windows Server 2008 or later is used you can perform the installation by temporarily changing the user account f...

Page 159: ...ES REGARDING INSTALLATION Windows Messages that may appear in installation 159 0 Messages that may appear in installation If the following message appears click Install this driver software anyway to proceed with the installation ...

Page 160: ... dialog box enables you to perform the installation by temporarily changing the user account Even when you have logged on Windows with the Administrator account the User Account Control dialog box may appear In this case click a button for allowing the operation such as Continue and then continue Before using the printer driver for printing configure the installed options of the equipment and depa...

Page 161: ...67 M Mac OS PPD 86 N N W Fax driver 16 140 Novell iPrint 22 35 P PostScript 12 PPD 14 Printer Drivers 16 34 R Raw TCP LPR Printing 35 Remote Scan Driver 16 132 S SMB Printing 35 System Requirements Mac OS 86 UNIX Linux 101 Windows 34 T TWAIN Driver 16 132 U Uninstalling 80 143 Universal Printer 2 12 UNIX Linux Filters 100 USB Printing 62 W Web Service Print 35 WIA driver 16 132 ...

Page 162: ...162 INDEX ...

Page 163: ...FC 2000AC 2500AC FC 2505AC 3005AC 3505AC 4505AC 5005AC DP 2008A 2508A 3008A 3508A 4508A 5008A FC 5506AC 6506AC 7506AC DP 5508A 6508A 7508A 8508A OME150059B0 ...

Page 164: ... JAPAN MULTIFUNCTIONAL DIGITAL COLOR SYSTEMS MULTIFUNCTIONAL DIGITAL SYSTEMS Software Installation Guide 2016 TOSHIBA TEC CORPORATION All rights reserved Patent http www toshibatec co jp en patent R150620Q7302 TTEC Ver02 F Issued in Oct 2016 ...

Reviews: