1.LOADING PAPER
24 Loading Paper on the Bypass Tray
Standard size paper on the bypass tray
Automatic 2-sided printing cannot be applied to some kind of paper in the bypass tray. For the paper which
Automatic 2-sided printing cannot be applied to, refer to the Specifications Guide.
For OHP films (Transparency), only 1-sided printing can be performed.
If paper cannot be fed, printing takes a long time after feeding or the quality is poor, turn over the paper and place
it again or place fewer sheets.
1
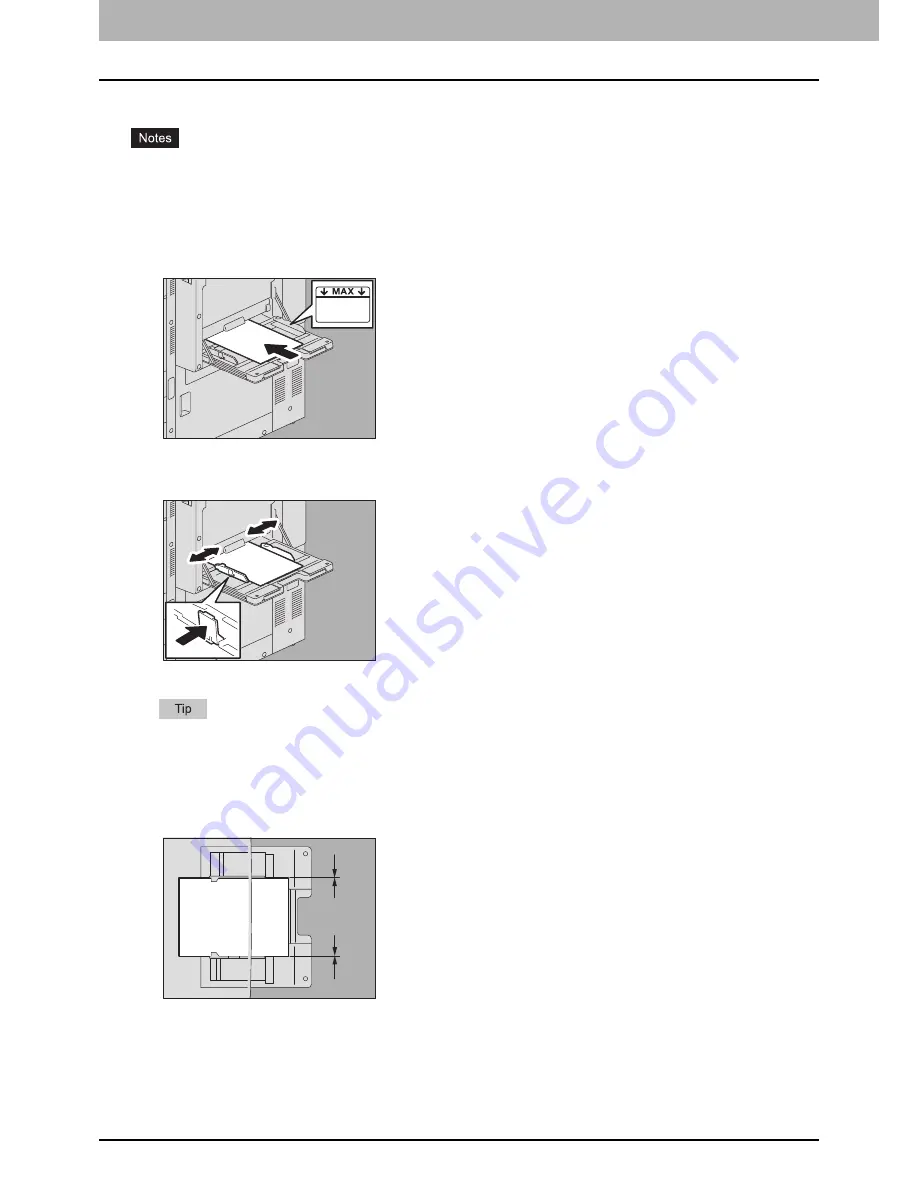
Place paper with its print side down on the bypass tray.
2
Hold the knob and align the side guides to the paper length.
When paper is placed, the menu for bypass tray settings appears.
There is no affect on the printing quality though noise may occur during paper feeding depending on the paper
type.
3
Check that there is no gap between the paper and the side guides.
If the gap is too wide, it could cause paper misfeeding, or the paper size could not be correctly detected.
Between the paper and side guides (“A” in the figure):
Make sure there is no gap. (0.5 mm (0.02") or less on one side, 1.0 mm (0.04") or less in total) However, if paper
misfeeding occurs, make a gap.
A
A
Summary of Contents for E-Studio 5506AC
Page 1: ...MULTIFUNCTIONAL DIGITAL COLOR SYSTEMS MULTIFUNCTIONAL DIGITAL SYSTEMS Paper Preparation Guide ...
Page 6: ...6 CONTENTS ...
Page 30: ...1 LOADING PAPER 30 Loading Paper on the Bypass Tray ...
Page 40: ...2 PLACING ORIGINALS 40 Placing Originals ...
Page 44: ...44 INDEX ...
Page 45: ...FC 5506AC 6506AC 7506AC DP 5508A 6508A 7508A 8508A OME15012700 ...


