Toshiba 32RV600E Owner'S Manual Download Page 3

3

Introduction

Welcome to Toshiba

•  Thank you for purchasing this Toshiba LCD 

Colour TV. This manual will help you use the 
exciting features of your new TV.

•  Instructions in this manual are based on using 

the remote control.

•  You also can use the controls on the TV if they 

have the same name as those referred to on 
the remote control.

•  Please read all safety and operating 

instructions in this manual carefully, and keep 
this manual for future reference.

Important Safety Instructions

Be sure to observe the following instructions and 
precautions to ensure safe use of this TV.

Installation

1)  Always connect the power plug to an 

appropriate electrical outlet equipped with 
E model: 220-240V, AC 50/60Hz, T model: 
110-240V, AC 50/60Hz and Y model: 220-
240V, AC 50Hz.

Never use the TV outside the specifi ed voltage 
range. It may cause a fi re or an electric shock.

Check!

Ex. 220-240V AC, 50/60Hz

WARNING ABOUT THREE-WIRE 
GROUNDING-TYPE PLUG: (Only for E 
models)

•  This product shall be connected to a main 

socket outlet with a protective earthing 
connection.

•  Never remove the earthing pin on the power 

plug. This system is equipped with a three 
pin earthing-type power plug. This plug will 
only fi t an earthing-type power outlet. This is 
a safety feature. If you are unable to insert 
the plug into the outlet, contact an electrician 
to replace the wall outlet.

•  Never defeat the purpose of the earthing 

plug.

About the fuse

In a three pin earthing-type, the fuse fi tted 
in this plug is approved by ASTA or BSI to 
BS1362. It should only be replaced by a 
correctly rated and approved type and the
fuse cover must be refi tted.

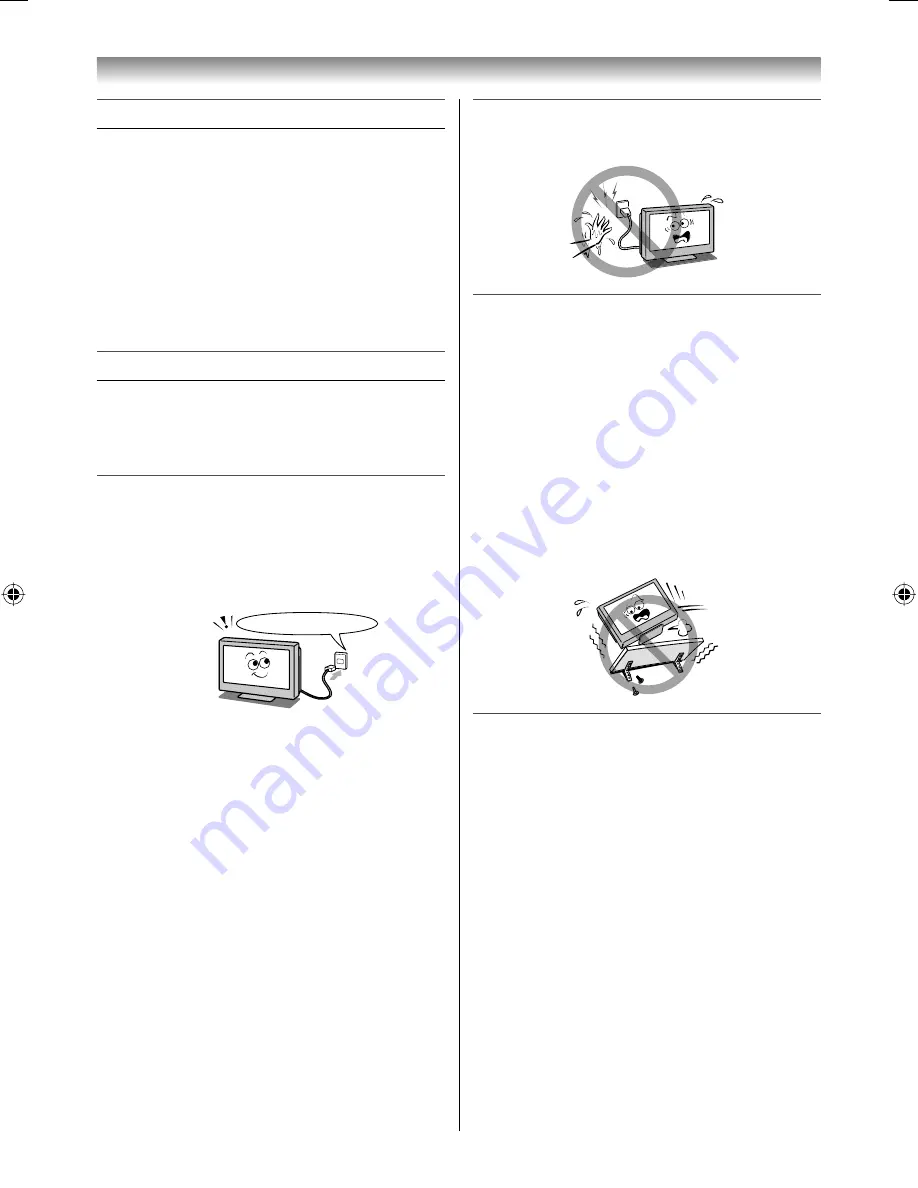
2) Never insert or remove the power plug with 

wet hands.

This may cause an electric shock.

3) Never place the TV in an unstabilized 

location such as on a shaky table, incline 
or location subject to vibration.

•  Only use cabinets or stands recommended 

by the TV manufacturer.

•  Only use furniture that can safely support 

the TV.

•  Ensure that the TV is not hanging over the 

edge of the supporting furniture.

•  Never place the TV on tall furniture (for 

example, cupboards or bookcases) without 
anchoring both the furniture and the TV to a 
suitable support.

The TV may drop or fall off, which may cause 
an injury or damage.

4) Never block or cover the slots and 

openings in the cabinet.

•  Never place the TV so that it is facing 

upward or on its side.

•  Never place the TV in a closet, bookcase or 

other similar area where the ventilation is 
poor.

•  Never drape a newspaper, tablecloth or 

curtain on the TV.

•  Never stand the TV on cloth or other 

material placed between the TV and 
supporting furniture.

•  When installing the TV against a wall, 

always keep the TV at least 10 cm away 
from the wall.

•  Never place the TV on a soft unstable 

surface, such as a carpet, or a cushion.

324246RV600ETY_En.indd   3

324246RV600ETY_En.indd   3

7/28/2009   10:08:03 AM

7/28/2009   10:08:03 AM

Summary of Contents for 32RV600E

Page 1: ... the TV Record these numbers in the spaces provided below Refer to them whenever you call upon your TOSHIBA dealer regarding this product Model number Serial number 32RV600E 32RV600T 32RV600Y 42RV600E 42RV600T 42RV600Y 46RV600E 46RV600T 46RV600Y 2009TOSHIBA CORPORATION All Rights Reserved VX1A00146200 YC J ...

Page 2: ... channels into the TV s channel memory 16 Using the TV s features Picture adjustment 18 Sound adjustment 22 Other features settings 23 Selecting the video input source to view 24 Channel List 25 Watching PIP Picture in Picture 25 Using REGZA LINK 26 Teletext 27 Connecting your TV Side connections 30 Back connections 30 Connecting HDMI or DVI devices 30 Selecting the PC HDMI1 audio mode 32 Setting ...

Page 3: ...lug into the outlet contact an electrician to replace the wall outlet Never defeat the purpose of the earthing plug About the fuse In a three pin earthing type the fuse fitted in this plug is approved by ASTA or BSI to BS1362 It should only be replaced by a correctly rated and approved type and the fuse cover must be refitted 2 Never insert or remove the power plug with wet hands This may cause an...

Page 4: ...er Use as short a tie as possible to ensure the TV is stable If the TV is not installed securely it may lean or fall over and cause an injury To prevent injury use the exclusive optional stand or wall hanging bracket to install this TV on the floor or wall securely in accordance with a qualified technician Top view Sturdy tie as short as possible Clip Side view Clip Clip 9 Precautions for moving t...

Page 5: ...y and contact a service technician Be especially careful that children do not insert objects in the TV Clip 4 Never stand or climb on the TV Educate children about the dangers of climbing on furniture to reach the TV or its controls Be especially careful in households with children to prevent them through climbing on top of the TV It may move fall over break become damaged or cause an injury 5 Whe...

Page 6: ...s broken turn off the TV and remove the power plug from the outlet immediately If the TV has power in this condition it may cause a fire or an electric shock If the cabinet is broken be careful when handling the TV to prevent an injury Contact a service technician for inspection and repair 4 When the TV reaches the end of its useful life ask a qualified service technician to properly dispose of th...

Page 7: ...not a sign of malfunction 6 About afterimage If a still picture is displayed an afterimage may remain on the screen however it will disappear This is not a sign of malfunction Exemptions Toshiba is not liable for any damage caused by fires natural disaster such as thunder earthquake etc acts by third parties accidents owner s misuse or uses in other improper conditions Toshiba is not liable for in...

Page 8: ...tarted Exploring your new TV Installing the remote control batteries Remove the battery cover Insert two R03 AAA batteries matching the polarities of the battery to the marks inside the battery compartment Cautions Dispose of batteries in a designated disposal area Batteries must not be exposed to excessive heat such as sunshine fire or the like Attention should be drawn to the environmental aspec...

Page 9: ...gs page 14 4 MENU Press to access the menu system page 14 RETURN When a menu is on screen this button will take you back to the previous page 15 5 o Input source selection When no menu is on screen this button selects the input source page 24 OK When a menu is on screen this button will take you back to the previous menu page 14 6 USB input terminal Insert your USB storage device here to view phot...

Page 10: ...terminal is for service use only 18 O MONITOR output terminals Standard video and standard audio outputs page 30 19 o 1 Video 1 input terminals Standard composite video and standard analogue stereo audio inputs page 30 20 o 3 Video 3 input terminals High definition component video and standard analogue stereo audio inputs page 30 21 o 4 Video 4 input terminals High definition component video and s...

Page 11: ...ess AUDIO to toggle between different audio mode Sound mute This button turns the sound off on Programme position U u page 15 Input source selection TV o1 o4 HDMI1 HDMI4 PC page 24 To access the Quick Menu page 14 EXIT page 15 To return to the previous menu page 15 To display on screen information page 15 Initial index function for Teletext page 29 Stereo bilingual selection page 22 Subtitle on of...

Page 12: ... change the channel To return to previous menu accessed Press to EJECT Press to STOP Press to PLAY Press to PAUSE Press to SKIP BACK Press to REWIND Press to FAST FORWARD Press to SKIP FORWARD The REGZA LINK mode switch on the TV remote control allows control of the connected REGZA LINK device being watched pages 26 27 Note These functions are dependent on the connected device Not all of the remot...

Page 13: ...ory function turns on the TV automatically when power is applied again If power is going to be off for a long time and you are going to be away from your TV unplug the power cord to prevent the TV from turning on in your absence Tuning the TV for the first time Before switching on the TV put your decoder and media recorder to Standby if they are connected and ensure that the aerial is connected To...

Page 14: ...PC Setting Picture position Quick Setup Location English Home PICTURE Picture settings 3D Colour management Base colour adjustment Active Backlight Control Auto Brightness Sensor MPEG NR DNR Off On Off Low Auto PICTURE Picture settings 3D Colour management Base colour adjustment Active Backlight Control Auto Brightness Sensor MPEG NR DNR Off On Off Low Auto SET UP Language Auto tuning Manual tunin...

Page 15: ...g Manual tuning Manual setting AV connection PC Setting Picture position Quick Setup English 2 Press V or U to select Language 3 Press Y or Z to select the desired language Changing the position 1 Enter the desired position number using the Number buttons on the remote control For positions below 10 use 0 and the required number e g for position 1 4 ABCD 2 You can also change the position by using...

Page 16: ...ich sound of broadcast transmission system adopts M system the sound system may not be tuned correctly if the radio waves transmit badly At that time preset the channel by Manual tuning The countries such as Myanmar Brazil Chile Colombia apply to this case See page 38 for more details Manual tuning 1 From the SET UP menu press V or U to select Manual tuning 2 Press Q to display the Manual tuning m...

Page 17: ... or Store mode Home is recommended for normal home use Select Store when using a TV for displaying in a shop etc 1 From the SET UP menu press V or U to select Location 2 Press Y or Z to select Home or Store Getting started Sorting positions The TV is capable of receiving a number of different channels depending upon where you live Sorting programme position is an easy way of storing each channel o...

Page 18: ...y stretching the image horizontally and vertically holding better proportions at the centre of the image Some distortion may occur Cinema When watching all sides panel format films video tapes this setting will eliminate or reduce the black bars on all the sides of the screen by zooming in and selecting the image without distortion Subtitle When subtitles are included on a letterbox format broadca...

Page 19: ...unction except for the purpose of your private viewing and listening it may infringe the copyright protected by the copyright laws Adjusting the picture position Adjustment to the position of the picture may be made to suit your viewing preferences 1 Press MENU then press Y or Z to display the SET UP menu SET UP Language Auto tuning Manual tuning Manual setting AV connection PC Setting Picture pos...

Page 20: ...Picture settings menu press V or U to select either Backlight Contrast Brightness Colour Tint or Sharpness and press Q 2 Press Y or Z to adjust the settings Note Backlight Contrast Brightness Colour Tint Sharpness Black White Level and Colour Temperature are not available when Picture Mode is set to AutoView Setting the black white level Black White Level improves the definition of dark areas of t...

Page 21: ... PICTURE menu press V or U to select Auto Brightness Sensor 2 Press Y or Z to select On or Off 2 Press Y or Z to select Cool Natural or Warm to suit your preference Colour Temperature Colour Temperature Cool Red Level Green Level Blue Level 0 0 0 3 Press V or U to select Red Level Green Level or Blue Level then press Y or Z to adjust the setting as required Resetting the picture settings This func...

Page 22: ...eft channel Sound adjustment Setting the MTS Multi channel TV Sound Auto mode The MTS Auto mode automatically recognize stereo bilingual programmes depending on the broadcast signal 1 Press MENU and then press Y or Z to display the SOUND menu SOUND MTS Dual Bass Treble Balance Advanced Sound Settings Stable sound Dual 1 Auto Off 0 0 0 2 Press V or U to select MTS and then press Y or Z to select Au...

Page 23: ...es settings Selecting the timer menu The Timer is especially useful if you want the TV to turn itself on or off after a selected period of time 1 Press MENU and then press Y or Z to display the TIMER menu TIMER Sleep timer On timer On timer Position 0 0 0 0 0 0 0 0 01 2 Press V or U to select the required timer mode Sleep timer Turn off the TV or On timer 3 Press the Number buttons 0 9 Y or Z to s...

Page 24: ...ect the item as shown below Manual setting Colour system Auto EXT1 A A B A Colour system Confirm that colour system is set to A Auto If not select A with V or U Activating blue screen With the blue screen function On the screen will automatically turn blue and the sound will be muted when no signal is being received 1 From the FUNCTION menu press V or U to select Blue screen 2 Press Y or Z to sele...

Page 25: ... HDMI Component video or PC pictures When the main picture is a picture from HDMI Component video or PC pictures the sub picture can only be from a TV or Standard video pictures Displaying a sub picture 1 Select the TV programme or HDMI signal you want to watch 2 Press to open the Quick Menu press V or U to select PIP 3 Press Q to display a sub picture will appear on the screen Main picture Sub pi...

Page 26: ...utput from the AV amplifier s speakers even if TV Speakers has been selected for Speaker Preference in the REGZA LINK menu Turn the TV first to standby and on again to output the sound from the TV s speaker The proper function may not work by operating AV amplifier In this mode the PIP function page 25 is not available The above functions are dependent on the connected device and TV setting REGZA ...

Page 27: ...ble from connected device is changed or HDMI cable from connected device setting are changed Enable REGZA LINK in the REGZA LINK menu may need to be reset On To control the REGZA LINK device First select the HDMI input source with the desired REGZA LINK device connected then switch the mode on the remote control to REGZA LINK and press the available button on the remote control page 12 On the sub ...

Page 28: ...e page numbers currently stored on the each colour button Using the TV s features Note If you press r while the Picture Mode is activated this mode will be cancelled Sub pages Once in this chosen page if there are sub pages they will automatically load into memory without changing the one you are reading If there are many sub pages it will take a long time for them all to load and this will depend...

Page 29: ...age A To reveal concealed text Some pages cover topics such as quizzes and jokes To discover the solutions press A B To hold a wanted page This function is included as it is part of the broadcast teletext system but you will not need it as this TV allows you to control the display of sub pages C To enlarge the teletext display size Press C once to enlarge the top half of the page press again to en...

Page 30: ...OMPONENT VIDEO INPUT COMPONENT VIDEO INPUT VIDEO AUDIO R Y L MONO PR CR PB CB MONITOR VCR Normal DVD video player with component video outputs Set Top Box VCR Recording TV back view Before connecting any external equipment turn off all main power switches The unauthorized recording of television programmes DVDs video tapes and other materials may infringe upon the provisions of copyright law The C...

Page 31: ...e that some devices may not operate properly with the TV E EDID Enhanced Extended Display Identification Acceptable PC signal format S VGA VESA 800 5 600 56 60 72 75 Hz XGA VESA 1024 5 768 60 70 75 Hz W XGA VESA 1280 5 768 60 75 Hz W XGA VESA 1360 5 768 60 Hz S XGA VESA 1280 5 1024 60 75 Hz However these signal formats are converted to match the number of pixels of the LCD panel Therefore the TV m...

Page 32: ...the TV An analogue RGB 15 pin computer cable can be connected PC RGB PC HDMI 1 AUDIO Computer Audio cable for PC to TV connection Conversion adapter if necessary RGB PC cable Mini D sub 15 pin Back of TV Connect a PC cable from the computer to the o RGB PC terminal on the back of the TV The following signals can be displayed VGA VESA 640 480 60 72 75 Hz S VGA VESA 800 600 56 60 72 75 Hz XGA VESA 1...

Page 33: ... However features not available will be greyed out In the PC input mode the Manual setting page 24 is not displayed First press L until the video input mode list appears on the screen then press V or U and Q in order to select the PC input mode page 24 This function may not be available for some signal or if no signal is received The optimum points of the clock phase and sampling clock adjustments...

Page 34: ...the PC Setting menu press V or U to select Sampling clock 2 Press Y or Z to optimize the picture Sampling clock 0 Resetting the PC setting The Reset function adjusts the PC Setting to the factory settings 1 From the PC Setting menu press V or U to select Reset 2 Press Q Note When a PC is connected using HDMI none of these function will be available Connecting your TV REGZA LINK connection You can ...

Page 35: ...the right side of the TV 5 A confirmation message will appear Highlight Yes and then press Q 6 Press V or U to select Photo and then press Q The list window of files will appear 7 Press V or U to select the USB device if the selection screen is displayed Note If Auto Start is set to Off you can start the Media Player manually Connection example 1 2 3 AV Amplifier Playback device TV back view Playb...

Page 36: ...ow mode settings 1 Press during Slide Show mode 2 Press V or U to highlight the item Interval Time or Repeat 3 Press Y or Z to adjust the setting 4 Press or to return to Slide Show mode Item Description Interval Time To set a time interval to view photos 3sec 5sec 10sec 15sec 30sec 60sec or 90sec Repeat To display photos in the same directory repeatedly On Off To rotate the image While viewing the...

Page 37: ...s of the screen are caused or some parts of the screen do not light up it may reach the end of its life Contact a service technician Some pixels of the screen do not light up The LCD display panel is manufactured using an extremely high level of precision technology however sometimes some pixels of the screen may be missing picture elements or have luminous spots This is not a sign of a malfunctio...

Page 38: ...ia etc SECAM B G Russian Federation etc SECAM D K Myanmar etc NTSC M Oceania Country or region Colour Sound Australia New Zealand etc PAL B G Africa Country or region Colour Sound Republic of South Africa etc PAL I South America Country or region Colour Sound Brazil PAL M Chile Colombia etc NTSC M Note PAL SECAM and NTSC 3 58 MHz are different colour signal broadcast transmission systems applicabl...

Page 39: ... M JAPAN VHF 1 12 UHF 13 62 CATV M1 M10 S1 S41 Special RF signal NTSC 4 43 colour system 5 5 6 0 6 5 MHz sound system PAL 60 Hz colour system 5 5 6 0 6 5 MHz sound system COMPONENT VIDEO INPUT terminals the signal format 480i 480p 576i 576p 720p 50 60 Hz 1080i 50 60 Hz These signal formats are converted to match the number of pixels of the LCD panel Colour system PAL SECAM NTSC 3 58 4 43 Aspect ra...

Page 40: ...lied accessories Owner s manual 1 Remote control 1 Batteries 2 Clip 1 Cleaning cloth 1 This is used to fix the TV to a wall pillar etc page 4 Design and specifications are subject to change without notice Never service or remodel the TV by yourself It may expose you to a fire hazard or dangerous voltages ...

Reviews: