background image

English

   - 32 -

English

Other Controls - 

continued

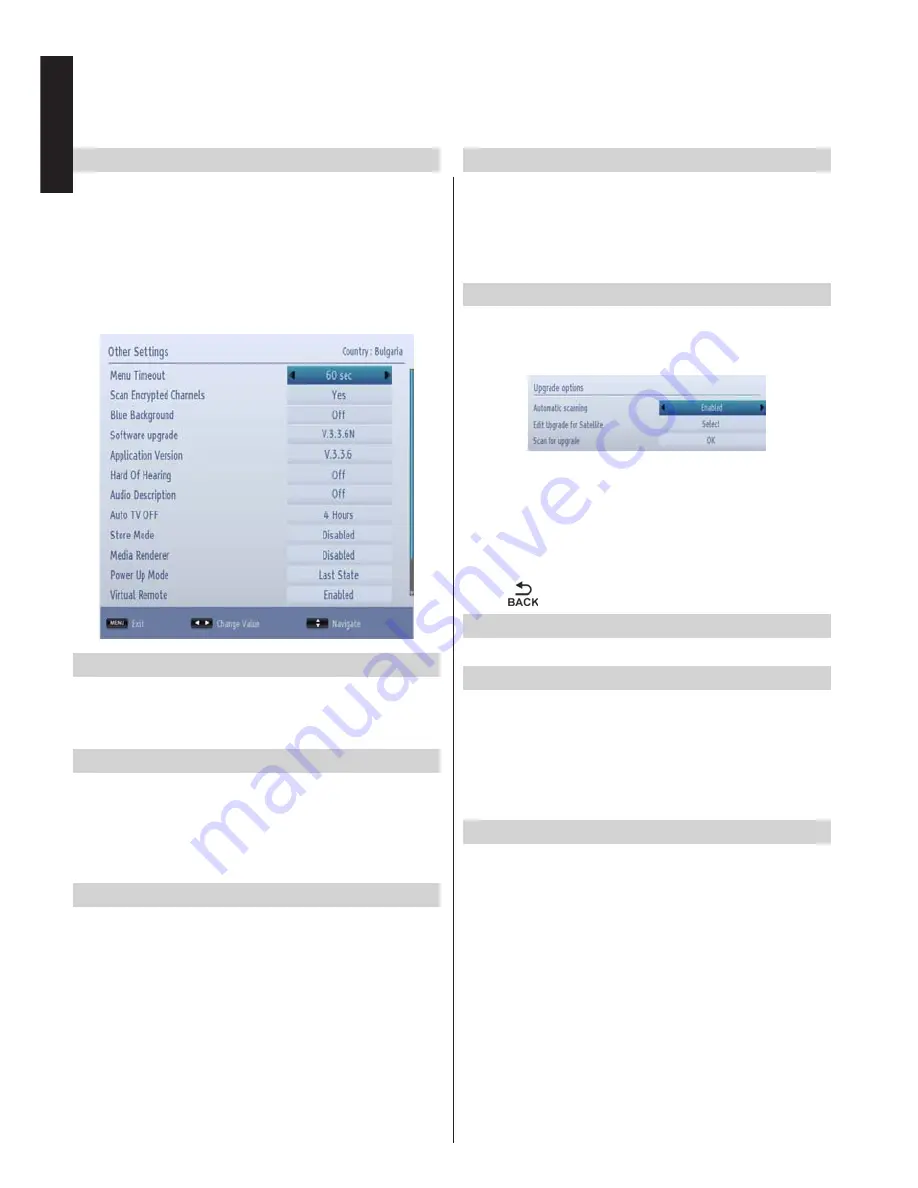
Configuring Other Settings - General

You  can  configure  the  settings  of  your  TV.  Select 

Settings from main menu and press OK to view the 
Settings menu. Press the MENU

 button on the remote 

control to exit.

To  view  general  configuration  preferences,  select 

Other Settings

 in the 

Settings

 menu and press 

OK 

button.

Operation

• Press 

Up

 or 

Down

 button to select an item.

• Use 

Left

 or 

Right

 button to set an option or press


OK

 button to view a sub-menu.

Menu Timeout

To set a specific display timeout for menu screens, 

set a value for this option.

In the 

Other Settings

 menu, select 

Menu Timeout


and choose 

15 sec

30 sec

60 sec

 or 

Off

 using 

Left


or 

Right 

button.

Scan Encrypted Channels 

When this setting is set as Yes

, search process will 

locate the encrypted channels as well. If it is set as 
No

 manually, encrypted channels will not be located 

while in automatic search or manual search. Scan 

Encrypted Channel feature will always be 

Yes after 

performing first time installation. 

• 

In the 

Other Settings

 menu, use 

Up 

or

 Down 

button 

to select 

Scan Encrypted

• Press 

Left

 or 

Right

 button to set this function as 

Yes

 or 

No

.

Blue Background

If the signal is weak or absent, the TV can automatically 

change  to  a  blue  screen.  To  enable  this,  set 

Blue 

Background to On from.

• 

The 

Other Settings

 menu, 

Background

 and select 

On

 or 

Off

 using 

Left

 or 

Right 

button.

Software Upgrade

This feature helps to keep your TV updated. It works 
automatically and searches for new information when 

available and selected. 

You can enable or disable automatic upgrade by the 

Automatic Scanning

 option.

You can manually start searching for new software by 

selecting 

Scan for upgrade 

and pressing 

OK

 button. 

You can select the satellite, which is used for updating 

process by setting 

Edit Upgrade for Satellite

 option.

Press 

 or 

MENU

 button to cancel the process.

Application Version

Displays the current application version.

Hard of Hearing

If  the  broadcaster  enables  any  special  signal 

concerning the audio, you can set this setting as 

On 

to receive such signals.

• Use 

Up

 or 

Down

 button to select 

Hard of Hearing 

and then press 

Left

 or 

Right

 button to set this setting 

as 

On

 or 

Off

.

Audio Description

Audio description refers to an additional narration 

track for blind and visually impaired viewers of visual 

media, including television and movies. The description 

narrator  talks  through  the  presentation,  describing 

what is happening on the screen during the natural 

pauses in the audio (and sometimes during dialogue, 

if deemed necessary). You can use this feature, only if 

the broadcaster supports that additional narration track. 

• 

Highlight 

Audio Description

  by  pressing 

Up

 or 

Down

 button. 

• Press  OK  button  to  enter  Audio  Description 

submenu.

• Use 

Up

 or 

Down

 button to select Audio Description 

setup and then press 

Left

 or 

Right

 button to set 

this setting.

Summary of Contents for 32L343 DG

Page 1: ...ble to ensure that your TV maintains optimum performance You can download the latest version of firmware from www toshiba om net firmware php Some features listed in this document are limited due to local legislation and may not be available in all countries Register your TV online at www toshiba europe com registration ...

Page 2: ...y Notifications 19 Viewing Channel List 20 Moving a Channel 20 Deleting a Channel 20 Renaming a Channel 20 Locking a Channel 20 Viewing Info Banner 21 Electronic Programme Guide 21 Language Settings 22 Viewing Parental Control Menu 23 Menu Lock 23 Maturity Lock 23 Child Lock 23 Set PIN 23 Configuring Picture Settings 24 Mode 24 Contrast 24 Brightness 24 Sharpness 24 Colour 24 Power Save Mode 24 Ba...

Page 3: ...Manual Start 36 Auto Start 36 Playing MP3 Files 37 Viewing JPEG Files 37 Slideshow Feature 38 Video Playback 38 Media Browser Settings 39 Using MENU button in Media Browser Mode 39 To Close the Media Player 39 Using Text Button TEXT 40 Accessing Sub pages 40 Revealing Concealed Text 40 Holding a Page 40 To display an initial page 40 Appendix A PC Input Typical Display Modes 41 Appendix B AV and HD...

Page 4: ...draw the mains plug before making or changing connections DO consult your dealer if you are ever in doubt about the installation operation or safety of your equipment DO be careful with any glass panels or doors on equipment Do not DON T remove any fixed cover as this may expose dangerous voltages DON T obstruct the ventilation openings of the equipment with items such as newspapers tablecloths cu...

Page 5: ...LCD TV and is not covered under the manufacturer s warranty Regular use of other size modes will prevent permanent retention Exclusion Clause Toshiba shall under no circumstances be liable for loss and or damage to the product caused by i fire ii earthquake iii accidental damage iv intentional misuse of the product v use of the product in improper conditions vi loss and or damage caused to the pro...

Page 6: ... disconnecting the unit from the socket outlet Do not pull on flex The flex can become damaged and cause a short circuit Use a soft dry cloth to clean the unit Set up unit so that no one will trip over the flex If you intend to wall mount the unit contact the shop where you purchased the unit for advice and leave the installation work to professionals Improper installation can cause damage and or ...

Page 7: ...ing make sure the appropriate bracket s are attached to the wall and the back of the TV as described in the instructions provided with the wall bracket 4 Always use the screws supplied or recommended by the wall mount manufacturer Removing the pedestal stand 1 Carefully lay the front of the unit face down on a flat cushioned surface with the stand hanging over the edge 2 Remove the screws 3 After ...

Page 8: ...ing on the model However you can set a special function to these buttons by pressing on them for five seconds when on a desired source channel or link A confirmation message will be displayed on the screen Now the selected MY BUTTON is associated with the selected function Note that if you perform first time installation MY BUTTON 1 2 will return to their default function 1 Standby 2 Numeric butto...

Page 9: ...signals but will also accept and display VGA 480i 480p 576i 576p and 720p signals PC format signals will also be displayed NOTE Although this TV is able to connect to HDMI equipment it is possible that some equipment may not operate correctly When connecting a device via the Side AV input you must use the supplied connection cable to enable connection When connecting a device via YPbPr input you m...

Page 10: ...0Hz you will need a Category 2 cable Conventional HDMI DVI cable may not work properly with this mode HDMI cable transfers both video and audio Separate analogue audio cables are not required see illustration To view the HDMI device video press SOURCE button to select the appropriate HDMI input To Connect a DVI Device Connect an HDMI to DVI cable HDMI type A connector to the HDMI input socket and ...

Page 11: ... YPbPr video connection cable for enabling connection First plug the single jack of the cable to the TV s YPbPr socket side Afterwards insert your YPbPr cable s not supplied connectors into the plural part of the supplied YPbPr video connection cable see illustration below Colours of the connected jacks should match To enable audio connection use the supplied SideAV connection cable First plug sin...

Page 12: ...Wireless USB LAN adaptor can be purchased from the retail outlet or Toshiba service company You can find the phone numbers of the local services on the back cover of this manual Wireless connection for models with integrated WIFI IF your TV has a built in WLAN system you don t need additional devices to connect to your network wirelessly Note Performance depends on many factors conditions and vari...

Page 13: ...pressed Right button Screen will be off in 15 seconds message will be displayed on the screen Select Proceed and press OK to turn the screen off immediately If you don t press any button the screen will be off in 15 seconds Press any button on the remote or on the TV to turn the screen on again If you disable Power Save Mode picture mode will be automatically set to Dynamic It is highly recommende...

Page 14: ...ss of the screen will reduce energyuse Energyefficiencycuts energy consumption and thus saves money NOTE Putting the TV into standby mode will reduce energy consumption but will still draw some power Using the Remote Control Press the MENU button on the remote control to see the menus The main menu appears as a group of icons each for a menu option Press the Left or Right button to select a topic ...

Page 15: ...analog TV only and full 4 When set Down button to select Teletext Language Use Left or Right button to select desired Teletext Language 5 Press OK button on the remote control to continue and the following message will be displayed on the screen Select Store mode if the TV will be placed in a store to exhibit This option will configure your TV s settings for best display quality and the supported ...

Page 16: ... Press OK button to quit channel list and watch TV Note Do not turn off the TV while initializing first time installation 12 If you select Satellite option from the Search Type screen Antenna Type menu will be displayed There are three types of antenna selection You can select Antenna type as Direct Unicable or DiSEqC Direct If you have a single receiver and a direct satellitedish selectthisantenn...

Page 17: ...arches and stores cable DVB stations Analogue Searches and stores analogue stations Digital Aerial Analogue Searches and stores aerial DVB and analogue stations Digital Cable Analogue Searches and stores cable DVB and analogue stations Satellite Searches and stores satellite channels Note Although this cable feature can be selected it is not fully supported in the UK If cable signals are input to ...

Page 18: ...ital Cable you can set the desired options and press OK button to search Analogue Manual Search Only if an analogue signal or Service is available The television can be tuned in manually For example if the television cannot be connected to a media recorder decoder with a SCART lead or to tune in a station on another System To allocate a programme position on the television for a decoder and media ...

Page 19: ...or Service is available Select Analogue Fine Tune from the Install and Retune menu by using Up or Down and OK buttons Analogue fine tune screen will be displayed Analogue Fine Tune feature will not be available if there are no analogue channels stored Use Left or Right button to set Fine Tune When finished press OK button Clear Service List This setting is visible only when the Country option is s...

Page 20: ... again to turn the subtitles off Viewing Main Menu Press or buttons on the TV at the same time to view main menu Press MENU button on the remote control to view main menu Controlling Volume and Muting Sound Volume Press or button on the remote control to adjust the volume Sound Mute Press button once to turn the sound off and again to cancel Selecting Programme Positions To select a programme posi...

Page 21: ... control and press OK If there is a previously stored channel on that number a warning screen will be displayed Select Yes if you want to move the channel and press OK Selected channel is now moved Deleting a Channel You can press GREEN button to tag untag all channels YELLOW button to tag untag channel Select the channel that you want to delete and select Delete option by using Left or Right butt...

Page 22: ...DE button the guide screen will appear highlighting details of the channel and programme currently being viewed This may take a few moments to appear For details of other programmes currently available press navigation buttons to scroll up and down or scroll left right through the list As channels are selected details of the programme currently being broadcast will appear Press RED button to view ...

Page 23: ... if available Otherwise the current settings will be used Audio By pressing Left or Right button change the audio language Subtitle Alter the subtitle language with Left or Right button The chosen language will be seen in subtitles Teletext Changes the preferred teletext language Guide By pressing Left or Right button change the guide language Current Audio If audio language is supported change th...

Page 24: ...em Use Up or Down buttons to go to Menu Lock option Use Left or Right buttons to choose Menu Lock Mode OFF All menus are unlocked ALL MENUS All Menus are accessible only with the correct lock key So the user cannot add delete rename channels or set timers INSTALLATION MENU Installation menu is locked So the user can t add channels Maturity Lock When set this option gets the maturity information fr...

Page 25: ...t button to adjust the colour Power Save Mode Enables or disables the power save mode Press Left or Right button to set as Disabled Eco or to turn the screen off See the section Environmental Information in this manual for further information on Power Save Mode Note PicturemodewillbesettoDynamicautomatically if the Power Save Mode is set to Disabled Backlight This setting controls the backlight le...

Page 26: ...re HDMI True Black optional While watching from HDMI source this feature will be visible in the Advanced Settings menu You can use this feature to enhance blackness in the picture Set this feature to On to activate Note HDMI True Black On Off feature functions only when the HDMI device output is set to RGB Reset This feature allows you to reset the current Picture Settings to the default values Pr...

Page 27: ...nt of WSS information which could be included in the broadcast signal or the signal from an external device Note Auto mode will only be available in SCART HDMI YPbPr and DTV Full mode is only available on HD channels 16 9 Use this setting when watching a widescreen DVD widescreen video tape or a 16 9 broadcast when available Due to the range of widescreen formats 16 9 14 9 etc black bars may be vi...

Page 28: ...t Autoposition and then press the OK button H Position H Horizontal Position shifts the image horizontally to right hand side or left hand side of the screen Press Down button until H Position is highlighted Press Left or Right button to adjust the value V Position V Vertical Position shifts the image vertically towards the top or bottom of the screen Press Down button until V Position is highligh...

Page 29: ...und output when headphones are connected Press Up or Down button to select Headphone PressRightbuttontoincreaseheadphonevolumelevel Press Left button to decrease headphone volume level Headphone volume level can be adjusted between 0 and 63 Sound Mode This setting is used to set the Sound Mode Higlight Sound Mode by using Up or Down button Press Left or Right button to set You can select Mono Ster...

Page 30: ...ertion of a CAM Conditional Access Module and card These are purchased from a service provider and allow additional subscription broadcasts to be viewed For more information see a service provider IMPORTANT Insert or remove the CAM only when the TV is SWITCHED OFF In order to watch certain digital channels a conditional access module CAM is necessary This module must be inserted in the CI slot of ...

Page 31: ...ate using the numeric buttons Start Enter a starting time using the numeric buttons End Enter an ending time using the numeric buttons Duration Displays duration between the starting and ending time Repeat Sets a timer to be repeated as Once Daily Weekly or Weekdays Use Left or Right button to select an option Change Delete Controls parental settings on timers Press OK button to save the timer Pre...

Page 32: ...he list of available satellites select this option You can add delete or edit the satellites in the list Antenna Installation You can change antenna settings and start a new satellite scan SatcoDX optional There are two options regarding to satcodx feature You can download or upload satcoDX data In order to perform these functions a USB device must be connected to the TV first You can upload curre...

Page 33: ...round and select On or Off using Left or Right button Software Upgrade This feature helps to keep your TV updated It works automatically and searches for new information when available and selected You can enable or disable automatic upgrade by the Automatic Scanning option You can manually start searching for new software by selecting Scan for upgrade and pressing OK button You can select the sat...

Page 34: ...lected channel source Bisskey Biss is a satellite signal scrambling system that is used for some broadcasts If you need to enter BISS key on a broadcast you can use Biss Key setting Highlight Biss Key and press OK to enter keys on the desired broadcast CEC This function allows to control the connected HDMI CEC compatible devices with the remote control of the TV Select the HDMI input of the connec...

Page 35: ...tc can be viewed across the web through a simple user interface Press button on the remote Select the desired application using the navigation buttons Press OK to launch the application or go to related link This can take uo to a minute or two to connect From the portal page the user can also access to the media files stored on USB storage devices connected to the TV or on the MEDIA servers in the...

Page 36: ...ser The TV does not support any download processes from the web browser Using YouTubeTM You need to configure a home network before using this feature This TV allows you to view Youtube content Press Mybutton1 to connect YouTube directly You can also press button on the remote and launch the YouTube application on the portal to access YouTube NOTES Depending on the network environment and use case...

Page 37: ... menu To list all available music video and picture files in the selected folder at once select All tab and press OK button If View Style is set to Flat all selected type of files will be listed If for instance Video is selected in the main Media Browser menu TV will search the source for all video files and list them Note Some USB compliant devices may not be supported If the USB storage device i...

Page 38: ...ayback Pause button Pause Resume the playback Red button Sort files by Title Artist or Album Note If the Viewing Style in Media Browser Settings menu is set to Folder the files will be displayed as sorted and there is no need to sort files again by pressing the RED button In that case the RED button will not function anyway Loop Shuffle Green button Press once to enable Loop Press again to enable ...

Page 39: ...Navigate menu LANG Play Preview Display selected file in a small preview screen Press again to stop preview Red button Sort files by name Play button Start to play all files listed beginning with the selected one Yellow Button Change viewing style Loop Shuffle Green button Press once to enable Loop Press again to enable both Loop and Shuffle Press once more to disable Loop Press again to disable S...

Page 40: ...Show Subtitle Set subtitle enabling preference Subtitle Language Set supported subtitle language Subtitle Position Set subtitle position as Up or Down Subtitle Font Size Set subtitle font size max 47pt Using MENU button in Media Browser Mode Pressing MENU button while in Media Browser mode displays the following menu screen You can access Picture Sound and Settings menu options using this screen P...

Page 41: ...screen To access one of the four given subjects press the relevant coloured button on the remote control For further information on your particular text system s see the broadcast text index page or consult your local Toshiba dealer Below is a guide to the functions of the remote control text buttons Accessing Sub pages If a text page has sub pages press Left Right buttons or enter the sub page nu...

Page 42: ...40x480 60Hz 5 640x480 66Hz 6 640x480 72Hz 7 640x480 75Hz 8 640x480 85Hz 9 800x600 56Hz 10 800x600 60Hz 11 800x600 70Hz 12 800x600 72Hz 13 800x600 75Hz 14 800x600 85Hz 15 832x624 75Hz 16 1024x768 60Hz 17 1024x768 66Hz 18 1024x768 70Hz 19 1024x768 72Hz 20 1024x768 75Hz 21 1024x768 85Hz 22 1152x864 60Hz 23 1152x864 70Hz 24 1152x864 75Hz 25 1152x864 85Hz 26 1152x870 75Hz 27 1280x768 60Hz 28 1360x768 6...

Page 43: ... 50Hz O 720P 50Hz O 720P 60Hz O 1080I 50Hz O 1080I 60Hz O HDMI1 HDMI2 HDMI3 480I 60Hz O 480P 60Hz O 576I 50Hz O 576P 50Hz O 720P 50Hz O 720P 60Hz O 1080I 50Hz O 1080I 60Hz O 1080P 24Hz 25Hz 30Hz 50Hz 60Hz O Note In some cases a signal on the LCD TV may not be displayed properly The problem may be an inconsistency with standards from the source equipment DVD Set top box etc If you do experience suc...

Page 44: ...power switches If there is no switch remove the mains plug from the wall socket Signal information for Mini D sub 15 pin connector Pin No Signal name Pin No Signal name Pin No Signal name 1 R 6 Ground 11 NC 2 G 7 Ground 12 NC 3 B 8 Ground 13 H sync 4 NC 9 NC 14 V sync 5 NC 10 Ground 15 NC NC not connected ...

Page 45: ...ec mp4 mov MPEG1 2 Layer 3 AAC HEAAC AC3 EAC3 LPCM ADPCM H 264 1080Px2 25fps 1080P 50fps Other 1080P 30fps 50Mbit sec avi MPEG1 2 4 Xvid H 264 VC1 WMV3 Sorenson H 263 Motion JPEG MPEG1 2 Layer 1 2 3 AAC HEAAC AC3 EAC3 LPCM ADPCM WMA H 264 1080Px2 25fps 1080P 50fps Other 1080P 30fps 50Mbit sec flv H 264 Sorenson H 263 MPEG1 2 Layer 3 AAC HEAAC LPCM ADPCM H 264 1080Px2 25fps 1080P 50fps Other 1080P ...

Page 46: ...s Temperature 5 C 35 C 41 F 94 F Humidity 20 80 non condensing Supplied Accessories Remote Control 2 batteries AAA IEC R03 1 5V Four screws Side AV cable YPbPr Connection Cable Stand fixing cover P Clip Optional Accessories Wireless USB Adaptor Toshiba WLM 30U2 and is available from the retail outlet or Toshiba service company 48 L Energy Efficiency Class A Visible Screen Size approx 121 cm 48 On ...

Page 47: ...s must be collected and disposed of separately from household waste Integrated batteries and accumulators can be disposed of with the product They will be separated at the recycling centres The black bar indicates that the product was placed on the market after August 13 2005 By participating in separate collection of products and batteries you will help to assure the proper disposal of products a...

Page 48: ...USB stick HDD is connected correctly Incorrect operation may occur from a USB Hub connection Check your network setup if using media server Why digital subtitles are not shown on screen when they are selected Subtitles are not currently being transmitted by the broadcaster Why is the digital channel locked Parental control is activated Check parental settings Why are some encrypted digital channel...

Page 49: ...iba herby declares that this product with an integrated Wireless Function is in compliance with the essential requirements and other relevant provisions of Directive 1999 5 EC EU Conformity Statement This product is carrying the CE Mark in accordance with the related European Directives Responsible for CE Marking is TOSHIBA 23 Davy Road Plymouth PL6 8BY UK This product is labeled with the CE Mark ...

Page 50: ...0 999 Ortstarif abweichender Mobilfunktarif möglich Gibralter 200 76334 Ελληνική 210 9554298 Magyar Köztársaság 23 428 870 Ísland 00 45 80 88 93 38 Yisrā el 03 953 5900 Italia 039 609 9301 Latvijas 00 372 69 97 800 Lietuvos 00 372 69 97 800 Luxembourg 00 32 2 391 01 01 Moldova 00380 443 511 317 Nederlanden 00 32 2 391 01 01 Norge 800 573 57 Polska 0 71 796 95 05 Portugal 707 265 265 Republic of Ir...

Reviews: