background image

16

Input selection and AV connections

ADDITIONAL FEATURES

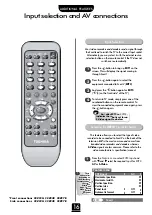
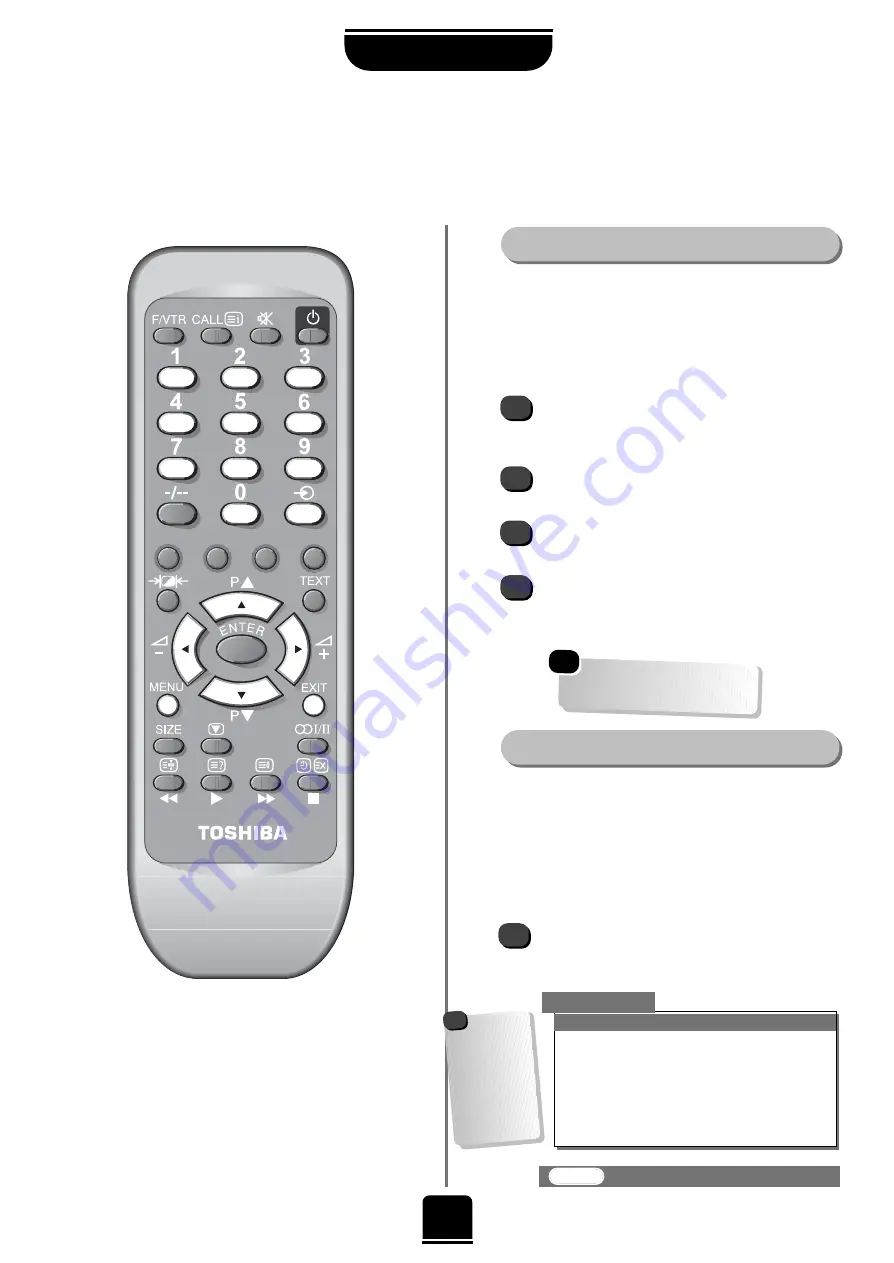
Input Selection

Selecting the 

INPUT

Signal for Scart 2

Press the 

B

button to bring up 

EXT1

on the

screen. This will display the signal coming in
through 

Scart 1

Press the 

B

button again to select the

equipment connected to 

Scart 2

(

EXT2

).

And press the 

B

button again for 

EXT3 

(

B

(3) on the front/side* of the TV). 

To return to TV mode, simply press one of the
numbered buttons on the remote control. To
view the connected equipment once again, press
the 

B

button again.

Most video recorders and decoders send a signal through

the Scart lead to switch the TV to the correct Input socket.

Alternatively, you may select it with the external source

selection button on the remote control if the TV does not

switch over automatically.

1

2

4

3

An 

S

after EXT2 

i.e. 

EXT2S

,

indicates the input is set for an 

S-Video signal, see below.

From the 

Feature menu

select 

EXT2 input 

and

with

z

and

x

select the required 

Input

for 

EXT2

:

AV

or 

S-Video.

1

This feature allows you to select the type of video

recorder to be connected to Scart 2 on the back of the

television. 

AV 

is the most common and comes from

standard video recorders and decoders whereas

S-Video 

signals are less common. Please refer to the

video manufacturer’s specification/manual.

Feature menu

EXT2 input

AV

Horizontal position
Horizontal width
Vertical position
Vertical size
Panel lock

Off

Automatic format

Off

EXIT

: To exit

*Front connections  28Z23G  28Z23B  28Z27B

Side connections  32Z23G  32Z23B  32Z27B

{

These

options alter

depending on

the widescreen

format you have

chosen, as

detailed on 

page 12, and

when viewing

connected

equipment.

!

Summary of Contents for 28Z23B

Page 1: ...owner s manual colour television 28Z23G 28Z23B 32Z23G 32Z23B 28Z27B 32Z27B TOSHIBA 8 ...

Page 2: ...on sound control bass treble balance Volume Correction Dynamic Sub Bass 11 Widescreen viewing Super Live Cinema Subtitle Wide 4 3 12 Picture adjustments Picture preferences Noise Reduction Picture size position Automatic format Widescreen 13 Virtual Dolby Surround models 28Z27B and 32Z27B only a five speaker sound effect without connecting additional speakers 14 The timer time display panel lock s...

Page 3: ... as such use can permanently damage your hearing DON T leave equipment switched on when it is unattended unless it is specifically stated that it is designed for unattended operation or has a standby mode Switch off using the switch on the equipment and make sure your family know how to do this Special arrangements may need to be made for infirm or handicapped people DON T continue to operate the ...

Page 4: ...text initial index function To mute the sound To display teletext To change programme positions and teletext pages To alter the volume When using menus the arrows move the cursor on the screen up down left or right ENTER to confirm your selection On screen Menus Widescreen mode selection F VTR button to speed up some functions and for use with a TOSHIBA video Number buttons 1 or 2 digit programme ...

Page 5: ...d power on light on the front is unlit press the POWER button on the SIDE to switch the set on then press a number button on the remote control to see the screen 28Z23G 28Z23B 28Z27B models 32Z23G 32Z23B 32Z27B models On the FRONT of the TV If the red power on light on the front is unlit press the POWER button on the FRONT to switch the set on then press a number button on the remote control to se...

Page 6: ...to EXIT To exit Set up Language English Auto tuning Manual tuning Programme sorting Teletext Character Character 1 Mode Auto EXIT To exit Now press theebutton to highlight Language in the Set up menu options 2 To choose your language press the MENU button and use the xbutton to select Set up from the top bar 1 Set up 5 Previous settings will be lost EXIT for no change System I Start Auto tuning Th...

Page 7: ...rt leads you will need to allocate a programme position on the television for each use Manual tuning see page 8 Your TV may display different Channel numbers Press the xbutton repeatedly to select your System B G Continental Europe D K Eastern Europe I UK L1 L2 France 6 With the e button highlight START and then press the xbutton for Continental Europe only The search will begin for all available ...

Page 8: ...on the remote control System Specific to certain areas Search Search up and down for a signal Programme skip means nothing has been stored or the facility to skip the channel is ON See page 10 Channel The channel number on which a station is being broadcast Manual fine tuning Only used if you experience interference weak signal See page 10 Station Station identification You can use the f or e and ...

Page 9: ... Searching will flash and the television will show the channel numbers whilst the search is progressing Searching 0 I RRR 32 0 Manual tuning Station 0 I 60 0 VCR Manual tuning 5 6 Press the MENU button and then the zor x button to select the Set up option from the top bar Press eto highlight Programme sorting and x to select The list of stations is now showing With the for ebutton highlight the st...

Page 10: ...e skip Programme skip To prevent certain programmes from being viewed for example a certain film by your children whilst you are out for the evening you can skip the programme position and take the remote control with you The television will still function as normal using the controls on the front or side of it but the set will not show the skipped programme position Then press the MENU button and...

Page 11: ...tton to highlight Bass Treble or Balance from the Sound menu and then the zor xbutton to change the setting Volume Correction will help reduce the difference of volume from one programme to another From the Sound menu highlight Volume Correction Choose between Auto and Off Selecting and changing programme position Volume control Bass treble and balance adjustments Volume Correction This feature al...

Page 12: ...s this setting will eliminate or reduce the black bars at the top and bottom of the screen by zooming in and selecting the image without distortion Wide Subtitle Subtitle Subtitle Wide When subtitles are included on a letterbox format broadcast this setting will raise the picture to ensure that all the text is displayed Use this setting when watching a widescreen DVD widescreen video tape or a 16 ...

Page 13: ... Press the MENU button and use the xbutton to select the Feature menu Now repeatedly press the ebutton to highlight one of the options 1 2 3 1 Press the zor xbutton to adjust Adjustments to picture positioning may be made using the Horizontal position Horizontal width Vertical position and Vertical size options When this TV receives a true Widescreen picture and Automatic format is On it will auto...

Page 14: ... from beyond the edges of the TV set 1 2 3 4 If you select the Panorama option you will hear not just a widening of the sound but also an amount of surround sound Traditional surround systems would give you left right centre and surround channels In Panorama mode you can have a sensation of these systems without the need for extra speakers Dolby Virtual Dolby Virtual P Panorama anorama Spatial Spa...

Page 15: ...emain on the screen for about 5 seconds The Time Display Select the Timer option from the top menu bar Select the On timer or the Off timer If for example you want the TV to turn ON or OFF in one and a half hours time enter 01 30 using the numbered buttons or the xand zbuttons to increase decrease in steps of 30 minutes When setting the On timer you must enter the programme position number you wan...

Page 16: ...e remote control if the TV does not switch over automatically 1 2 4 3 An S after EXT2 i e EXT2S indicates the input is set for an S Video signal see below From the Feature menu select EXT2 input and with zand xselect the required Input for EXT2 AV or S Video 1 This feature allows you to select the type of video recorder to be connected to Scart 2 on the back of the television AV is the most common...

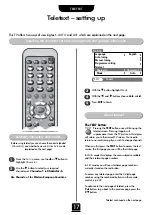
Page 17: ...List mode you will see whichever page number is currently stored on the red button To access any teletext page enter the 3 digit page number using the numbered buttons on the remote control e g 430 To advance to the next page of teletext press the P fbutton to go back to the previous page press the P ebutton 2 3 4 5 With the ebutton highlight Mode With the z and xbuttons choose Auto or List Press ...

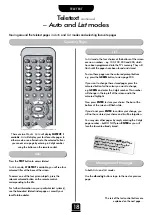
Page 18: ...ay view other pages by simply entering the 3 digit page number but DO NOT press ENTER or you will lose the favourite already stored In both Auto and List modes Use the fand ebuttons to go to the next or previous page Press the TEXT button to access teletext In Auto mode if FASTEXT is available you will see four coloured titles at the base of the screen To access one of the four given subjects pres...

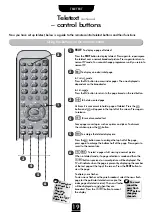
Page 19: ...ext Press again to superimpose the teletext over a normal broadcast picture Press again to return to normal TV mode You cannot change programmes until you return to normal TV T q TEXT 1 2 To enlarge the teletext display size Press the sbutton once to enlarge the top half of the page press again to enlarge the bottom half of the page Press again to revert to the normal size 5 3 6 4 To select a page...

Page 20: ... eFf buttons to navigate and select the options Press the MENU button until the display disappears 28Z23G 28Z23B 28Z27B front connections panel When connecting equipment always refer to the relevant owner s manual for full details CAMCORDER Front side connections and controls CONNECTING OTHER EQUIPMENT You can connect a wide variety of external equipment via the sockets located behind the flap on ...

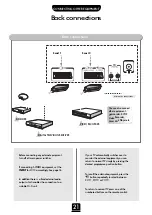
Page 21: ...See page 16 In addition there is a fixed external audio output which enables the connection to a suitable Hi Fi unit If your TV automatically switches over to monitor the external equipment you can return to normal TV simply by pressing the desired programme position button To recall the external equipment press the Bbutton repeatedly to select between EXT1 EXT2 or EXT3 To return to normal TV pres...

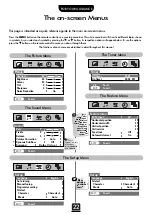
Page 22: ...nual tuning Programme sorting Teletext Character Character 1 Mode Auto Set up Language English Teletext Character Character 1 Mode Auto EXIT To exit Picture EXIT To exit EXIT To exit Contrast 60 Brightness 50 Colour 50 Tint 0 Sharpness 0 Noise Reduction On Timer 0 9 To set EXIT To exit Off timer 00 00 On timer 00 00 P01 The Sound Menu The Set up Menu Bass 0 Treble 0 Balance 0 Volume Correction Aut...

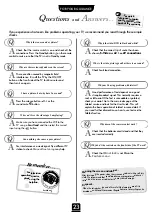
Page 23: ...picture but why have I no sound Q Check that the batteries aren t dead and that they are inserted correctly A Why doesn t the remote control work Q Check that Panel lock is not On in the Feature menu A Why don t the controls on the front side of the TV work Q Good performance of text depends on a good strong broadcast signal This normally requires a roof or loft aerial If the Text is unreadable or...

Page 24: ...________________________5 Sharpness _______________________________________________________13 Sound Mute_____________________________________________________11 Standby_____________________________________________________________5 Stereo _____________________________________________________________15 Switching on ______________________________________________________5 Teletext______________________...

Reviews: