background image

18

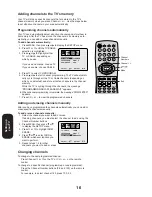
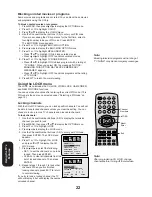
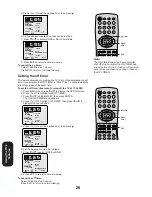
To clear your favorite channels:

1. Select a channel you want to clear.
2. Press MENU, then press   or   to display the OPTION menu.
3. Press 

 or 

 to highlight FAVORITE CH.

4. Press   or   to display the FAVORITE CH menu. SET/CLEAR will

be highlighted.

5. Press   or   to highlight CLEAR.

6. Press ENTER until “0” replaces the channel number you want to

erase.

7. Press EXIT to clear the screen.
8. Repeat steps 1-6 for the other channels.

Using the V-Chip (parental control) feature

The V-Chip feature is available only for the U.S. V-Chip system.
The Canadian V-Chip system is not supported.
You can prevent others from viewing certain programs or channels by
blocking them using the V-Chip feature.

Selecting a PIN code

Before you can block programs and channels, you must select a
personal identification number (PIN) code. The PIN code you select
prevents others from changing the rating limits you set.

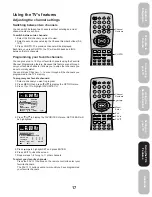
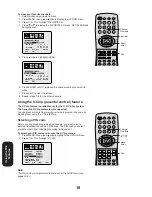
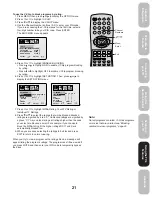
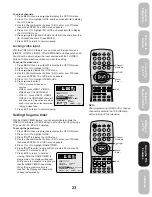
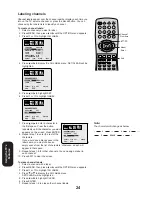
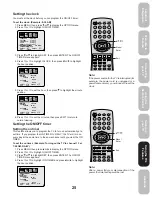
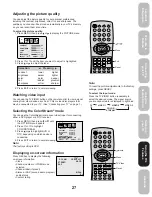
To select your PIN code and access the V-Chip menus:

1. Press MENU, then press   or   to highlight the OPTION menu.
2. Press 

 or 

 to highlight V-CHIP.

Using the TV’

s

Features

PICTURE AUDIO

SETUP

CH

OPTION

END

EXIT

CLEAR

ENTER

TV CABLE

SELECT

FAVORITE CH : CH012

7

36

4

1

13

28

97 112

12 125

63

40

SET UP CH

SET/CLEAR

SET CLEAR

PICTURE AUDIO

SETUP

CH

OPTION

END

EXIT

SET

ENTER

TV CABLE

SELECT

FAVORITE CH : CH012

7

36

4

1

13

28

97 112

12 125

63

40

SET UP CH

SET/CLEAR

SET CLEAR

PICTURE AUDIO

SETUP

CH

OPTION

SELECT

START

CH LABEL

START
START

DVD

FAVORITE CH

V-CHIP

LOCK

OFF

ON/OFF TIMER
COLORSTREAM

ENGLISH

LANGUAGE

START
START

Note:

The PIN code you programmed is also used in the LOCK menu; see
pages 22-23.

POWER

1

2

3

4

5

6

7

8

9

0

TV

VCR

CABLE

DVD

100

CH +

CH –

FAV

EXIT

RECALL

TV/VIDEO

CH RTN

CODE

MTS

SLEEP

MUTE

RESET

CAP/TEXT

DVD CLEAR

DVD MENU

TOP MENU

1/2

MENU/

ENTER

VOL

FAV

VOL

+

VOL

DISPLAY

+10

Menu/
Enter

Exit

Channel
Numbers

POWER

1

2

3

4

5

6

7

8

9

0

TV

VCR

CABLE

DVD

100

CH +

CH –

FAV

EXIT

RECALL

TV/VIDEO

CH RTN

CODE

MTS

SLEEP

MUTE

RESET

CAP/TEXT

DVD CLEAR

DVD MENU

TOP MENU

1/2

MENU/

ENTER

VOL

FAV

VOL

+

VOL

DISPLAY

+10

Menu/
Enter

Exit

Channel
Numbers

 3N41801A/E P17-22

17:5:03, 15:23

18

Summary of Contents for 27A43

Page 1: ...27A43 Appendix Using the TV s Features Setting up your TV Using the Remote Control Connecting your TV Welcome to Toshiba Important Safeguards ...

Page 2: ...family and friends Thank you Safety Precautions WARNING TO REDUCE THE RISK OF FIRE OR ELECTRIC SHOCK DO NOT EXPOSE THIS APPLIANCE TO RAIN OR MOISTURE Dear Customer Thank you for purchasing this Toshiba TV This manual will help you use the many exciting features of your new TV Before operating the TV please read this manual completely and keep it nearby for future reference NOTE TO CATV INSTALLERS ...

Page 3: ...instructions 2 Keep these instructions 3 Heed all warnings 4 Follow all instructions 5 Do not use this apparatus near water 6 Clean only with a dry cloth 7 Do not block any ventilation openings Install in accordance with the manufacturer s instructions 8 Do not install near any heat sources such as radiators heat registers stoves or other apparatus including amplifiers that produce heat 9 Do not d...

Page 4: ... the picture appear distorted or the color appear faded If this happens turn off the TV for 6 to 7 hours to allow the condensation to evaporate 31 For added protection of your TV from lightning and power surges always unplug the power cord and disconnect the antenna from the TV if you leave the TV unattended or unused for long periods of time 32 During normal use the TV may make occasional snappin...

Page 5: ... s memory 16 Programming channels automatically 16 Adding and erasing channels manually 16 Changing channels 16 Using the TV s features 17 Adjusting the channel settings 17 Switching between two channels 17 Programming your favorite channels 17 Using theV Chip parental control feature U S V Chip system only 18 Selecting a PIN code 18 Blocking programs by ratings 19 Blocking unrated movies or progr...

Page 6: ...quipment See Connecting your TV on page 7 for more information Please read all the safety and operating instructions carefully before you begin Exploring your new TV You can operate your TV by using the buttons on the front panel or the remote control The front and back panels provide all the inputs you will need to connect other equipment to your TV Welcome to Toshiba TV back panel VIDEO Y PB PR ...

Page 7: ...channel Connecting your TV Connecting your TV If you haven t connected electronic equipment before or you have been frustrated in the past you may wish to read this section Cables are not supplied A coaxial cable is the standard cable that comes in from your antenna or cable converter box Coaxial cables use F connectors Standard A V audio video cables are usually color coded according to use yello...

Page 8: ...box and connect the output of the box to the Antenna Jack on the back of the television Follow the connections shown below Set the television to the output of the Converter Descrambler box usually channel 3 or 4 and use the Converter Descrambler box to select channels For Subscribers to Unscrambled Basic Cable with Scrambled Premium Channels If you subscribe to a cable service in which basic cable...

Page 9: ... set of component video cables one pair of standard audio cables Connecting your TV Connecting a DVD player with ColorStream component video and a VCR This connection allows you to watch DVD VCR or TV programs and record TV programs You can record from one source while watching a program from another source Your TV is capable of using ColorStream component video Connecting your TV to a component v...

Page 10: ...allows you to use external speakers IN OUT VIDEO IN from ANT CH 3 CH 4 OUT to TV AUDIO L R IN OUT VIDEO IN from ANT CH 3 CH 4 OUT to TV AUDIO L R VIDEO Y PB PR AUDIO L MONO R VIDEO IN OUT ANT 75Ω VIDEO 1 VIDEO 2 AUDIO S VIDEO L MONO R Stereo VCR Playback TV Stereo VCR Recording IN OUT AUDIO L R VIDEO Y PB PR AUDIO L MONO R VIDEO IN OUT ANT 75Ω VIDEO 1 VIDEO 2 AUDIO S VIDEO L MONO R To antenna Camc...

Page 11: ...lied with the equipment to see which features are available In addition the original controllers may have features not available on this remote control If you would like to continue to use these features you may want to use the original remote control Cautions Dispose of batteries in a designated disposal area Do not throw batteries into a fire Do not mix battery types or combine used batteries wi...

Page 12: ...de within 10 seconds from step 1 or if you enter a code not listed below this operation is canceled Each time you replace the batteries you must reprogram the remote control Some newer VCRs are capable of working on either of two remote codes These VCRs have a switch labeled VCR1 VCR2 If your VCR has this kind of switch and does not respond to any of the codes for your VCR set the switch to the ot...

Page 13: ...Mathes 14 59 Quasar 14 59 Daewoo 44 46 48 54 RCA 15 16 20 27 40 42 60 Daytron 36 46 Realistic 06 08 12 14 31 DBX 02 18 Samsung 20 30 Emerson 03 21 23 26 33 35 43 50 Sansui 39 Fisher 11 12 13 47 Sanyo 06 12 47 Funai 31 Scott 04 05 33 43 General Electric 14 16 20 Sears 06 09 11 12 15 Goldstar 09 Sharp 08 61 Go Video 56 62 63 Shintom 39 Hitachi 15 57 Signature 2000 08 14 16 19 31 49 Instant Replay 14...

Page 14: ...tops a videotape DVD Rec starts recording a videotape Play plays a videotape DVD FF fast forwards a videotape DVD Rew rewinds a videotape DVD Pause Still pauses a videotape DVD TV VCR toggles between TV and VCR modes when viewing while recording VCR Channel cycles through programmed channels of VCR DVD Skip skips chapter of DVD Display displays status information on screen in the DVD Volume adjust...

Page 15: ...en display language You can choose from three different languages English French and Spanish for the on screen displays Adjustment menus and messages will appear in the language of your choice To select a language 1 Press MENU then press or until the OPTION menu appears 2 Press or to highlight LANGUAGE 3 Press or to highlight your desired language PICTURE AUDIO SETUP CH OPTION CH LABEL START SELEC...

Page 16: ... 7 Press CH or to view the programmed channels Adding and erasing channels manually After you have programmed the channels automatically you can add or erase specific channels manually To add or erase channels manually 1 Select the channel you want to add or erase If adding channels you must select the channel to add using the Channel Number buttons 2 Press MENU then press or to display the SETUP ...

Page 17: ...ess MENU then press or to display the OPTION menu 3 Press or to highlight FAVORITE CH 4 Press or to display the FAVORITE CH menu SET CLEAR will be highlighted 5 Press or to highlight SET and press ENTER 6 Press EXIT to close the screen 7 Repeat steps 1 6 for up to 11 other channels To select your favorite channels Press the FAV buttons on the remote control to select your favorite channels The FAV...

Page 18: ...s the V Chip menus 1 Press MENU then press or to highlight the OPTION menu 2 Press or to highlight V CHIP Using the TV s Features PICTURE AUDIO SETUP CH OPTION END EXIT CLEAR ENTER TV CABLE SELECT FAVORITE CH CH012 7 36 4 1 13 28 97 112 12 125 63 40 SET UP CH SET CLEAR SET CLEAR PICTURE AUDIO SETUP CH OPTION END EXIT SET ENTER TV CABLE SELECT FAVORITE CH CH012 7 36 4 1 13 28 97 112 12 125 63 40 SE...

Page 19: ...ber buttons 0 9 to enter a new code Press ENTER 7 Press EXIT to return to normal viewing Blocking programs by ratings The Motion Picture Association of America MPAA uses a rating system to qualify motion picture content Television broadcasters employ a rating system to qualify the content of television programs as well The MPAA Youth TV and TV ratings work with the V Chip feature and allow you to ...

Page 20: ...lly designed to be viewed by adults and therefore may be unsuitable for children under 17 Language Crude or indecent language Sex Explicit sexual activity Violence Graphic violence 14 Parents strongly cautioned This program contains some material that many parents would find unsuit able for children under 14 years of age Dialog Intensely suggestive dialog Language Strong coarse language Sex Intens...

Page 21: ...gs higher than the ones you select are blocked as well For example if you choose to block the MPAA rating R the higher ratings NC17 and X are automatically blocked too 9 When you are done selecting the ratings to be blocked press EXIT to return to normal viewing When you try to view a program with a ratings block a message will appear listing the program s ratings The program can still be viewed i...

Page 22: ...tune locked channels unless you clear the setting You can choose to lock up to nine TV channels and nine cable channels To lock channels 1 Use the Channel Number Buttons 0 9 to display the television channel you wish to lock 2 Press MENU then press or to display the OPTION menu 3 Press or to highlight LOCK 4 Press or to display the LOCK menu 5 Use the Channel Number buttons 0 9 to enter your PIN c...

Page 23: ...n to normal viewing Setting the game timer With the GAME TIMER feature you can automatically activate the VIDEO LOCK feature VIDEO setting to set a time limit for playing a TV game 30 60 90 or 120 minutes To set up the game timer 1 Press MENU then press or to display the OPTION menu 2 Press or to highlight LOCK 3 Press or to display the LOCK menu 4 Use the Channel Number buttons 0 9 to enter your ...

Page 24: ...ge as below SPACE 0 9 A Z Labeling channels Channel labels appear over the channel number display each time you turn on the TV select a channel or press the Recall button You can choose any four characters to identify a channel To create channel labels 1 Select a channel you want to label 2 Press MENU then press or until the OPTION menu appears 3 Press or to highlight CH LABEL 4 Press or to displa...

Page 25: ... every day at the same time to the same channel until you clear the ON TIMER To set the on timer Example Turning on the TV to channel 12 at 7 00 AM DAILY 1 Press MENU then press or to display the OPTION menu 2 Press or to highlight ON OFF TIMER 3 Press or to highlight SET then press ENTER The ON OFF TIMER menu appears 4 Press or to highlight ON TIMER and press or to highlight the hour position PIC...

Page 26: ...ss MENU then press or to display the OPTION menu 2 Press or to highlight ON OFF TIMER 3 Press or to highlight SET then press ENTER The ON OFF TIMER menu appears 4 Press or to highlight OFF TIMER then press or to highlight the hour position 5 Press or to set the desired hour then press 6 Set the desired minutes as in step 5 7 Press or to select ONCE or DAILY 8 Press EXIT to return to normal viewing...

Page 27: ...een information Clock Channel number or VIDEO mode selected Channel label if preset Stereo or SAP second audio program audio status Content rating TV CABLE 007 ABCD 8 30 AM STEREO SAP MPAA X Watching video input You can use the TV VIDEO button on the remote control to view a signal coming from other devices such as VCRs or video disc players that may be connected to your TV See Connecting your TV ...

Page 28: ... half of the TV screen when available To view captions or text 1 Select the desired program Closed captioned programs are usually marked in your local TV listing as CC 2 Press CAP TEXT repeatedly to select caption or text mode CAPTION CH1 TEXT CH1 CAPTION CH2 TEXT CH2 3 Press 1 2 to select the caption or text channel Note A closed caption signal may not be decoded in the following situations when ...

Page 29: ...ssed The MTS feature is not available in the VIDEO mode You can leave your TV in STEREO mode because it will automatically output stereo or monaural sound depending on the broadcast type If the stereo sound is noisy select MONO to reduce the noise The word STEREO or SAP is displayed in light blue when the TV receives the signal To select the desired MTS setting Repeatedly press the MTS button to s...

Page 30: ...xceptional sound quality from the TV s speakers The feature uses stereo signals from a TV broadcast or video input To turn on the surround sound feature 1 Select the STEREO mode if available see Selecting stereo SAP broadcasts on page 29 2 Press MENU and then press or until the AUDIO menu appears 3 Press or to highlight SURROUND 4 Press or to highlight ON To turn off the surround sound feature Hig...

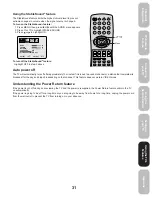
Page 31: ... off The TV will automatically turn off after approximately 15 minutes if it is tuned to a vacant channel or a station that completes its broadcast for the day and stops broadcasting on that channel This feature does not work in VIDEO mode Understanding the Power Return feature If the power is cut off while you are viewing the TV and the power is resupplied the Power Return feature will turn the T...

Page 32: ...output to 480i interlaced mode first see page 9 Poor reception of broadcast channels The station may have broadcast difficulties Try another channel Check the antenna connections If you are using a VCR make sure the TV VCR button is set correctly Cannot receive above channel 13 Make sure TV CABLE is set to CABLE mode Unable to select a certain channel The channel may be blocked by the V Chip featu...

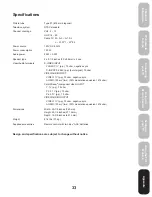
Page 33: ...o terminals S VIDEO INPUT Y INPUT 1V p p 75 ohm negative sync C INPUT 0 286V p p burst signal 75 ohm VIDEO AUDIO INPUT VIDEO 1V p p 75 ohm negative sync AUDIO 150 mV rms 30 modulation equivalent 47k ohm ColorStream component video INPUT Y 1V p p 75 ohm PR 0 7V p p 75 ohm PB 0 7V p p 75 ohm VIDEO AUDIO OUTPUT VIDEO 1V p p 75 ohm negative sync AUDIO 150 mV rms 30 modulation equivalent 47k ohm Dimens...

Page 34: ... better customer service and improved product support Failure to return the product registration card will not affect your rights under this warranty Your Responsibility THE ABOVE WARRANTIES ARE SUBJECT TO THE FOLLOWING CONDITIONS 1 You must provide your bill of sale or other proof of purchase 2 All warranty servicing of this television must be made by an Authorized TACP THI Service Station 3 The ...

Page 35: ... all parts labor and picture tubes Owner s Manual Read this owner s manual thoroughly before operating this television Your Responsibility THE ABOVE WARRANTIES ARE SUBJECT TO THE FOLLOWING CONDITIONS 1 You must provide your bill of sale or other proof of purchase 2 All warranty servicing of this television must be made by anAuthorized TCL Service Depot 3 The warranties from TCL are effective only ...

Page 36: ...AILAND National Service Division TEL 905 470 5400 Service Centers TORONTO 191 McNABB STREET MARKHAM ONTARIO L3R 8H2 CANADA TEL 905 470 5400 MONTREAL 1643 NORTH SERVICE RD TRANS CANADA HIGHWAY DORVAL QUEBEC H9P 1J1 CANADA TEL 514 856 4100 VANCOUVER 22171 FRASERWOOD WAY RICHMOND B C V62 1J5 CANADA TEL 604 303 2500 03 06 U ...

Page 37: ...27A43 3 Importantes mesures de sécurité Branchement de votre téléviseur Installation de votre téléviseur Utilisation des fonctions Annexe Utilisation de la télécommande Bienvenue chez Toshiba ...

Page 38: ...écurité AVERTISSEMENT POUR RÉDUIRE LE RISQUE D INCENDIE OU DE CHOC ÉLECTRIQUE N EXPOSER CET APPAREIL NI À LA PLUIE NI À L HUMIDITÉ Cher client Merci d avoir acheté ce téléviseur TOSHIBA Ce manuel vous aidera à utiliser les possibilités nombreuses et variées de votre nouveau téléviseur Avant d allumer votre téléviseur veuillez lire ce manuel en entier Gardez le à portée de la main pour pouvoir le c...

Page 39: ...rises ni les rallonges Instructions importantes sur la sécurité 1 Lire ces instructions 2 Conserver ces instructions 3 Observer tous les avertissements 4 Suivre toutes les instructions 5 Ne pas utiliser cet appareil à proximité d eau 6 Nettoyer seulement avec un chiffon sec 7 Ne pas bloquer les ouvertures d aération Installer selon les instructions du fabricant 8 Ne pas installer près d une source...

Page 40: ...ela pourrait déformer l image ou ternir les couleurs Dans ce cas là éteindre le téléviseur pendant 6 à 7 heures pour permettre à la buée de s évaporer 31 Pour une meilleure protection du téléviseur contre les dommages causés par la foudre ou la surtension toujours débrancher l appareil de la prise électrique et déconnecter l antenne en cas d absence ou lorsque l appareil n est pas utilisé pendant ...

Page 41: ... canaux 16 Programmation automatique des canaux 16 Ajout et suppression des canaux en mode manuel 16 Modification des canaux 16 Utilisation des fonctions 17 Réglage des canaux 17 Passage d un canal à l autre 17 Programmation de vos chaînes préférées 17 Se servant de la caractéristique PUCE V contrôle parental système PUCE V américain seulement 18 Sélection d un code d accès 18 Blocage des programm...

Page 42: ...tre téléviseur sur la page 7 pour plus d informations Veuillez lire attentivement les instructions de sécurité et de fonctionnement avant de commencer Exploration de votre nouveau téléviseur Vous pouvez faire fonctionner votre téléviseur en utilisant les touches sur le tableau de commande du téléviseur ou sur la télécommande Les panneaux avant et arrière présentent toutes les sorties dont vous ave...

Page 43: ... des programmes vidéo de lire ou d enregistrer sur votre magnétoscope tout en regardant la télévision et d enregistrer un canal tout en regardant une autre canal Branchement de votre téléviseur Si vous n avez jamais branché d appareil électronique auparavant ou si vous avez eu des difficultés dans le passé ce qui suit vous intéressera peut être Les câbles ne sont pas fournis Un câble coaxial est l...

Page 44: ... ci dessous Réglez le télécouleur sur le canal de sortie du convertisseur débrouilleur en général 3 ou 4 et utilisez le convertisseur débrouilleur pour choisir les canaux Pour les abonnés aux canaux câblodistribués non brouillés et aux canaux payants brouillés Si vous êtes abonné à un service de câblodistribution offrant des canaux de base non brouillés et des canaux payants exigeant l utilisation...

Page 45: ...ouvez enregistrer un programme provenant d une source et regarder un programme provenant d une autre source Votre téléviseur peut utiliser ColorStream composantes vidéo Le branchement de votre téléviseur sur un lecteur de disque vidéo numérique DVD compatible vidéo du composant tel qu un lecteur de disque vidéo numérique Toshiba avec Color Stream peut considérablement améliorer la qualité de l ima...

Page 46: ...une autre chaîne Vous aurez besoin de un ensemble de câbles A V standards Remarque Pour une meilleure qualité d image si votre camescope est équipé d une prise S video vous pouvez utiliser un câble S video en plus des câbles audio standard au lieu d un câble vidéo standard Ne connectez un câble vidéo standard et un câble S vidéo en même temps sous peine de rendre la qualité de l image inacceptable...

Page 47: ...portez vous au manuel d utilisation fourni avec l appareil pour voir quelles fonctions sont disponibles En outre les télécommandes fournies avec le magnétoscope le lecteur DVD et ou le convertisseur pour le câble peuvent avoir des fonctions qui ne sont pas disponibles sur cette télécommande Si vous souhaitez continuer à utiliser ces fonctions vous pouvez utiliser la télécommande fournie avec le ma...

Page 48: ...glée pour commander votre téléviseur Si vous n entrez pas le code en moins de 10 secondes après l étape 1 ou si vous entrez un numéro n apparaissant pas dans la liste ci dessous cette opération est annulée Chaque fois que vous remplacez les piles vous devez reprogrammer la télécommande Certains magnétoscopes récents peuvent fonctionner avec l un ou l autre des deux codes Ces magnétoscopes ont un c...

Page 49: ...itizen 09 Portland 46 Craig 12 Pro Scan 16 60 Curtis Mathes 14 59 Quasar 14 59 Daewoo 44 46 48 54 RCA 15 16 20 27 40 42 60 Daytron 36 46 Realistic 06 08 12 14 31 DBX 02 18 Samsung 20 30 Emerson 03 21 23 26 33 35 43 50 Sansui 39 Fisher 11 12 13 47 Sanyo 06 12 47 Funai 31 Scott 04 05 33 43 General Electric 14 16 20 Sears 06 09 11 12 15 Goldstar 09 Sharp 08 61 Go Video 56 62 63 Shintom 39 Hitachi 15 ...

Page 50: ... des menus page 15 Stop arrêt d une vidéocassette DVD Utilisation de la télécommande Rec enregistrement d une vidéocassette Play lecture d une vidéocassette DVD FF faire avancer une vidéocassette DVD Rew réembobiner une vidéocassette DVD Pause Still arrête momentanément la bande magnétoscopique DVD TV VCR alterne entre le télévieur et le magnétoscope pendant un enregistrement VCR Channel passe aux...

Page 51: ...Choix de la langue d affichage Vous pouvez choisir parmi les trois langues suivantes Anglais Français et Espagnol pour l affichage à l écran Les menus et les messages de réglage apparaîtront dans la langue de votre choix Pour sélectionner une langue 1 Appuyez sur MENU puis appuyez sur ou jusqu à ce que le menu OPTION apparaisse 2 Appuyez sur ou pour mettre en surbrillance LANGUE 3 Appuyez sur ou p...

Page 52: ...u pour visualiser les canaux programmés Ajout et suppression des canaux en mode manuel Après avoir programmé automatiquement les canaux vous pouvez ajouter ou supprimer manuellement des canaux spécifiques Pour ajouter ou supprimer manuel des canaux 1 Sélectionnez le canal que vous voulez ajouter ou supprimer Si vous souhaitez ajouter des canaux vous devez sélectionner le canal à ajouter en utilisa...

Page 53: ...r ou pour mettre en surbrillance le menu OPTION 3 Appuyez sur ou pour mettre en surbrillance CAN PREFERES 4 Appuyez sur ou pour afficher le menu CAN PREFERES REGLAGE EFFACE sera mis en surbrillance 5 Appuyez sur ou pour mettre en surbrillance REGLAGE et appuyez sur ENTER 6 Appuyez sur EXIT pour effacer l écran 7 Répétez les étapes 1 6 pour obtenir jusqu à 11 autres chaînes Pour sélectionner vos ch...

Page 54: ...porté Vous pouvez empêcher d autres personnes de regarder certains programmes ou certaines chaînes grâce à la fonction de blocage PUCE V Sélection d un code d accès Cependant avant de pouvoir vérouiller des programmes et des canaux vous devez sélectionner un code d identification personnel Ce code d accès que vous avez choisi permet de vous assurer que personne d autre ne peut changer les limites ...

Page 55: ...ez les touches numériques 0 9 pour saisir un nouveau code Appuyez sur ENTER 7 Appuyez sur EXIT pour retourner à un écran normal Blocage des programmes par un système de classification La Motion Picture Association of America MPAA utilise un système de classification ayant pour but d évaluer le contenu des films Les professionnels de la radiodiffusion télévisuelle ont également recours à un système...

Page 56: ...ltes et par conséquent peut ne pas convenir aux enfants de moins de 17 ans Vocabulaire Langage grossier ou indécent Erotisme Scènes érotiques explicites Violence Violence graphique 14 Présence des parents fortement recommandée Ce programme contient certaines scènes que beaucoup de parents risquent de considérer comme non convenables pour les enfants de moins de 14 ans Dialogue Dialogue intensément...

Page 57: ...t signalées par l indication en vert Lorsque vous bloquez certaines classes de programmes tous les programmes étant supérieurs aux programmes que vous avez sélectionnés seront également bloqués Par exemple si vous décidez de bloquer les programmes classés R par la MPAA les programmes étant classés supérieurs NC17 et X seront également automatiquement bloqués 9 Lorsque vous avez sélectionné les cla...

Page 58: ...ANAL vous pouvez bloquer des canaux spécifiques Vous ne pourrez pas capter les canaux bloqués à moins que vous effaciez les réglages Vous pouvez décider de bloquer jusqu à neuf chaînes télévisées et neuf chaînes du câble Pour bloquer des canaux 1 Utilisez les touches numériques 0 9 pour afficher les chaînes télévisées que vous souhaitez bloquer 2 Appuyez sur MENU puis sur ou pour afficher le menu ...

Page 59: ...ionner ARRET permet de débloquer toutes les sources d entrées vidéo VIDEO permet de bloquer VIDEO1 VIDEO2 VIDEO3 et COLORSTREAM VIDEO permet de bloquer VIDEO1 VIDEO2 VIDEO3 COLORSTREAM les cannaux 3 et 4 Cette option doit être utilisée si vous utilisez l antenne pour lire une cassette vidéo 7 Appuyez sur EXIT pour retourner à un écran normal Réglage de la Minuterie Jeux Avec la fonction MINUTERIE ...

Page 60: ...AN 12 LABEL TERMINER EXIT REGLAGE ENTER CHOISIR PICTURE AUDIO SETUP CH OPTION REGLAGE EFFACE REGLAGE S TIT CANAL CAN 12 LABEL TERMINER EXIT REGLAGE ENTER CHOISIR Attribution d un nom aux différentes chaînes Le nom des chaînes apparaîtra sur le numéro de chaîne chaque fois que vous allumerez le téléviseur sélectionnerez une chaîne ou chaque fois que vous appuierez sur la touche RECALL rappel Vous p...

Page 61: ...e sous tension du téléviseur sur le canal 12 à 7h00 du matin 1 Appuyez sur MENU puis appuyez sur ou jusqu à ce que le menu OPTION apparaisse 2 Appuyez sur ou pour mettre en surbrillance MINU MAR ARR 3 Appuyez sur ou pour mettre en surbrillance REGLAGE puis ENTER MINU MAR ARR apparaisse 4 Appuyez sur ou pour mettre en surbrillance MINU MARCHE et appuyez sur ou pour mettre la position des heures en ...

Page 62: ...EAR effacer à l étape 7 ci dessus Appuyez sur EXIT pour retourner à un écran normal PICTURE AUDIO SETUP CH OPTION TERMINER EXIT ADUSTER CHOISIR EFFACE 12 00 AM MINU ARRET 7 00 AM CAN 012 QUOT MINU MARCHE HORLOGE MINU MAR ARR 8 30 AM Utilisation des fonctions Remarque L heure de mise sous tension comporte une fonction de mise hors tension automatique après 1 heure Une heure après que l heure de mis...

Page 63: ...COLORSTREAM Réglage de la qualité de l image Vous pouvez régler la qualité de l image selon vos préférences y compris le contraste la luminosité la couleur la teinte et la netteté Les paramètres de qualité que vous choisissez seront mémorisés de façon à ce que vous puissiez les rappeler à tout moment Pour régler la qualité de l image 1 Appuyez sur MENU puis sur ou pour mettre en surbrillance le me...

Page 64: ... n est pas standard Quand vous choisissez un canal de sous titres et le mode de télétexte l écran de texte reste affiché en permanence Cependant quand il n y pas de signal aucun caractère n apparaît sur l écran de texte Pressez de façon répétée CAP TEXT jusqu à ce que la boîte disaparaisse 4 Pour mettre hors service la fonction de sous titres appuyez répétitivement sur CAP TEXT jusqu à ce que les ...

Page 65: ...he RECALL La fonction MTS son multi canaux n est pas disponible en mode VIDEO Vous pouvez laisser votre téléviseur sur la position STEREO pour pouvoir sortir automatiquement des émissions en stéréo ou en mono selon le type d émissions Si le son est trop fort en stéréo sélectionnez MONO pour réduire le bruit Le terme STEREO ou SAP est affiché en bleu clair lorsque le téléviseur reçoit le signal Uti...

Page 66: ...ance des haut parleurs de la TV La fonction utilise des signaux stéréo d une diffusion TV ou d une entrée vidéo Pour activer la fonction de son ambiophonique 1 Sélectionnez le mode STEREO si disponisble cf Sélection des émissions stéréo SAP page 29 2 Apppuyez sur MENU puis sur ou jusqu à l aparition du menu AUDIO 3 Appuyez sur ou pour mettre en surbrillance SURROUND 4 Appuyez sur ou pour mettre en...

Page 67: ...mode veille après une durée approximative de 15 minutes s il est réglé sur un canal non attribué ou une chaîne termine la diffusion de ses programmes en fin de journée Cette fonction n est pas disponible en mode VIDEO Comprendre la fonction du mode mémoire Si la tension électrique est momentanément coupée pendant que vous regardez le téléviseur la fonction du mode mémoire ré allumera automatiqueme...

Page 68: ...ode entrelace 480i page 9 Mauvaise réception des chaînes La station peut avoir des problèmes d émission Essayez une autre chaîne Vérifiez le branchement de l antenne Si vous utilisez un magnétoscope assurez vous que la touche TV VCR est sur la bonne position Ne recoit pas de chaîne au delà de la Vérifiez que TV CABLE est en mode CABLE chaîne numéro 13 Ne peut pas sélectionner un canal spécifique L...

Page 69: ...nes Vidéo Audio ENTREE S VIDEO ENTREE Y 1V p p 75 ohm synchronisation négative ENTREE C 0 286V p p signal de salve 75 ohm ENTREE VIDEO AUDIO VIDEO 1V p p 75 ohm synchronisation négative AUDIO 150 mV rms 30 modulation équivalente 47k ohm ENTRÉE ColorStream composantes vidéo Y 1V p p 75 ohm PR 0 7V p p 75 ohm PB 0 7V p p 75 ohm SORTIE VIDEO AUDIO VIDEO 1V p p 75 ohm synchronisation négative AUDIO 15...

Page 70: ...vous a offert le téléviseur l a acheté Le fait de renvoyer cette carte d enregistrement du produit permet à TACP THI de mieux vous servir et d améliorer son service de soutien technique Si vous ne renvoyez pas la carte d enregistrement du produit cela n affectera en aucun cas les droits dont vous disposez aux termes de cette garantie Étendue de votre responsabilité LES GARANTIES SUS MENTIONNÉES SO...

Page 71: ...de la date à laquelle le téléviseur a été expédié à la société de location selon la première occurrence Téléviseurs utilisés à des fins commerciales Les téléviseurs vendus et utilisés à des fins commerciales ont une garantie limitée de quatre vingt dix 90 jours sur toutes les pièces la main d œuvre et les tubes images Guide de l utilisateur Veuillez lire ce guide de l utilisateur dans sa totalité ...

Page 72: ...é en Thaïlande National Service Division TEL 905 470 5400 Service Centers TORONTO 191 McNABB STREET MARKHAM ONTARIO L3R 8H2 CANADA TEL 905 470 5400 MONTREAL 1643 NORTH SERVICE RD TRANS CANADA HIGHWAY DORVAL QUEBEC H9P 1J1 CANADA TEL 514 856 4100 VANCOUVER 22171 FRASERWOOD WAY RICHMOND B C V62 1J5 CANADA TEL 604 303 2500 ...

Reviews: