background image

21

DVD Playback


Input Source

TV

AV

COMPONENT

HDMI1

HDMI2

PC

DVD

Important Information 

The blue silkscreen letters on the remote control are available 
in DVD mode.

Starting Disc Playback 

3. Press 

INPUT

 and select 

DVD

 by using the               button. 

    Press OK to confirm, then press 

PLAY    

  to start playback.

Language

OSD Lang                     Eng

Preference

Audio                            Eng

Disc Menu                     Eng

Subtitle                          Eng

English
French
Spanish
Italian
German

Language

Default  

Preference

Parental

Password
Spdif Output

Reset

2. Insert a disc into the DVD slot with the label facing front.         

1. Turn on the TV.

1. During playback, press 

PAUSE     

to pause playback and 

    display a still picture. Sound will be muted. To resume normal 
    playback, press 

PLAY 

or

 OK

.


Basic Playback Control 

Unless otherwise stated, all operations described are based on 
remote control use.

2. Press 

SKIP         / SKIP         

to go to the previous or next 

    chapter/track during playback.
3. Press 


to display the disc information for Title/Chapter/

    Track.
       

4. Use the number buttons to enter valid chapter/track number 
    directly. The playback skips to the selected chapter/track.
5. Press 

STOP  


to stop during playback.

Depending on the disc, a menu may appear on the TV screen 
once you load in a disc and press 

INPUT

 then select 

DVD

.   

Operations for Video Playback 

1. Use cursors or number buttons on the remote control to 
    select a playback feature or item, then press 

OK

 to start 

    playback.


2. Press 

MENU


to access or remove the menu.


This function allows you to enlarge the picture on the TV 
screen and to pan through the enlarged picture.

1. During playback, press 

ZOOM 

repeatedly to display the 

    pictures with different scales.
2. Press 

ZOOM 

repeatedly


to return to the original size.

1. Press 

SLOW

 during playback to select the required speed: 

    1/2, 1/4, 1/8, 1/16 -(forward only). Sound will be muted.
2. Press 

PLAY      

to return to normal speed.


You can fast forward or fast reverse a disc during playback 
and select a desired search speed: 2x,4x,8x,16x,32x.
1. During playback, press 

REV        / FF         

to select the 

    required speed (backward or forward). 
2. Press 

PLAY      

to return to normal speed.


1. During a disc playback, press 

REPEAT A-B 

at your 

    chosen start point. 
2. Press 

REPEAT A-B 

again at your chosen end point. 

    The section will now repeat continuously.
3. To exit the sequence, press 

REPEAT A-B.

You can repeat the playback of a specific segment within a 
title or track. To do this, you must mark the start and end of 
the segment you want.
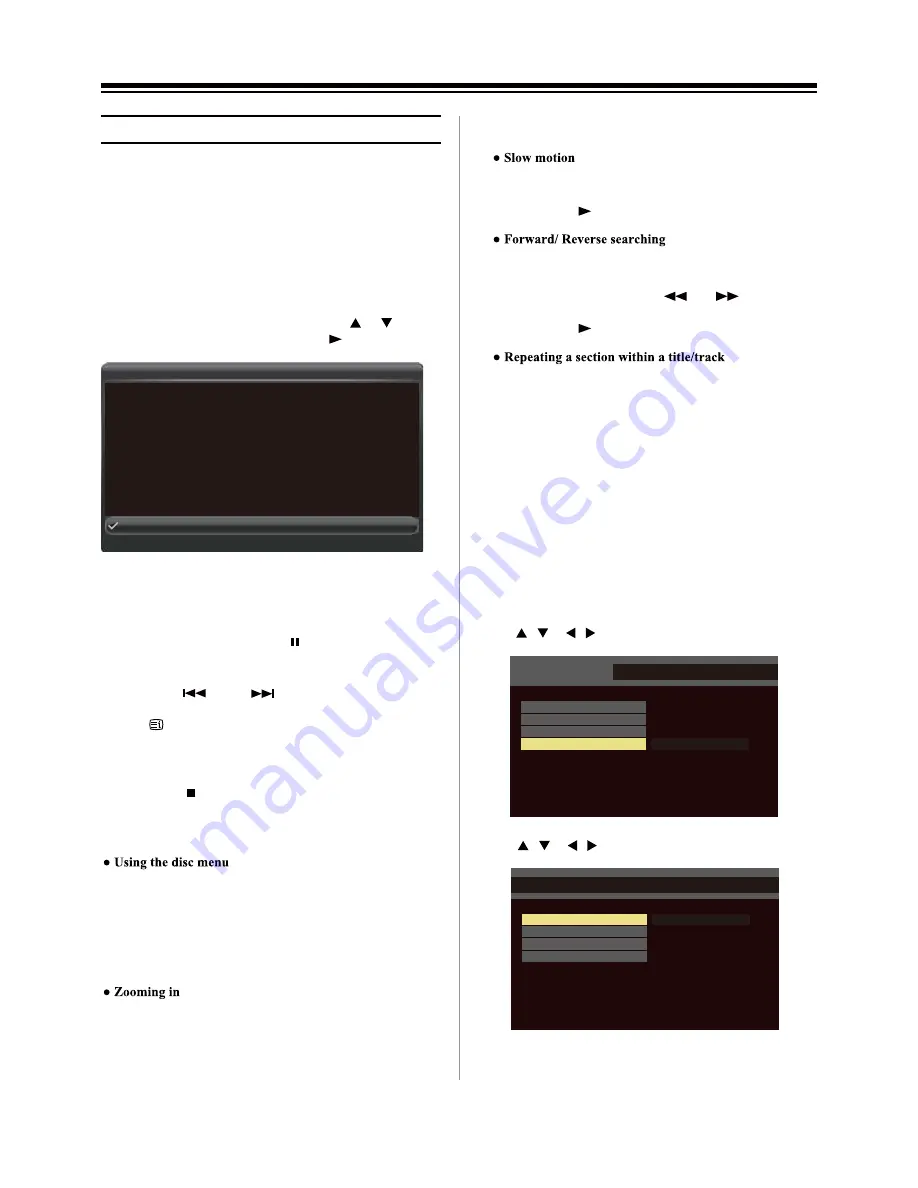
DVD Setup Menu 

In DVD mode, stop disc playback. Press 

SETUP MENU 

on 

the remote control, DVD setup menu will display on the TV
screen.

Use   /   or   /   to select your desired language. 


Use 

 to set your preference. 

 /   or   / 

 or    

Note: In some situation, the DVD playback will start 
automatically when you insert the disc in the slot.

Summary of Contents for 23'L900A

Page 1: ...LCD TV Owner s Record You will find the model number and serial number on the back of the TV Record these numbers in the spaces provided below Refer to them whenever you call upon your TOSHIBA dealer regarding this product Model number Serial number ...

Page 2: ...ng programme positions 15 Switching between two programme positions 15 Stereo and Bilingual transmissions 15 Time Display 15 Quick Access 15 Information 15 EPG 15 Changing picture format 16 Using the TV s features General 17 Picture 17 Sound 17 Setup 18 Applications 19 Preferences 19 Media Player 19 Start Media Player 19 Viewing Photos 20 Playing Music 20 Watching Videos 20 To close the Media Play...

Page 3: ... result in a fire or an electric shock 6 Never place the TV in an area exposed to high humidity levels such as in a bathroom or close to a humidifier This may cause a fire or an electric shock 7 Never place the TV next to a stove where it will be exposed to oil smoke or steam or in a location where there is a large quantity of dust This may cause a fire or an electric shock 8 Always place the TV o...

Page 4: ...areful that children do not insert objects in the TV 4 Never stand or climb on the TV Be specially careful in households with children to prevent them from climbing on top of the TV It may move fall over break become damaged or cause an injury 5 When the TV will not be used for a long period of time such as during vacation or travel remove the power plug from the wall outlet for safety The TV is n...

Page 5: ...lways keep the disc clean Do not use any type of solvent such as thinner benzine commercially available cleaners or antistatic spray for vinyl LPs It may damage the disc 1 Notes on region numbers The region number of this TV DVD combo is 4 If region numbers which stand for their playable area are printed on your DVD and you do not find or disc playback will not be allowed by the player In this cas...

Page 6: ...e double D symbol are trademarks of Dolby Laboratories The terms HDMI and HDMI High Definition Multimedia Interface and the HDMI logo are trademarks or registered trademarks of HDMI Licensing LLC in the United States and other countries DVB is a registered trademark of Digital Video Broadcasting Project MPEG Layer 3 audio coding technology licensed from Fraunhofer IIS and Thomson THIS PRODUCT IS L...

Page 7: ...ttery disposal Never mix battery types or combine used batteries with new ones Notes If the remote control does not operate correctly or if the operating range becomes reduced replace both batteries with new ones If the batteries are dead or if you will not use the remote control for a long time remove the batteries to prevent battery acid from leaking into the battery compartment Effective range ...

Page 8: ...hionedsurface such as a quilt or blanket Leave the bottom of the unit protruding over the edge of the surface and assemble asindicated above Avoid using chemicals on or near TV pedestal or serious injury could result Note Extreme care should always be used when attaching the pedestal stand to avoid damage to the LCD panel Warning To prevent possible electric shock protect the power cord from being...

Page 9: ...ce input receives digital audio and uncompressed digital video from an HDMI device or uncompressed digital video from a DVI device Refer to page 23 Connecting an HDMI or a DVI device 2 USB port For use when inserting a USB device 3 Digital audio output terminal For use when connecting an amplifier with coaxial type digital audio input 4 Headphone jack For use with headphones Notes Please always re...

Page 10: ... socket 5 AV terminal Standard video and standard audio inputs 6 Component input terminals For use when connecting a high definition component video device with standard audio output 7 RGB PC Input terminals For use when connecting a computer Refer to page 25 Connecting a computer 8 Antenna input terminal Analogue TV Digital DVB T antenna signal input 5 6 7 8 ...

Page 11: ...me 11 To alter the volume 12 To display Quick Access menu 13 To display title menu 14 To display the programme guide 15 To exit menus 16 To move up down left or right in the on screen menu OK To confirm the selection 17 To return to the previous level of the on screen menu 18 In DVD mode To display on screen menu when DVD is in playback To display DVD menu when DVD is not in playback In TV mode to...

Page 12: ...mode PLAY MODE To select a repeat play option among Chapter Title All and Repeat Off ZOOM To enlarge a picture SLOW To do a slow forward To reveal concealed text in TV mode To set a bookmark in DVD mode To hold a wanted page in TV mode To repeat playback from point A to B on a disc in DVD mode To enlarge text display size in TV mode To jump to the chapter track you like in DVD mode 25 MARKER REPEA...

Page 13: ...V is turned off When the TV will not be used for a long period of time such as during vacation or travel remove the power plug from the wall outlet If power is cut off while you are viewing the TV the Last Mode Memory function turns on the TV automatically when power is applied again If power is going to be off for a long time and you are going to be away from your TV unplug the power cord to prev...

Page 14: ...logue Use the or button to select one then press OK to start channel scan Analogue Manual Scan Press the or button to select Analogue Manual Scan and press OK to enter Use the or button to select your System then press the or button to select Search and press OK to start channel scan After scanning select Store Current Channel or Store as New Channel to store selected channels Digital Manual Tune ...

Page 15: ...ia Player and REGZA LINK Press the QUICK button to display the Quick Access menu and press or to select the option you d like to change Information The on screen information will give the details of the channel programme currently being viewed 1 Press the information screen will appear giving details of the programme and event currently being viewed 2 Press again to close the information screen EP...

Page 16: ...atching a widescreen DVD widescreen video tape or a 16 9 broadcast when available Due to the range of widescreen formats 16 9 14 9 etc black bars may be visible on the top and bottom of the screen Use this setting to view a true 4 3 broadcast This stretches the left and right sides of a normal picture 4 3 aspect ratio to fill the screen without making the picture appear unnatural The top and botto...

Page 17: ...Settings press OK to enter its submenu The options are as below Picture Mode selects a suitable picture effect The options include Standard Dynamic Mild User and Movie Back Light sets the backlight level Contrast sets the lightness and darkness values of the picture Brightness sets the brightness value for the picture Colour sets the colour value for the picture Tint sets the tint of the colour Sh...

Page 18: ...tomatic Power Down turns on or off the automatic power down feature When set to On the TV will turn into standby if there is no operation for 4 hours Available when select Home Location selects the location Home or Store Software Upgrade allows you to upgrade the TV s software Press OK to enter its submenu USB Upgrade plug a USB device stored with the new software to the TV first Then press OK to ...

Page 19: ...copyright content Toshiba cannot and does not grant such permission Applications Press MENU and select APPLICATIONS by using the or button Press OK to display the APPLICATIONS menu EPG goes to electronic programme guide Time Zone selects a time zone Country Region selects a country region Clock allows you set the date time power on timer power on channel and power off timer Note either the power o...

Page 20: ... in Media Player by using the or button then press OK to continue 2 Press MENU to display the music menu The options include Sort Sort folders and music by Name Genre Artist or Album Parser You can select Recursive to display all music stored in the USB device 3 Use the button to select a music 4 Select a music press OK to play and an automatic playback begins from the selected music Press MENU to...

Page 21: ...se cursors or number buttons on the remote control to select a playback feature or item then press OK to start playback 2 Press MENU to access or remove the menu This function allows you to enlarge the picture on the TV screen and to pan through the enlarged picture 1 During playback press ZOOM repeatedly to display the pictures with different scales 2 Press ZOOM repeatedly to return to the origin...

Page 22: ... Language Default Preference Parental Password Spdif Output Change Language Preference Change Old Password New Password Confirm PWD The default password from the factory is 0000 Use or to change password ...

Page 23: ...ectronic components turn off the HDMI or DVI device first and then the TV Some early HDMI equipment may not work properly with your latest HDMI TV Supported Audio format Linear PCM sampling rate 32 44 1 48kHz To Connect an HDMI Device Connect an HDMI cable type A connector to the HDMI terminal For proper operation it is recommended that you use an HDMI cable with the HDMI Logo Notes If your HDMI c...

Page 24: ...INK compatible device is connected The back of your television AV amplifier Playback equipment Playback equipment HDMI out HDMI out HDMI out HDMI in Notes It is recommended that for correct operation all audio video devices are connected using HDMI cables branded with the HDMI logo If several devices are connected the REGZA LINK feature may not operate properly After connecting the equipment use t...

Page 25: ...ation Especially do not repeatedly quickly plug and unplug the devices This may cause physical damage to the TV and especially the USB device itself Connecting a Computer To Connect a Computer With either an RGB PC or an HDMI connection you can watch your computer s display on the television When connecting a PC to the PC input on television use an analogue RGB 15 pin computer cable To use a PC se...

Page 26: ...operly Make sure to use cables with the HDMI logo Some early HDMI equipment may not work properly with the latest HDMI TV products due to adoption of new standards Why is the VCR DVD picture in black and white Check the correct input has been AV or COMPONENT Why did TV turn off by itself After roughly 15 minutes without any input video signal in TV mode the TV will turn off to save power Why doesn...

Page 27: ...AL SECAM NTSC 3 58 4 43 Aspect ratio 16 9 Visible size diagonal 58 5cm Number of pixels 1920 H x 1080 V dots Sound output at 10 distortion 3Wx2 Input Output terminals Antenna Input 75 Ω RF Input Composite Input Video RCA CVBS Audio RCA L Mono R Component Input Video RCA Y PB CB PR CR Audio RCA L Mono R HDMI Input type A 19pin A V Digital RGB PC Input Mini D sub 15 pin Analogue RGB USB port USB 2 0...

Page 28: ...e laws These software components are provided in as is condition without any warranty whether express or implied Warranty here includes but not limited to an implied warranty for marketability or fitness for specific uses All risks associated with the quality or performance of these software components are assumed by the user TOSHIBA shall not be liable whatsoever for any cost of repair or correct...

Page 29: ...72 MT10AN AUN1E ...

Reviews: