background image

English   

- 3 -

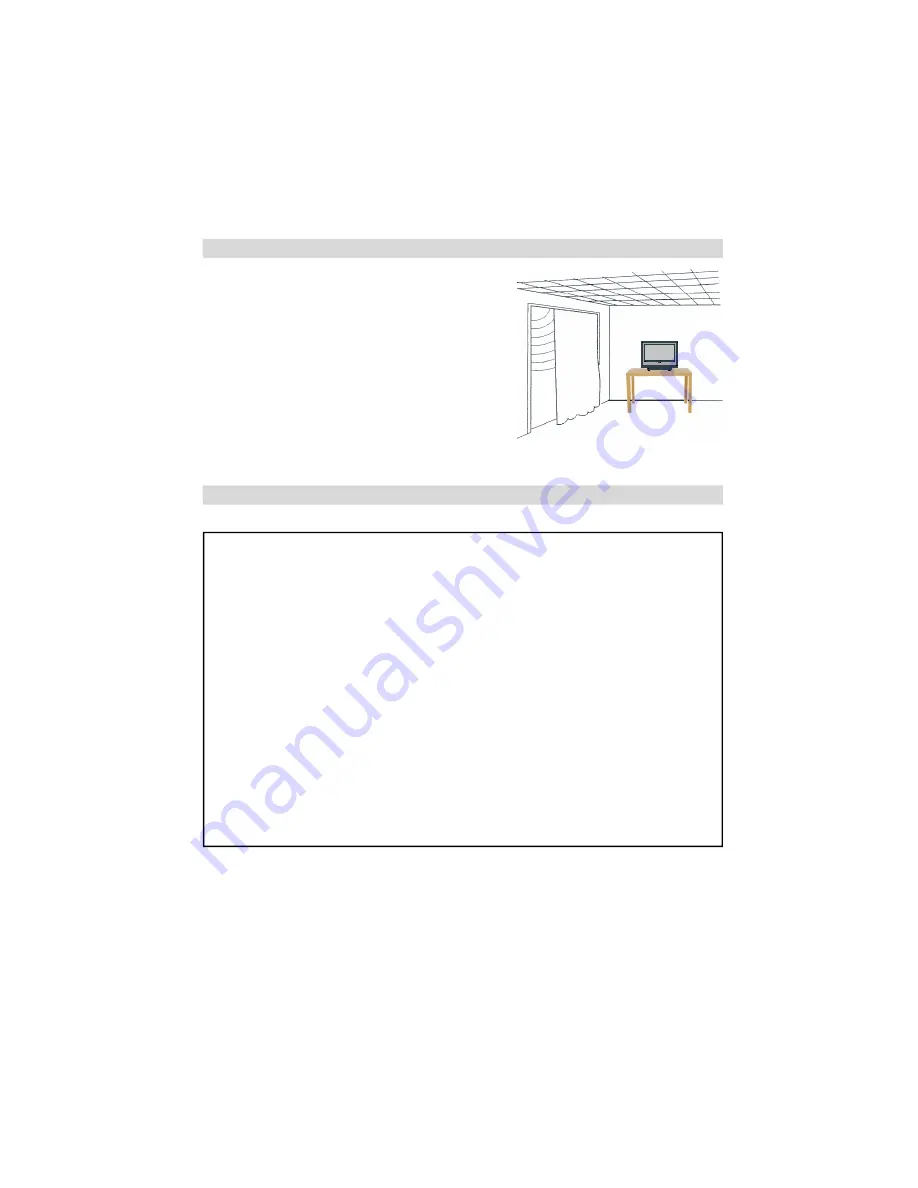
Locate the television away from direct sunlight and strong lights; soft,
indirect lighting is recommended for comfortable viewing. Use curtains
or blinds to prevent direct sunlight falling on the screen.
Place  on  a  sturdy  platform,  the  mounting  surface  should  be  flat  and
steady. 

It must then be secured to the wall with a sturdy tie using

the  clip  on  the  back  of  the  television,  this  will  prevent  it  from
falling  over.

Make  sure  the  television  is  located  in  a  position  where  it  cannot  be
pushed  or hit by objects and that  small items cannot be inserted into
slots or openings in the case.

Please take note

EXCLUSION CLAUSE

Toshiba shall under no circumstances be liable for loss and/or damage to the product caused by:
i)

fire;

ii)

earthquake;

iii)

accidental damage;

iv)

intentional  misuse of  the  product;

v )

use of the product in improper conditions;

vi)

loss and/or damage caused to the product whilst in the possession of a third party;

vii) any damage or loss caused as a result of the owner’s failure and/or neglect to follow the instructions set

out in the owner’s manual;

viii) any  loss  or damage  caused  directly  as  a  result  of  misuse  or malfunction  of  the  product  when  used

simultaneously  with  associated  equipment;

Furthermore,  under  no  circumstances  shall  Toshiba  be  liable  for  any  consequential  loss  and/or  damage
including  but  not limited  to  the  following,  loss  of profit,  interruption of  business, the  loss  of  recorded  data
whether caused during normal operation or misuse of the product.

Note:

 A Toshiba wall bracket or stand, where available, must be used. If a non Toshiba wall bracket or stand

is used the products' BEAB approval will become void and the equipment is then used at the consumers own
risk.

If stationary images generated by text services, channel identification logos, computer displays, video games, on screen
menus, etc. are left on the television screen for any length of time they could become conspicuous, it is always advisable
to reduce both the brightness and contrast settings.

Installation  and  important information

Where to install

Summary of Contents for 19W330DB

Page 1: ...19W330DB COLOUR TELEVISION OWNER S MANUAL 呏午䥂䄭 㥖 い䈩ⴱ㤷㤵ⵃ佖䕒 䅇䔭呆吭 〵〵㔶ⴵ〱へ硸 〵 慺楲慮 㜠卡泽 〺 㨰 ...

Page 2: ... controls picture mode contrast brightness sharpness colour hue 15 colour temperature room lighting Analogue sleep timer 16 On screen information 16 Digital programme guide and setting digital programme timer 17 Digital parental controls setting the pin mode 18 Digital settings favourite programmes locked programmes encrypted programmes 19 Digital settings country and language audio languages 20 D...

Page 3: ...ion leads and interconnections between pieces of equipment are properly made and in accordance with the manufacturers instructions Switch off and withdraw the mains plug before making or changing connections DO consult your dealer if you are ever in doubt about the installation operation or safety of your equipment DO be careful with glass panels or doors on equipment Do not DON T remove any fixed...

Page 4: ...ird party vii any damage or loss caused as a result of the owner s failure and or neglect to follow the instructions set out in the owner s manual viii any loss or damage caused directly as a result of misuse or malfunction of the product when used simultaneously with associated equipment Furthermore under no circumstances shall Toshiba be liable for any consequential loss and or damage including ...

Page 5: ...ing a Toshiba VCR or DVD press to PAUSE STEP press to PLAY press to REWIND press to FAST FORWARD press to EJECT press to STOP press to SKIP REWIND press to SKIP FORWARD MENU GUIDE EXIT TEXT Standby mode To mute the sound To return to the previous programme in TV mode On screen menus To select TV programme number To select between analogue and digital TV or an external source Picture format To exit...

Page 6: ...English 5 Connecting external equipment Before connecting any external equipment disconnect from the main power ...

Page 7: ... to select between TV EXT1 S Video PC YPBPR DTV or HDMI Connecting external equipment continued Connecting the PC via PC input Power off both computer and TV before making any con nections Connect the PC cable to the PC input of your TV and to the 15 pin connector on the rear of your computer Tighten the screws on the plugs until the connectors are fastened securely For PC sound use stereo jack so...

Page 8: ...ress the Right or OK buttons on the remote control to select Use the Up and Down buttons to select the required choice Follow the on screen in structions The functions of each menu are described in detail throughout the manual Using the controls and connections Using the control buttons on the top of the TV To alter the volume press To alter the programme position press on the top of the TV Press ...

Page 9: ...e to move down through the list Set your Language and Audio Language out of the options available You can also set Subtitles OFF as well as specifying the subtitle language When completed press OK to start tuning After auto tuning has completed you may find the time is not correct In this case you can adjust the time by using and buttons to highlight Local Time Setting and and buttons to set the c...

Page 10: ... programmes will be lost Select the SETUP MENU and use to highlight the Auto tuning Press OK A screen will appear warning that previous digital programmes and settings will be deleted Press OK to continue with the Auto tuning WARNING All previous digital programmes and settings will be deleted Continue YES Select Cancel The television will start to search for all available stations You must allow ...

Page 11: ...t allow the television to complete the search When the search is complete the television will automati cally select programme position 1 This may not be a clear picture or the signal may be weak so the station order can be changed using program table which will appear on the screen P01 P01 BBC 1 P02 C 04 P03 P13 P12 P11 P04 P14 P05 P15 P06 P16 P07 P17 P08 P18 P09 P19 P10 P20 Program Table Delete N...

Page 12: ...ing the Down button select Programme and key in the programme position to be tuned with the number buttons we suggest Programme 0 for a media recorder PROGRAMMING Programme 4 Band S Back Menu Exit Exit Channel 30 Standard BG Colour System PAL Use the Down button to select Search then press the Left or Right button to search The television will begin searching for channels Each signal will show on ...

Page 13: ...ress the Left or Right button to set the country Press the MENU button to cancel APS or the OK but ton to start Auto Programming System APS is running 78 Exit Exit You must allow the television to complete the search When the search is complete the television will automati cally select programme position 1 This may not be a clear picture or the signal may be weak so the station order can be change...

Page 14: ...he word Mono will appear Stereo Press to select Stereo or Mono Bilingual Bilingual transmissions are rare If they are transmitted the word Dual will display Choose the re quired programme number and if the word Dual appears press to select Dual 1 or Dual 2 In digital mode a list of languages and audio formats may be shown briefly mono stereo multi channel Use the button to select between them Chil...

Page 15: ...3 When Auto is selected the format being displayed is determined by the picture being broadcast WIDE Use this setting when watching a 16 9 broadcast 4 3 Use this setting to view a true 4 3 broadcast Using the special functions to change the size of the displayed image i e changing the height width ratio for the purposes of public display or commercial gain may infringe on copyright laws ...

Page 16: ...djustments to factory default settings Hue This item is displayed in PICTURE menu when the TV re ceives an NTSC signal In the PICTURE menu press the Down button until Hue is highlighted Press the Left and Right buttons to adjust Hue to suit your preference PICTURE Picture Mode Bright Brightness Back Menu Exit Exit Contrast Colour Hue Colour Temperature Colour Temperature increases the warmth or co...

Page 17: ...Exit Child Lock Off Menu Colour Gray Favorite Mode Off Information Select information by pressing the information screen will appear giving details of the channel and programme currently being viewed BBC ONE BBC TWO CBBC Channel BBC THREE BBC FOUR Showing also Newsround starting in 9 minutes on CBBC Channel Showing also Language Page Down Page Up 13 45 Sat 21 Aug 13 35 Boxing Olumpic 014 minutes l...

Page 18: ...tion about the currently highlighted programme 5 Press EXIT button to return to original programme Programme timer digital only This feature will set the television to go to a specific channel at a certaintime Itcan be used to viewa particular programme or by setting the mode to daily or weekly can be used to view a series of programmes Press MENU and or to select the TIMER MENU TIMER MENU Program...

Page 19: ... a four digit number when these have been entered the screen will ask you to confirm them by entering them again DEFINE PIN NUMBER New PIN Confirm PIN Exit Press MENU to go back to the Parental Control screen The PIN number is now set Mode This feature locks various menus to prevent the television being retuned or the settings being overridden In the PARENTALCONTROL menu press to select Mode PAREN...

Page 20: ... Lock ed Programmes OK Favourites ALL PROGS Common Interface Slot Software Upgrade OK Back Watch TV Press EXIT Using the P buttons will only access those channels in Favourite List 1 when FAV 1 is selected Locking Programmes Locked programmes stops the viewing of selected digi tal channels which can only be accessed by entering the PIN From the FEATURE MENU press to select Favourite and Locked Pro...

Page 21: ...ontinued country language and audio languages Language This feature will define the Menu language selection From the LOCAL OPTIONS menu press to select Language item LOCAL OPTIONS Back Watch TV 13 39 Use or to set your language Audio Languages This feature allows a programme or film to be viewed with a choice of soundtrack language provided they are currently being broadcast From the SETUP MENU pr...

Page 22: ... TV Selecting Reset TV will delete all stored digital and ana logue channels and settings The television will return to factory settings and then auto tune Press MENU and then press until Reset TV is highlighted Press OK to select A screen will appear warning that all previous settings will be deleting press OK to con tinue The digital welcome screen will appear press OK to continue the television...

Page 23: ...elevision is on or in standby If the television is on a screen prompt will appear showing the software download taking place From the SOFTWARE UPGRADE menu press to select Auto Upgrade Use or to select ON or OFF Searching for new software If prefered software upgrades can be searched for manu ally using Search For New Software In the SOFTWARE UPGRADE menu press or to select Search For New Software...

Page 24: ...K to store the settings Press EXIT to return to TV Sound Balance Press the Right button to select the SOUND option from the main menu Press the Down button to highlight Balance and Left or Right button to adjust the settings Press OK to store the settings Press EXIT to finish AVL Auto Volume Limiter AVL limits high volume levels and prevents the extreme changes involume that can occur when channel...

Page 25: ...ble source options are TV EXT1 S Video PC YPBPR DTV or HDMI Press the button on the remote control or the TV AV button on the TV until the required input is high lighted Either wait or press OK to select Input selection AV connections Settings for the INPUT and OUTPUT sockets so that the television recognises connected equipment See page 5 and 6 for a clear view of the back connection recommendati...

Page 26: ...hifts the image vertically towards the top or bottom of the screen In the GEOMETRY menu press the Down button until V Position is highlighted Press the Left or Right button to adjust the value Clock Clock adjustment corrects interference that appear as ver tical banding in dot intensive presentations like spreadsheets or paragraphs or text in smaller fonts In the GEOMETRY menu press the Down butto...

Page 27: ...cal 1 640 480 60 IBM VGA 2 800 600 56 VESA 3 800 600 60 VESA 4 640 480 72 VESA 5 640 480 75 VESA 6 800 600 72 VESA 7 800 600 75 VESA 8 1024 768 60 VESA 9 1024 768 70 VESA 10 1024 768 75 VESA 11 1280 720 60 VESA 12 1280 768 60 VESA Resolution Frequency Hz Mode ...

Page 28: ...ack Menu Exit Exit Txt region West Europe Program Table After the teletext language is selected press EXIT The Text button To view text services press Press again to superimpose text over a normal broadcast picture Press again to return to normal viewing Programmes cannot be changed until text is cancelled The first text page shown will be the initial page Any text page can be accessed by entering...

Page 29: ...again To enlarge the text display size Press once to enlarge the top half of the page press again to enlarge the bottom half of the page Press again to revert to normal size To select a page whilst viewing a normal page Enter the page number then press a normal pic ture will be displayed The television will indicate when the page is present by displaying the page number at the top of the screen Pr...

Page 30: ...a ke s ure the VC R o r D VD playe r is co nn ecte d to the te le vis io n as s ho w n on page 5 th e n s e le ct the co rrect in pu t by pre s s in g A Ple as e che ck you h ave s ele cte d th e co rre ct co un try Go to th e LOCAL OPTIO NS m e nu a nd ch eck the COUNTRY s ettin g on page 1 9 Oth erw is e you can co rre ct th e tim e u s ing the LOCAL TIM E SETTING s ee page 20 Q W hy is the V C ...

Page 31: ...on the top and bottom of the screen occur during a 16 9 broadcast Q Why can only certain digital channels be viewed A Favourite Mode has been set to On See page 19 Q Why are some encrypted digital channels unavailable A Your subscription needs upgrading Contact your service provider Q Why is the soundtrack in English when a different audio language has been selected A The programme is currently be...

Page 32: ...English 31 Notes For your own records ...

Page 33: ...English 32 Notes For your own records ...

Page 34: ... H 80mm D without stand Switzerland 05 12 21 69 approx 480mm W 397mm H 175mm D with stand Sweden 05 12 21 69 Finland 05 12 21 69 Weight approx 5 5 Kg with stand Greece 05 12 21 69 5 1 Kg without stand Austria 05 12 21 69 Headphone Socket 3 5mm stereo Video Input PAL SECAM NTSC 3 58 4 43 Accessories Remote control External Connections 2 batteries EXT 1 Input Output 21 pin Scart RGB A V AAA IEC R03 ...

Page 35: ...100 Chlorine free European Service centre Toshiba Information Systems U K Ltd Consumer Products Division European Service Centre Admiralty Way Camberley Surrey GU15 3DT England 50074235 呏午䥂䄭 㥖 い䈩ⴱ㤷㤵ⵃ佖䕒 䅇䔭呆吭 〵〵㔶ⴵ〱へ硸 〵 慺楲慮 㜠卡泽 〺 㨰 ...

Reviews: