background image

59

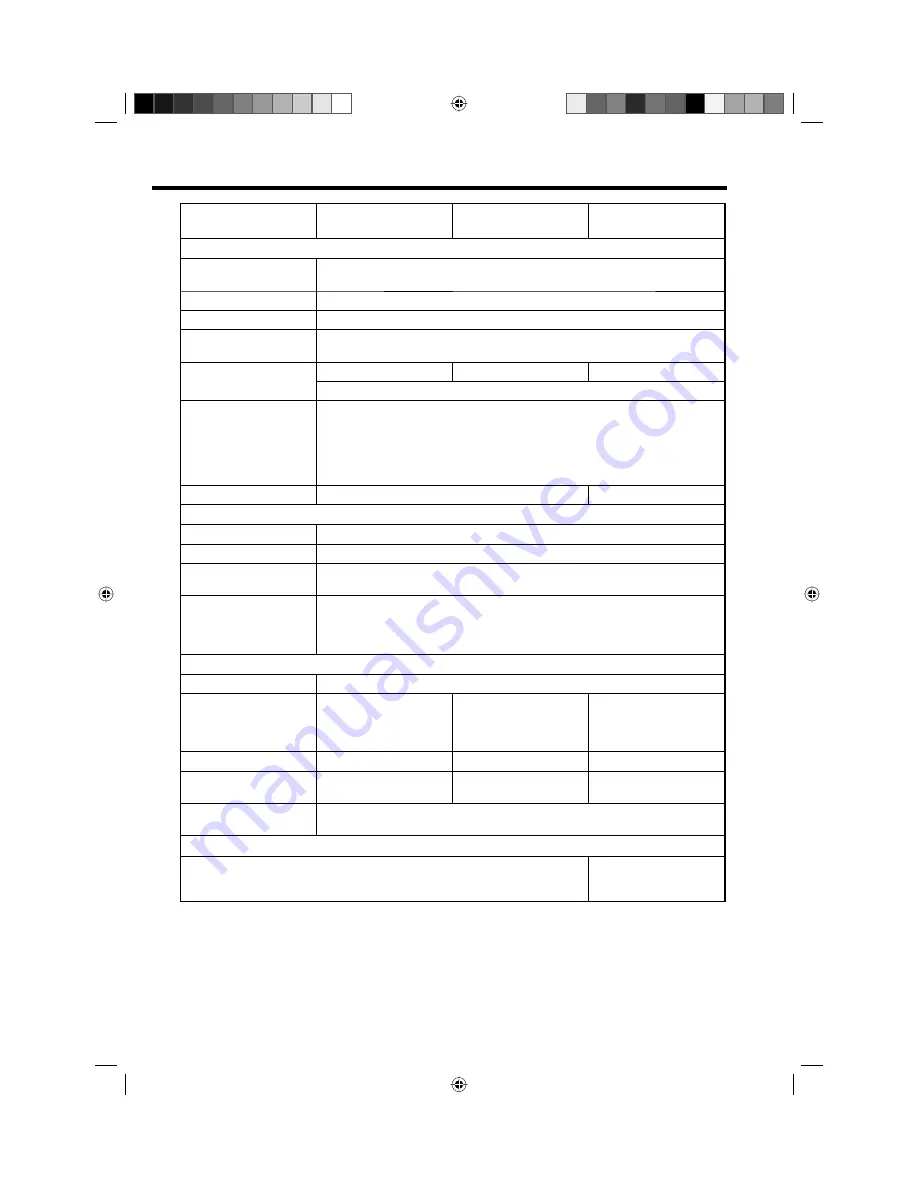
Specifications

Model

19DV615DG/ 

19DV616DG

22DV615DG/ 

22DV616DG

26DV615DG

TV

System:

Analogue: PAL UK, IR, CCIR, FRENCH System, B/G, D/K, I/I, L

Digital: DVB-T (OFDM 2k/8k 16QAM/64QAM)

Video Colour System:

PAL/SECAM/NTSC 3.58/NTSC 4.43/PAL 60

Preset channels:

Analogue channels (99) + Digital channels (Carrier 200/Service1000)

Frequency Range:

Analogue: IreE2~E4, X~Z+2, S1~S10, E5~E12, S11~S41, E21~E69

Digital: E5~E12, ItaD~H2, Fra1~6, Rus6~12, E21~E69

LCD:

470 mm visible*

548 mm visible*

661 mm visible*

TFT low-glass Active Matrix Colour LCD, 1366 x 768 Pixel

HDMI input:

HDMI compliant (type A connector)

HDCP compliant

Suggested scan rates:  PAL: 576i/576p/720p/1080i

 NTSC: 

480i/480p/720p/1080i

PC Audio:  2-channel PCM, 32/44.1/48 kHz sampling frequency


16/20/24 bits per sample

Audio Output Power:

approx. 1.5W (MAX) x 2

approx. 10W (MAX) x 2

DVD

Signal system:

NTSC, PAL (Region 2)

Applicable disc:

DVD (12cm, 8cm), CD (12cm, 8cm)

Output:

Audio : 

(RCA) –12.0 dBm, 1 k 

Ω

Digital Audio :  0.5Vp-p/75 

Ω

Pickup:

CD : 

Wavelength: 775 - 805 nm


Maximum output power: 0.5 mW

DVD :  Wavelength: 640 - 660 nm


Maximum output power: 1.0 mW

GENERAL

Power Source:

AC 220-240V, 50Hz

Power Consumption:

Operation: approx. 38W 

at 230V, 50Hz

Standby: approx. 0.8W 

at 230V, 50Hz

Operation: approx. 53W 

at 230V, 50Hz

Standby: approx. 0.8W 

at 230V, 50Hz

Operation: approx. 94W 

at 230V, 50Hz

Standby: approx. 0.7W 

at 230V, 50Hz

Weight:

5.2 kg

5.4 kg

10.3 kg

Dimensions:

47.6(W)x36.4(H)x

20.7(D)cm

55.0(W)x40.7(H)x

20.7(D)cm

68.1(W)x51.4(H)x

22.7(D)cm

Surrounding 

temperature:

Operation: 5°C ~ 40°C/Storage: –20°C ~ 60°C

ACCESSORIES

2 batteries (AAA/R03/UM-4)/Remote control unit/Aerial cable/AC cord

2 batteries (AAA/R03/

UM-4)/Remote control 

unit/AC cord

Weight and Dimensions are approximate. Because we continually strive to improve our products we may 

change specifications and designs without prior notice.

*Visible screen size is approximate.

52R0131A_ENG.indd   59

52R0131A_ENG.indd   59

4/3/09   11:09:02 AM

4/3/09   11:09:02 AM

Summary of Contents for 19DV616DG

Page 1: ...ughly LCD TV DVD COMBINATION Ownerʼs Record The model number and serial number are on the back of your TV DVD Record these numbers in the spaces below Refer to these numbers whenever you communicate with your Toshiba dealer about this TV DVD Model number Serial number 52R0131A_ENG indd 1 52R0131A_ENG indd 1 4 3 09 11 08 06 AM 4 3 09 11 08 06 AM ...

Page 2: ...n conforms to the DVB T specifications the compatibility to future digital DVB T transmissions is not guaranteed Some digital television functions may not be available in some countries The DVB T system present in this device is FTA Free to air The HD ready Logo is a trademark of EICTA DVB is a registered trademark of the DVB Project This logo indicates that the product is compliant with European ...

Page 3: ...Parental lock 25 Version 26 Software Upgrade 26 Common Interface 26 Channel list 27 Channel banner 27 Multi audio 28 DVB Subtitle 28 Using the Digital Service UK only 28 EPG Electronic Program Guide 29 EPG Timer 30 Disc 31 Playing a disc 32 Zooming 35 Locating desired scene 35 Marking desired scenes 36 Repeat playback 37 A B Repeat playback 37 Changing angles 38 Title selection 38 DVD menu 38 Chan...

Page 4: ...r of the set to overheat resulting in faults or damage to the set Taking fall prevention measures If these measures are not taken the unit can fall and you could be injured Contact the shop where you purchased the unit to obtain full details of the measures When a TV stand is used Ensure the unit is fully on the stand and placed in the centre Do not leave the stand doors open You could be hurt as ...

Page 5: ...osture 3 Grab the pedestal stand and lift the display up Confirm the pivot is locked 4 Place the TV on a sturdy level surface that can support the weight of the TV 5 Be sure to secure the TV to a wall stud pillar surface or other immovable structure To secure the TV in this manner 1 attach a clip to an immovable structure then 2 pass a sturdy strap through the clip and attach each end to the hooks...

Page 6: ... 230V 50Hz a If standby LED is red you may turn off To turn off press TV button 1x and release For confirmation standby LED will turn off b If standby LED is off you may turn on To turn on press TV button 1x and release For confirmation standby LED will change to red and about 1 second later to green c If the TV is currently working press TV button 1x and release to turn off For confirmation stand...

Page 7: ...14 Call Setup menu Activate the analogue menu 47 11 Exit the menu screen Cancel marking 11 36 Remove DVD set up menu 47 51 Play 32 Stop 32 Hold the text page Skip chapter to reverse direction 15 34 Reveal quiz page answers Review playpack 15 34 Sub page selection Forward playback 15 34 Teletext enlargement Skip chapter to forward direction 15 34 Fastext TOPtext buttons DVD control buttons 15 34 37...

Page 8: ... 1 Open the battery compartment 2 Install the batteries as shown below ensuring the correct polarity 3 Close the battery compartment The remote control handset will not work properly in the following cases If bright sunlight directly beams onto the unit front If an obstacle is placed between the unit and the handset Z Z Z Z Z Z If the batteries have not been installed according to their polarities...

Page 9: ...analogue A V Signal Composite or S Video See page 56 E Digital audio output Digital output for CD DVD DVB T see page 56 F PC MONITOR input PC See page 53 G Scart socket AV1 For the connection of scart cable See pages 55 56 H PC HDMI AUDIO input See pages 53 54 I HDMI input See page 54 J Aerial input socket Connect the outdoor aerial to the aerial input socket as shown K C I slot The Common Interfa...

Page 10: ...IT END MENU RETURN GERMANY 3 Press or to select AUTO TUNING then press ENTER The confirmation screen will be displayed Press ENTER to start automatic tuning Your TV will now automatically tune in all available channels Your TV will tune the analogue channels first then tune the digital channels Note Please be patient the Auto Tuning process can take several minutes to complete When the programme o...

Page 11: ...ss or to select AUTO TUNING then press ENTER to enter the AUTO TUNING menu on the following pages the MENU can be called in the same way as here AUTO TUNING MANUAL TUNING CH ALLOCATION LANGUAGE ENGLISH VERTICAL POSITION 0 4 3 AUTO 4 3 DEFAULT 4 Press EXIT to return to the normal screen Selecting the video input source Press INPUT to view a signal from another device connected to your TV such as a ...

Page 12: ...ged if you wish 1 Select CH ALLOCATION Then press ENTER AUTO TUNING MANUAL TUNING CH ALLOCATION LANGUAGE ENGLISH VERTICAL POSITION 0 4 3 AUTO 4 3 DEFAULT 2 Select desired option then press ENTER SORT ERASE PROGRAM SKIP CH LABEL 3 After setting the each option press MENU to return to CH ALLOCATION menu 4 Press EXIT to return to the normal screen Description about the each setting option SORT Press ...

Page 13: ...o start tuning Tuning will stop automatically at next available station If this does not happen to be the BBC 2 press or again to continue tuning for the BBC 2 Then press ENTER SEARCH FINE 168 30MHz COLOUR SYSTEM AUTO SOUND SYSTEM AUTO BBC1 168 30MHz 6 If you like to use fine tuning select FINE and press ENTER Press or to fine tune See the note on this page SEARCH FINE 175 30MHz COLOUR SYSTEM AUTO...

Page 14: ...back to the last selected channel Volume adjusting Press VOL or to adjust the volume The volume level indicator disappears after 4 seconds MUTE Press MUTE The sound will be cut off MUTE will appear for approx 4 seconds The muting can be released by pressing MUTE again or VOL or Information display In the analogue TV mode Press Channel number and picture size setting will appear for approx 4 second...

Page 15: ...u desire appears Or enter the requested page number by using the 10 Number Buttons And if you mistype something just enter the com plete 3 digit wrong page number then enter the de sired number again Or press one of the coloured teletext buttons so that a page from Fastext TOPtext is shown Hold Pages Some pages are divided up into subpages by the channel Subpages are automatically shown in turn as...

Page 16: ...MONO A broadcast signal is received NICAM M1 M2 illuminates for approx 4 seconds when a NICAM MONO A and MONO B broadcast signal is received This will be displayed for approx 4 seconds if a NICAM signal is received when the NICAM OFF option is selected Stereo reception in Germany STEREO illuminates for approx 4 seconds when a STEREO broadcast signal is received When 2 channel sound reception is av...

Page 17: ...ansmit a Wide Screen Signalling WSS signal which can determine the correct picture width and set it automatically when the AUTO setting is used If you want to change this setting you can select from the formats listed below 16 9 CINEMA 14 9 Notes When the PICTURE SIZE is set to AUTO the aspect ratio will automatically change according to the Wide Screen Signalling WSS signal if it is available Thi...

Page 18: ... or to adjust the vertical position of the picture by up to 10 and downwards by up to 10 AUTO 4 3 DEFAULT 2 4 3 16 9 This option selects the default way that a 4 3 signal is shown either as normal 4 3 or expanded in the 16 9 mode according to your preferences SLEEP TIMER 0 120 min every 10 minutes You can set SLEEP TIMER to automatically turn off the TV To cancel the SLEEP TIMER set to 0 AV1 INPUT...

Page 19: ... Channel Organizer Technical Information Common Interface Installation System Configuration Guide of the available buttons Language Setup 2 Press ENTER The selected menu will appear Some of the options have a sub menu Press or to select desired sub menu then press ENTER Example sub menu in the Installation option Language Setup Menu Language English Pref Audio Language English Pref Subtitle Langua...

Page 20: ...m n i a M ABC CH1 CH2 CH3 Texd CI i ABC i 2 The confirmation banner will be displayed Press or to select Yes or No then press ENTER 3 The Auto Scan process will now begin The scanning process will be displayed in the progress bar Auto Scan TV Progress Searching Carrier 1 Frequency kHz 562000 003 DVB T 16QAM Radio 070 BBC Radio 1 001 001 BBC ONE 002 BBC TWO 007 BBC THREE Navigate Exit Note If FINLA...

Page 21: ...set Channel List Type Select the Channel List Type by pressing and press ENTER If FINLAND is selected on the AUTO INSTALLATION COUNTRY screen Data is displayed on the Carrier Setup screen Carrier Setup The Carrier setup option menu lists all the carriers multiplexes that are currently available and allows you to Rename Delete or Rescan carriers individually 1 Press or to select Carrier Setup then ...

Page 22: ...ton 1 8 you can activate the following functions from this menu for each channel Lock Skip Go To Delete Rename Move Change No and Move To You can deactivate each of these functions by pressing the same number again See page 23 for setting details Indications S No Service Name Lock Skip Del Move 030 CBBC Service number Service name Pay channel Locked service Delete mark Skipped service Move mark Th...

Page 23: ...ing A confirmation message displays Press to select Yes and then press ENTER Rename Change individual service names Press to select the desired service Press 5 on the remote control A character set screen displays Press Yellow button to enter a new name for the service Press to move the cursor then press ENTER to confirm the input of a character Press DIGITAL MENU to save the setting A confirmatio...

Page 24: ...reen Bottom 3 After all the changes are made press EXIT to return to the normal screen Time Setup If the time displayed on the Channel banner differs from the actual time it can be corrected 1 Press or to select Time Setup then press ENTER P Subtitle assword Setup Display Setup Time Setup Main menu System Configuration ABC CH1 CH2 CH3 Texd CI i ABC i 2 Time Setup menu will appear If the time displ...

Page 25: ...e Then press EXIT to return to the normal screen 4 You can also change the password using the next option Press or to select Change password Then enter your chosen new password 0 to 9 be sure to remember this password After you have entered the new password for the first time you need to enter the same password again for confirmation The Information banner will then appear Press EXIT to return to ...

Page 26: ...on No you can continue to watch TV programmes as before Note Do not disconnect the AC cord when the software upgrade is in progress as this may cause the upgrade to fail At this time you cannot use any of the buttons When the unit searches for a software upgrade signal the message Please wait will be displayed Auto upgrade 1 When you tune to the service that provides the upgrade via Over Air Downl...

Page 27: ...ge 24 o e r e t S E N O C B B 1 0 0 251_ABC_Monosco_0 17 17 37 7 0 0 2 8 0 0 2 8 3 7 1 8 0 7 1 0 1 e g A Service No Service name Lock status DVB Teletext available DVB Subtitle available Pay TV Audio mode Time and date Parental rating Programme name Starting time Ending time of current programme Duration graph Genre Undefined 2 Press again to display the Basic Service Information You can verify th...

Page 28: ...udio service The DVB Subtitle feature can be enabled or disabled at anytime 1 Press or to select Subtitle then press ENTER Time Setup Password Setup Subtitle Display Setup Main menu System Configuration ABC CH1 CH2 CH3 Texd CI i ABC i 2 Press or to select your desired subtitle language from the available languages Subtitle e g a u g n a L English Navigate Enter Exit 3 To turn off the DVB Subtitle ...

Page 29: ... the programme information for the currently highlighted programme To scroll through the service list page by page press Red or Green button Events list List the events in a grid of rows and columns Each row shows the list of events that are available for the corresponding service in the service list Within each row you can press or to navigate through the rest of the events You can easily move to...

Page 30: ...ay MNO PQS STU TCM VWXYZ SAT 1 ARTE DEF 671_MNO_10Step_0820_0100_0120_Audio2_0100_0120 8 0 0 2 8 0 0 2 n u S 671 MNO 01 00 Channels 679_VWXYZ_Monosoo_0100_0300 No Event Name No Event Name No Event Name No Event Name 671_M 672_PQR_SMPTE_col 673_STU_SDTV 673_STU_SDTV Moving 672_PQR_SMPTE_col 671_M 671_MNO_10step 02 00 01 30 Navigate Enter Exit Guide View Info TV Radio Guide 16 50 Sun 20 08 2008 TV N...

Page 31: ... or bend the disc Storing Disc Store the disc in the case to avoid risk of scratches dirt or damage Do not leave disc exposed to direct sunlight or in hot or humid places Cleaning Disc Wipe the disc with a clean dry cloth from center to edge Do not wipe in circular direction Do not use liquid or aerosol cleaners On Video CDs This unit supports Video CDs equipped with the PBC Version 2 0 function P...

Page 32: ...ces Reading 4 Press to end playback The unit records the stopped point depending on the disc appears on the screen Press PLAY to resume playback from the scene point If you press again appears on the screen the unit will clear the stopped point To start playback in the stop mode Press PLAY Note If the unit does not operate properly Static electricity etc may affect the player s operation Disconnec...

Page 33: ...g facility Resuming cannot function when you play a PBC featured Video CD while the PBC is on To turn off the PBC see page 31 Some playback operations of DVDs may be intentionally fixed by software producers Since this unit plays DVDs according to the disc contents the software producers designed some playback features may not be available Also refer to the instructions supplied with the DVDs Do n...

Page 34: ...ou press the picture advances one frame To resume normal playback Press PLAY Note You can use frame by frame playback for DivX CD The sound is muted during frame by frame playback Playing in slow motion DVD VCD Press or during playback Each time you press or the slow motion speed changes To resume normal playback Press PLAY Note The sound is muted during slow motion playback You can use slow motio...

Page 35: ... desired point to playback In the case of VCD Audio CD discs time and track are used to locate the desired point to playback To check the title chapter track and time press 1 Press JUMP during playback or resume stop mode Time Title Chapter Jump 2 Press or to select the Title Track Chapter or Time Time Title Chapter Jump 3 Press Number buttons 0 9 to input the number If you input a wrong number pr...

Page 36: ...RKER during playback or stop mode Marker 2 Marker 1 Marker 3 27 00 54 16 08 25 31 01 02 2 Press or to select the Marker 1 3 Marker 2 Marker 1 Marker 3 27 16 08 54 25 31 00 01 02 3 Press ENTER Playback starts from the marked scene To cancel the Marker Follow the above steps 1 2 then press CANCEL Note Some discs may not work with the marking operation The marking is cancelled when you eject the disc...

Page 37: ...playback DVD VCD Audio CD A B repeat playback allows you to repeat selection between two selected points 1 Press REPEAT A B during playback The start point is selected A 2 Press REPEAT A B again The end point is selected Playback starts at the point that you selected Playback stops at the end point and returns to Point A automatically then starts again A B To resume normal playback Press REPEAT A ...

Page 38: ... PLAY The playback of the selected title will start Note Depending on the DVD you may not be able to select the title Depending on the DVD a title menu may simply be called a menu or title in the instructions supplied with the disc DVD menu DVD Some DVDs allow you to select the disc contents using the menu When you playback these DVDs you can select the subtitle language soundtrack language etc us...

Page 39: ...e desired language is selected The on screen display will disappear after a few seconds In case of Video CD playback Audio type changes as follows each time you press AUDIO SELECT 2 2 Fre Dolby Digital LR L R Subtitles DVD When playing back a disc recorded with subtitles you can select the subtitle language or turn the subtitle off 1 Press SUBTITLE repeatedly during playback until the desired lang...

Page 40: ... than one minute for this unit to read MP3 JPEG DivX files depending on its structure Music recorded by Joliet Recording Specification can be played back The music files recorded by Hierarchical File System HFS cannot be played Limitations on displaying of the file name The maximum number for display is 15 characters Long file names will be condensed To playback MP3 JPEG DivX CD in the recorded or...

Page 41: ...e only MP3 files are played back in order Folder 1 Folder 2 MP3 1 MP3 2 MP3 3 MP3 4 MP3 5 MP3 6 MP3 2 MP3 JPEG Preview Select Files Repeat Off Mode Off If the first file is a JPEG file the first JPEG file is played back If the first file is a DivX file the first DivX file is played back If there is no file at a root directory playback does not begin automatically 2 Press ENTER The selected file st...

Page 42: ...s Press ZOOM See Zooming on page 35 3 Press to end playback The file browser appears on the screen If you want to watch the other file repeat steps 1 2 Slide show playback The slide show enables you to view pictures files one after another automatically Preparation Set JPEG Interval setting to Off 5 Seconds 10 Seconds or 15 Seconds See page 49 1 Select your desired starting file for the slide show...

Page 43: ...gin automatically 2 Press ENTER or PLAY The selected DivX movie will be played back on the TV screen 3 Press STOP to end playback The unit records the stopped point appears on the TV screen Press PLAY to resume playback from the scene point If you press STOP again or unload the disc the unit will clear the stopped point To watch the other file repeat steps 1 2 Playing DivX VOD content DivX VOD con...

Page 44: ...R repeatedly to select Track or All Folder 1 Folder 2 MP3 1 Select Files Repeat Track Mode Off 3 Press PLAY The unit automatically starts repeat playback after finishing the current track To resume normal playback Select Repeat Off in step 2 Random playback Audio CD MP3 JPEG DivX 1 In the file browser press to select Mode during stop mode Folder 1 Folder 2 MP3 1 Select Files Repeat Off Mode Off 2 ...

Page 45: ...ogram list select Edit Mode again and press ENTER to release edit mode Folder 1 Folder 2 MP3 1 MP3 2 Edit Mode Program View Add To Program 4 Press to select Program View then press ENTER Program View shows only the programed files that you have added in Step 2 Browser View Program View Folder 1 Folder 2 MP3 1 MP3 2 MP3 3 Edit Mode Program View Add To Program MP3 1 MP3 2 MP3 5 MP3 3 MP3 6 Edit Mode...

Page 46: ...tep 2 press to select the track number you want to change then press CANCEL Press Number buttons 0 9 to overwrite the new track number To clear the program one by one Select Mode to Program press to select the track number Then press CANCEL To clear all the programs In the above column press to select Clear Program Then press ENTER 1 2 Random playback VCD 1 Press PLAY MODE during playback or stop ...

Page 47: ...e corresponding pages 48 50 Press ENTER to save the setting Repeat steps 3 and 5 to change other option To select another section go back to step 2 by pressing or RETURN repeatedly 6 To clear SETUP screen press SETUP or press RETURN repeatedly Setting details Section Option Details Page Menu Subtitle Audio To select the language of Menu Subtitle and Audio if more than one languages are available o...

Page 48: ...uage is French Espanol To display OSD language is Spanish Deutsch To display OSD language is German Italiano To display OSD language is Italian Parental Off Set Password Output Interlace DivX R VOD DRC Off QSound On TV Screen 16 9 Display On Picture Mode Auto JPEG Interval Off TV Screen You have the following screen sizes to choose from 4 3 Letterbox When playing back a wide screen DVD disc it dis...

Page 49: ... form of a slide show at 10 second intervals 15 Seconds Plays back images in the form of a slide show in 15 second intervals Parental Off Set Password Output Interlace DivX R VOD Menu English Subtitle English Audio English E B L Off TV Screen 4 3 Display On Picture Mode Auto JPEG Interval 5 Seconds Screen Saver On Night Mode Off Digital Out Bitstream Night Mode Night Mode enables you to control th...

Page 50: ...cific rating level information though its disc jacket says adult For those discs the age restriction will not work The password is required every time when you change the parental level If you input a wrong number press CANCEL Password 1 Press or to select Password then press ENTER Enter Current Password screen will appear 2 Press Number buttons 0 9 to input the current password If the password ha...

Page 51: ...ng screen will change depending on which disc is played If you select YES with the ENTER password input screen will then appear 3 Enter the password with Number buttons 0 9 Then press ENTER To exit from the entry press RETURN Enter Password 4 Playback will commence if the entered password was correct Depending on the DVD disc the disc may try to temporarily cancel the rating level that you have se...

Page 52: ...8 Bihari 1218 Hungarian 1831 Oriya 2528 Tibetan 1225 Breton 1228 Icelandic 1929 Panjabi 2611 Tigrinya 3019 Bulgarian 1217 Indonesian 1924 Pashto Pushto 2629 Tonga 3025 Burmese 2335 Interlingua 1911 Persian 1611 Turkish 3028 Byelorussian 1215 Irish 1711 Polish 2622 Turkmen 3021 Cambodian 2123 Italian 1930 Portuguese 2630 Twi 3033 Catalan 1311 Japanese 2011 Quechua 2731 Ukrainian 3121 Chinese 3618 J...

Page 53: ...s not granted for this TV Description about the each setting option PICTURE Menu BRIGHTNESS and CONTRAST You can adjust these according to your personal preferences HOR POSITION and VER POSITION To adjust the horizontal and vertical placing of the image PHASE and CLOCK Eliminates the horizontal PHASE and vertical CLOCK interfering lines RED GREEN BLUE Influences the colour balance BACKLIGHT Press ...

Page 54: ...e the appropriate HDMI audio input setting for each connection depending on whether the source is equipped with a DVI or HDMI socket 1 Select HDMI1 AUDIO only for 26DV615DG the rest of the models are HDMI AUDIO then press ENTER Press or to select HDMI or DVI NICAM AUTO BASS 25 TREBLE 25 BALANCE 0 SURROUND OFF HDMI HDMI 1 AUDIO HDMI 2 Press EXIT to return to the normal screen Note Follow the user s...

Page 55: ...and correctly attached before connecting the appliances to the power supply Connect with Satellite receiver as shown below Select the TV Program at the satellite receiver To do this use the remote control of the satellite receiver You cannot store the same station once again additionally in LCD Monitor which already stored in satellite receiver 2 Connecting a DVD player To ensure optimum picture q...

Page 56: ... Digital sound track Please insert the correct DVD side When a DTS sound track is played the integrated loudspeakers are mute The DTS sound can only be played digitally using the digital outlet DTS decoder is necessary for hearing Digital audio output is active only when receiving DVB T not when receiving analogue cable TV broadcasting 4 Connecting Video camera and Video recorder Select the AV inp...

Page 57: ...e there is no TV service in the channel list No services There are no services in the received signal No subtitles There are no subtitles in the received signal No video No audio The signal does not contain audio or video Audio stream not available The Multi Audio Menu cannot be displayed because there is no sound Descrambling not possible The services for the selected channel are not available fo...

Page 58: ...a disc An unplayable disc is inserted Insert a playable disc Check the disc type and colour system Place the disc in the disc slot with the label side facing forward The disc is dirty Clean the disc Cancel the parental lock function or change the parental lock level 32 31 32 31 50 51 appears on the screen The function is prohibited with the unit or the disc 34 The LCD panel is a very high technolo...

Page 59: ...le disc DVD 12cm 8cm CD 12cm 8cm Output Audio RCA 12 0 dBm 1 k Ω Digital Audio 0 5Vp p 75 Ω Pickup CD Wavelength 775 805 nm Maximum output power 0 5 mW DVD Wavelength 640 660 nm Maximum output power 1 0 mW GENERAL Power Source AC 220 240V 50Hz Power Consumption Operation approx 38W at 230V 50Hz Standby approx 0 8W at 230V 50Hz Operation approx 53W at 230V 50Hz Standby approx 0 8W at 230V 50Hz Oper...

Page 60: ...e disposal service or the shop where you purchased the product Following information is only valid for EU member States Disposal of batteries and or accumulators The crossed out wheeled dust bin symbol indicates that batteries and or accumulators must be collected and disposed of separately from household waste If the battery or accumulator contains more than the specifi ed values of lead Pb mercu...

Reviews: