background image

Maintenance

22

Greasing and Lubrication

Service Interval/Specification

Grease the machine after every 25 operating hours or
once a year, whichever occurs first. Grease more
frequently when operating conditions are extremely
dusty or sandy.

Grease Type: General-purpose grease.

How to Grease

1.

Disengage the blade control (PTO), set the
parking brake, and turn the ignition key to
“OFF” to stop the engine.

2.

Clean the grease fittings with a rag. Make sure to
scrape any paint off the front of the fitting(s).

3.

Connect a grease gun to the fitting. Pump grease
into the fittings.

4.

Wipe up any excess grease.

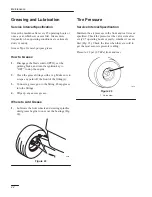
Where to Add Grease

1.

Lubricate the front wheels and steering spindles
until grease begins to ooze out the bearings (Fig.
22).

2346

Figure 22

Tire Pressure

Service Interval/Specification

Maintain the air pressure in the front and rear tires as
specified. Check the pressure at the valve stem after
every 25 operating hours or yearly, whichever occurs
first (Fig. 23). Check the tires when they are cold to
get the most accurate pressure reading.

Pressure: 12 psi (.85 kPa) front and rear

1

1872

Figure 23

1. Valve stem

Summary of Contents for Wheel Horse 16-44 HXLE

Page 1: ...refully It contains information about your safety and the safety of others Also become familiar with the controls and their proper use before you operate the product FORM NO 3317 996GB Wheel Horse 16...

Page 2: ...ry and damage to the product Although Toro designs produces and markets safe state of the art products you are responsible for using the product properly and safely You are also responsible for traini...

Page 3: ...d Stopping the Engine 11 Using the Blade Control PTO 12 The Safety System 12 Driving Forward or Backward 13 Stopping the Machine 13 Setting the Height of Cut 14 Page Positioning the Seat 14 Positionin...

Page 4: ...f the effects of ground conditions especially slopes incorrect hitching and load distribution Preparation 1 While mowing always wear substantial footwear and long trousers Do not operate the equipment...

Page 5: ...ly Use care when reversing Use counterweight s or wheel weights when suggested in the instruction handbook 7 Watch out for traffic when crossing or near roadways 8 Stop the blades rotating before cros...

Page 6: ...rass catcher frequently for wear or deterioration 6 Replace worn or damaged parts for safety 7 If the fuel tank has to be drained this should be done outdoors 8 On multi bladed machines take care as r...

Page 7: ...Safety 5 Slope Chart Read all safety instructions on pages 2 8...

Page 8: ...hile engine is running Stay a safe distance from the machine Machine rollover Machine rollover Machine rollover side hill up hill down hill Stay a safe distance from the mower Machine rollover ROPS Sa...

Page 9: ...passenger seat only if the driver s view is not hindered Severing of hand Rotating knives Severing of foot Rotating knives Cutting or entanglement of foot Rotating auger Severing of fingers or hand i...

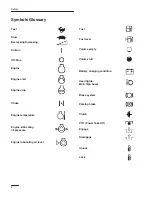
Page 10: ...hoke Clutch Engage Disengage Brake system Parking brake On Run Battery charging condition Off Stop Engine Head lights Main high beam Fuel Engine lubricating oil pressure PTO Power Take Off Unlock Lock...

Page 11: ...line fumes may be ignited by a spark Store gasoline in an approved container and keep it out of the reach of children Never buy more than a 30 day supply of gasoline Stabilizer Conditioner Toro Stabil...

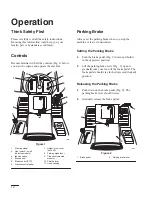
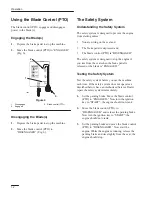
Page 12: ...of cut lever deck lift 8 Parking brake lever 9 Tilt button selected models 10 Throttle lever 11 Hood opening Parking Brake Always set the parking brake when you stop the machine or leave it unattended...

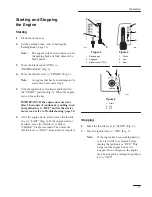
Page 13: ...anking turn the ignition key to OFF and let the starter motor cool refer to Troubleshooting page 30 6 After the engine starts slowly move the throttle lever to FAST Fig 4 If the engine stalls or hesit...

Page 14: ...ISENGAGED The safety system is designed to stop the engine if you rise from the seat when the brake pedal is released or the blade is ENGAGED Testing the Safety System Test the safety system before yo...

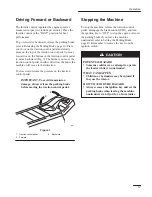
Page 15: ...the traction control pedal IMPORTANT To avoid transmission damage always release the parking brake before moving the traction control pedal 1 2 3 1861 Figure 7 1 Traction control pedal 2 Forward 3 Bac...

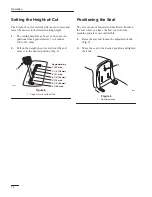
Page 16: ...ck lift and move it to the desired position Fig 8 1 1 1 2 38 mm 1 25 mm 2 51 mm 2 1 2 64 mm 3 76 mm 3 1 2 89 mm 4 102 mm Approximately 1853 Figure 8 1 Height of cut lever deck lift Positioning the Sea...

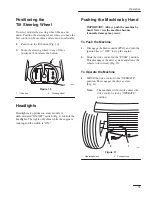
Page 17: ...The lights only shine while the engine is running and the switch is ON Pushing the Machine by Hand IMPORTANT Always push the machine by hand Never tow the machine because transaxle damage may occur To...

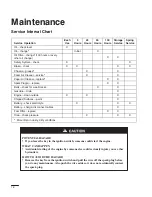
Page 18: ...X Engine clean outside X X X Chipped Surfaces paint X Battery check electrolyte X X X Battery charge disconnect cables X Fuel Filter replace X X Tires check pressure X X X More often in dusty dirty c...

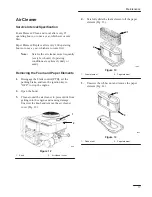
Page 19: ...the Foam and Paper Elements 1 Disengage the blade control PTO set the parking brake and turn the ignition key to OFF to stop the engine 2 Open the hood 3 Clean around the air cleaner to prevent dirt f...

Page 20: ...bber seal IMPORTANT Never clean the paper element with pressurized air or liquids such as solvent gas or kerosene Replace the paper element if it is damaged defective or cannot be cleaned thoroughly 1...

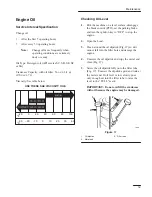
Page 21: ...hine on a level surface disengage the blade control PTO set the parking brake and turn the ignition key to OFF to stop the engine 2 Open the hood 3 Clean around the oil dipstick Fig 17 so dirt cannot...

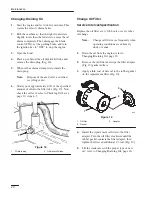
Page 22: ...efer to Checking Oil Level page 19 steps 4 5 1 2 1869 Figure 18 1 Oil drain plug 2 Oil dipstick fill tube Change Oil Filter Service Interval Specification Replace the oil filter every 100 hours or eve...

Page 23: ...sing damage 4 Remove the spark plug and metal washer 2 1 1798 Figure 20 1 Spark plug wire 2 Spark plug Checking the Spark Plug 1 Look at the center of the spark plug Fig 21 If you see light brown or g...

Page 24: ...scrape any paint off the front of the fitting s 3 Connect a grease gun to the fitting Pump grease into the fittings 4 Wipe up any excess grease Where to Add Grease 1 Lubricate the front wheels and ste...

Page 25: ...ler gauge required 1 Check the brake before you adjust it refer to Checking the Brake page 23 2 Release the parking brake refer to Releasing the Parking Brake page 10 3 To adjust the brake remove the...

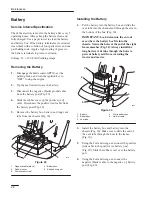
Page 26: ...ine toward the fuel tank Fig 25 4 Pull the fuel line off the filter Fig 25 and allow gasoline to drain into a gas can or drain pan Note Now is the best time to install a new fuel filter because the fu...

Page 27: ...lder 1 4 turn counterclockwise and remove it from the reflector Fig 27 4 Push and rotate the bulb counterclockwise until it stops approx 1 4 turn and remove bulb from the bulb holder Fig 28 1 2 3 4 4...

Page 28: ...nt tube from the chassis Fig 30 1 2 3 4 5 1876 Figure 29 1 Negative cable black 2 Rubber cover 3 Positive cable red 4 Battery box 5 Bolt and wing nut Installing the Battery 1 Put the battery into the...

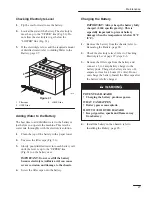
Page 29: ...ot overfill the battery because electrolyte sulfuric acid can cause severe corrosion and damage to the chassis 4 Screw the filler caps onto the battery Charging the Battery IMPORTANT Always keep the b...

Page 30: ...TO SWITCH N O Y I A S X B MAGNETO N C N 0 LIGHTS N O KEY SWITCH YELLOW LIGHT BLUE SEAT SWITCH N O GRAY GREEN RED RED RED RED RED RED BROWN BROWN BLACK BLACK BLACK LIGHT HARNESS NOT SHOWN KEY SWITCH CI...

Page 31: ...d charge it fully refer to Battery page 26 Do not connect the battery cables to the battery posts during storage IMPORTANT The battery must be fully charged to prevent it from freezing and being damag...

Page 32: ...plug is pitted fouled or gap is incorrect 5 Install new correctly gapped spark plug 6 Choke is not closing 6 Check for choke operation 7 Dirt in fuel filter 7 Replace fuel filter 8 Idle speed is too l...

Page 33: ...ankcase 3 Cooling fins and air passages under engine blower housing are plugged 3 Remove obstruction from cooling fins and air passages Machine does not drive 1 Drive control is in PUSH position 1 Mov...

Page 34: ......

Page 35: ...elativa a su seguridad y a la seguridad de otras personas Familiar cese con los controles y su correcta utilizaci n antes de usar este producto Manual del operador FORM NO 3317 996ES Wheel Horse 16 44...

Page 36: ...cializa productos seguros y de la m s alta calidad Vd es el responsable de utilizar el producto de forma segura y adecuada Vd tambi n es el responsable de instruir a las personas a las que tiene inten...

Page 37: ...ranque y parada el motor 12 Utilizaci n del control de la cuchilla PTO 14 El sistema de seguridad 14 Conducci n hacia adelante y hacia atr s 15 Parada de la m quina 15 Ajuste de la altura de corte 16...

Page 38: ...la p rdida de control son la rueda no tiene suficiente agarre se conduce demasiado r pido no se frena correctamente el tipo de m quina no es adecuado para el tipo de tarea al que se la destina descon...

Page 39: ...m quina con la marcha engranada especialmente cuando est cuesta abajo en las pendientes y durante los giros se debe mantener una marcha baja mant ngase alerta por si existen protuberancias o agujeros...

Page 40: ...antes de guardar la cortadora en un recinto cerrado 4 Para reducir el riesgo de incendio mantenga el motor el silenciador el compartimiento de la bater a y el rea del dep sito del combustible libre d...

Page 41: ...s Lea todas las instrucciones de seguridad contenidas en las p ginas 2 8 ALINEE ESTE BORDE CON UNA SUPERFICIE VERTICAL ARBOL EDIFICIO VALLA POSTE ETC PLIEGUE POR LA LINEA APROPIADA EJEMPLO COMPARE EL...

Page 42: ...No abra o retire las protecciones de seguridad mientras el motor est en marcha Mant ngase a una distancia prudencial de la m quina Volcado de la m quina en una pendiente Volcado de la m quina cuesta a...

Page 43: ...la visi n del conductor Amputaci n de las manos Cuchillas giratorias Amputaci n de los pies Cuchillas giratorias Puede cortar o atrapar el pie taladro giratorio Amputaci n de los dedos o la mano cuch...

Page 44: ...ngranar Sistema de frenos Freno de estacionamiento Encendido funcionando Estado de carga de la bater a Apagado aparado Motor Faros Luces largas Combustible Presi n del aceite de lubricaci n del motor...

Page 45: ...lina puede causar quemaduras al operador y a otras personas y causar da os materiales COMO EVITAR EL PELIGRO Utilice un embudo y llene el dep sito de combustible en el exterior en un rea abierta y con...

Page 46: ...vos de combustible que contengan metanol o etanol Llenado del dep sito de combustible 1 Apague el motor y abra el cap 2 Limpie alrededor de la tapa del dep sito de combustible y saque la tapa Utilizan...

Page 47: ...oner en marcha el motor y trabajar con la m quina familiar cese con todos los controles Fig 1 1 2 3 4 5 6 7 8 9 10 11 1857 Figura 1 1 Volante 2 Interruptor de encendido de las luces modelos selecciona...

Page 48: ...siento del tractor 2 Aplique el freno de estacionamiento consulte la secci n Aplicaci n del freno de estacionamiento en la p gina 12 Nota El motor no se pondr en marcha a menos que aplique el freno de...

Page 49: ...trol de la cuchilla PTO Figura 4 1 Estrangulador 2 R pida 3 Lenta 1 3 1 2 3 2 1852 1859 Figura 5 1 Arranque 2 Encendido 3 Apagado 3 2 1 1860 Parada 1 Coloque la palanca del acelerador en la posici n L...

Page 50: ...motor si el operador se levanta del asiento cuando el pedal del freno no est pisado o la cuchilla est ENGRANADA Prueba del sistema de seguridad Pruebe siempre el sistema de seguridad antes de trabajar...

Page 51: ...da os en la transmisi n libere siempre el freno de estacionamiento antes de mover el pedal de control de tracci n 1 2 3 1861 Figura 7 1 Pedal de control de tracci n 2 Hacia adelante 3 Hacia atr s Par...

Page 52: ...e elevaci n de la cubierta y col quela en la posici n deseada Fig 8 1 1 1 2 38 mm 1 25 mm 2 51 mm 2 1 2 64 mm 3 76 mm 3 1 2 89 mm 4 102 mm Aproximadamente 1853 Figura 8 1 Palanca de altura de corte el...

Page 53: ...s Un interruptor de encendido ON OFF montado en el tablero de instrumentos Fig 1 controla los faros Los faros se encienden s lo cuando el motor est funcionando y el interruptor est en la posici n ON E...

Page 54: ...n la posici n FUNCIONAMIENTO OPERATE De esta forma se engrana el sistema de accionamiento Fig 11 Nota La m quina no se mover a menos que el control de accionamiento est en la posici n FUNCIONAMIENTO O...

Page 55: ...seguridad revisar X X Freno revisar X X X X Chasis engrasar X X Depurador de aire de espuma mantenimiento X X Depurador de aire de papel reemplazar X X Buj a s cambiar X X Correas revisar en busca de...

Page 56: ...rasar cada 25 horas de funcionamiento o una vez al a o lo que ocurra primero Elemento de papel Reemplazar cada 100 horas de funcionamiento o una vez al a o lo que ocurra primero Nota Realice el manten...

Page 57: ...ju guelo minuciosamente B Seque el elemento apret ndolo contra un pa o limpio C A ada una o dos onzas de aceite Fig 15 Estruje el elemento del filtro para distribuir el aceite Importante Reemplace el...

Page 58: ...depurador de aire Fig 14 Nota Compruebe que la junta de goma quede plana contra la base del depurador de aire 3 Instale la tapa del depurador de aire y la perilla Fig 12 Apriete firmemente la perilla...

Page 59: ...el motor 1 2 3 1868 Figura 17 1 Varilla medidora de aceite 2 Extremo met lico 3 Tubo de llenado Cambio drenaje del aceite 1 Arranque el motor y d jelo funcionar durante cinco minutos De esta forma el...

Page 60: ...a secci n Cambio Drenaje de aceite en la p gina 23 2 Saque el filtro viejo y limpie la superficie de la junta del adaptador del filtro Fig 19 3 Aplique una capa delgada de aceite nuevo a la junta de g...

Page 61: ...causar da os 4 Retire la buj a y la arandela de metal 2 1 1798 Figura 20 1 Cable de la buj a 2 Buj a Inspecci n de la buj a 1 Mire hacia la parte central de la buj a Fig 21 Si se observa un color gri...

Page 62: ...de la parte delantera de lo s engrasadore s 3 Conecte una pistola de lubricaci n al engrasador y bombee grasa 4 Limpie cualquier exceso de grasa D nde engrasar 1 Lubrique las ruedas delanteras y las m...

Page 63: ...n Inspecci n del freno en la p gina 27 2 Libere el freno de estacionamiento consulte la secci n Liberaci n del freno de estacionamiento en la p gina 12 3 Para ajustar el freno saque el pasador de chav...

Page 64: ...te explosiva QUE PUEDE OCURRIR Un incendio o una explosi n causados por la gasolina puede causar quemaduras al operador y a otras personas y causar da os materiales COMO EVITAR EL PELIGRO Drene la gas...

Page 65: ...remos de la abrazadera de la manguera y desl cela alej ndola del filtro Fig 25 4 Desmonte el filtro de los tubos de combustible 5 Instale un filtro nuevo y acerque las abrazaderas de las mangueras al...

Page 66: ...2 3 4 4 5 5 1874 Figura 27 1 Z calo de la bombilla 2 Reflector 3 Leng etas 4 Ranuras 5 Terminales Instalaci n de la bombilla 1 En la parte lateral de la base de la bombilla hay unos pasadores met lic...

Page 67: ...n Tensi n 12V 160 Amps arranque en fr o Desmontaje de la bater a 1 Desengrane el control de la cuchilla PTO aplique el freno de estacionamiento y gire la llave de encendido hasta la posici n OFF para...

Page 68: ...a y la bater a en el chasis Fig 30 Aseg rese de deslizar el extremo del tubo de ventilaci n a trav s del orificio del bastidor Fig 30 3 Utilizando el perno y la palomilla conecte el cable positivo roj...

Page 69: ...sto es de especial importancia para evitar da os en la bater a si la temperatura desciende por debajo de 32 F 0 C 1 Saque la bater a del chasis consulte la secci n Desmontaje de la bater a en la p gin...

Page 70: ...O PTO SWITCH N O Y I A S X B MAGNETO N C N 0 LIGHTS N O KEY SWITCH YELLOW LIGHT BLUE SEAT SWITCH N O GRAY GREEN RED RED RED RED RED RED BROWN BROWN BLACK BLACK BLACK LIGHT HARNESS NOT SHOWN KEY SWITC...

Page 71: ...p gina 22 7 Saque la buj a y compruebe su estado consulte la secci n Buj a en la p gina 25 Con la buj a fuera del motor vierta dos cucharadas de aceite de motor en el orificio de la buj a Utilice aho...

Page 72: ...e combustible A A ada la cantidad correcta de Acondicionador estabilizador Toro al dep sito lleno de gasolina Nota El estabilizador acondicionador suele conservar la gasolina durante seis u ocho meses...

Page 73: ...asiento arrancar o no sigue funcionando 2 Dep sito de combustible vac o 2 Llenar el dep sito de combustible con gasolina 3 Depurador de aire sucio 3 Limpiar o reemplazar el elemento del depurador de...

Page 74: ...stible 7 Filtro de combustible sucio 7 Cambiar el filtro de combustible 8 Hay suciedad agua o combustible viejo en el sistema de combustible 8 Ponerse en contacto con el concesionario de servicio auto...

Page 75: ......

Page 76: ......

Page 77: ......

Page 78: ......

Page 79: ......

Page 80: ......

Page 81: ......

Page 82: ......

Page 83: ......

Page 84: ......

Page 85: ......

Page 86: ......

Page 87: ......

Page 88: ......

Page 89: ......

Page 90: ......

Page 91: ......

Page 92: ......

Page 93: ......

Page 94: ......

Page 95: ......

Page 96: ......

Page 97: ......

Page 98: ......

Page 99: ......

Page 100: ......

Page 101: ......

Page 102: ......

Page 103: ......

Page 104: ......

Page 105: ......

Page 106: ......

Page 107: ......

Page 108: ......

Reviews: