4.
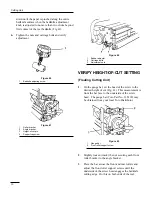
Tighten the nuts securing the roller brackets.
MOUNT THE CUTTING UNITS
(Floating Cutting Unit)
1.
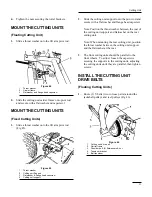
Slide a thrust washer onto the lift arm pivot rod.
2.
Slide the cutting unit carrier frame onto pivot rod
and secure with a flatwasher and capscrew. l
MOUNT THE CUTTING UNITS
(Fixed Cutting Units)
1.
Slide a thrust washer onto the lift arm pivot rod
(Fig 45).
2.
Slide the cutting unit support onto the pivot rod and
secure with a flat washer and flange head capscrew.
Note: Position the thrust washer between the rear of
the cutting unit support and flatwasher on the rear
cutting unit.
Note: When mounting the rear cutting unit, position
the thrust washer between the cutting unit support
and the flatwasher at the rear.
3.
The front cutting units should be parallel to the
front wheels. To adjust, loosen the capscrews
securing the supports to the cutting units, adjusting
the cutting units until they are parallel, then tighten
screws.
INSTALL THE CUTTING UNIT
DRIVE BELTS
(Floating Cutting Units)
1.
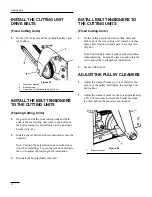
Route (3) V-belts (two in loose parts) around the
jackshaft pulleys and reel pulleys (Fig 46).
31
Cutting Unit
Figure 44
1. Thrust
washer
2. Carrier
frame
3. Flatwasher and flange head capscrew
Figure 46
1. Cutting unit drive belt
2. Carrier
frame
3. Shoulder bolt, (2) flatwashers & nut
4. Tensioner
bracket
5. Belt
tensioner
Figure 45
1. Thrust
washer
2. Cutting unit Support
3. Flatwasher & flange head capscrew
4. Cutting unit support
Summary of Contents for reelmaster 216
Page 24: ...Figure 28 Figure 29 Figure 30 Figure 31 24 Maintenance ...
Page 34: ......
Page 35: ......
Page 36: ......


