background image

Summary of Contents for 78476

Page 1: ...lly It contains information about your safety and the safety of others Also become familiar with the controls and their proper use before you operate the product FORM NO 3318 954 Rev A Z MASTER 60 Mower for Zero Radius Tractors Model No 78476 790001 Up ...

Page 2: ...rial No The warning system in this manual identifies potential hazards and has special safety messages that help you and others avoid personal injury even death DANGER WARNING and CAUTION are signal words used to identify the level of hazard However regardless of the hazard be extremely careful DANGER signals an extreme hazard that will cause serious injury or death if the recommended precautions ...

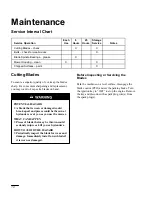
Page 3: ...ttachment Lift 7 Adjusting the Height of Cut 7 Adjusting the Gauge Wheel 8 Tips for Mowing Grass 9 Page Maintenance 10 Service Interval Chart 10 Cutting Blades 10 Correcting Cutting Unit Mismatch 13 Setting the Side to Side Leveling 13 Setting the Front to Rear Pitch 14 Greasing the Bearings 15 Replacing the Deck Belt 15 Replacing the Drive Belt 16 Replacing the Grass Deflector 17 Storage 17 Troub...

Page 4: ...Safety 2 Safety and Instruction Decals Safety decals and instructions are easily visible to the operator and are located near any area of potential danger Replace any decal that is damaged or lost ...

Page 5: ... 3 3 4 95 mm Spring Locknut 3 8 24 1 2 2 2 Install deflector to mower Stabilizer bars Clevis pin 3 8 1 1 4 32 mm Clevis pin 3 8 2 1 4 57 mm Hairpin cotter 2 4 2 6 Install stabilizer bars Flange nut Washer 3 8 Jam nut 3 8 16 2 2 2 Install mower to traction unit Operator s Manual Parts Catalog 1 1 Read before operating Ordering parts ...

Page 6: ... to the full down position 2 5 1 4 m 2549 3 Figure 1 1 Bolt 3 8 24 x 3 3 4 95 mm 2 Deflector Mount 3 Spring 4 Pivot Bracket 5 Locknut 3 8 Installing the Mower 1 Remove 2 wing nuts and washers on footrest panel and remove panel from frame 2 Slide mower under traction unit 3 Secure stabilizer bars to traction unit frame mounts with 2 3 8 1 1 4 32 mm clevis pins and 2 hairpin cotters Fig 2 4 Select p...

Page 7: ...forward and install pedal spring Fig 3 9 Route drive belt around top pulley of mower idler pulleys on pivot plate Fig 2 and the clutch drive pulley 10 Hook spring over pin on idler plate and loosely mount to mower with eye bolt 3 8 washer and 2 3 8 jam nuts Fig 5 11 Tension the drive belt by tightening the front jam nut on eyebolt until the spring is 16 1 2 41 9 cm Measure the spring length betwee...

Page 8: ...Never try to clear discharge area or mower blades unless you move the power take off PTO to OFF and rotate the ignition key to OFF Also remove the key and pull the wire s off the spark plug s The power take off PTO engages and disengages power to the attachment clutch Operating the Power Take Off PTO The power take off PTO engages and disengages power to the attachment clutch Engaging the Power Ta...

Page 9: ...al with your heel then release foot pressure to lower the attachment lift Fig 7 Remove your foot to hold the attachment in the down or desired position m 2716 2 1 Figure 7 1 Lift pedal UP 2 Lift pedal DOWN Adjusting the Height of Cut The pins and stabilizer bars are used to adjust the height of cut range refer to Setting the Front to Rear Pitch page 14 1 Set the stabilizer bars for the desired cut...

Page 10: ...is pin and remove the clevis pin from the gauge wheel plate and mounting bracket Fig 9 2 Reposition the gauge wheel so it s approximately 1 4 to 3 8 6 to 10 mm above the ground then insert the clevis pin through the gauge wheel plate and mounting bracket Fig 9 3 Reinstall the hairpin cotter into the clevis pin Fig 9 2 1 3 4 5 m 2553 Figure 9 1 Mounting Bracket 2 Hairpin Cotter 3 Clevis Pin 4 Gauge...

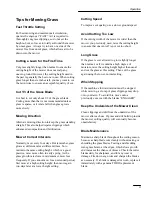
Page 11: ...er mow less frequently If you cannot mow for an extended period first mow at a high cutting height then mow again two days later at a lower height setting Cutting Speed To improve cut quality use a slower ground speed Avoid Cutting Too Low If the cutting width of the mower is wider than the mower you previously used raise the cutting height to ensure that uneven turf is not cut too short Long Gras...

Page 12: ...D A blade that is worn or damaged could break apart and pieces could be thrown at bystanders or at you as you use the mower WHAT CAN HAPPEN Pieces of blade that may be thrown could seriously injure or kill you or bystanders HOW TO AVOID THE HAZARD Periodically inspect the blade for wear and damage Immediately install a new blade if it is worn or damaged Before Inspecting or Servicing the Blades Pa...

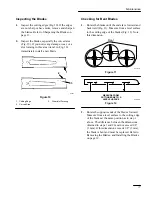
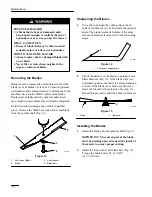
Page 13: ...t Forming Checking for Bent Blades 1 Rotate the blades until the ends face forward and backward Fig 11 Measure from a level surface to the cutting edge of the blades Fig 12 Note this dimension Front m 1078 Figure 11 m 2539 Figure 12 2 Rotate the opposite ends of the blades forward Measure from a level surface to the cutting edge of the blades at the same position as in step 1 above The difference ...

Page 14: ...her and blade from the spindle shaft Fig 13 1 3 4 m 2751 2 Figure 13 1 Sail Area of Blade 2 Blade 3 Lock Washer 4 Blade Bolt Sharpening the Blades 1 Use a file to sharpen the cutting edge at both ends of the blade Fig 14 Maintain the original angle The blade retains its balance if the same amount of material is removed from both cutting edges 1 m 1854 Figure 14 1 Sharpen at original angle 2 Check ...

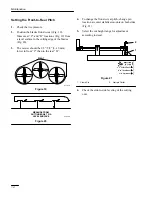
Page 15: ...t be within 1 8 3 mm of each other If the blade tips are not within 1 8 3 mm of each other add shim washers Part No 3256 24 between the appropriate spindle housing and the bottom of the cutting unit to align the blades Setting the Side to Side Leveling 1 Check the tire pressure 2 Position the blades side to side Fig 16 Measure at A and B locations Fig 16 from a level surface to the cutting edge of...

Page 16: ... blades Fig 20 3 The mower should be 1 8 5 8 3 16 mm lower in front C than in the rear D D Front C D m 1078 Figure 19 m 2539 Figure 20 4 To change the front to rear pitch change pin location at center stabilizer mounts on both sides Fig 21 5 Select the cut height range for adjustment according to decal 1 2 Figure 21 1 Clevis Pin 2 Hairpin Cotter 6 Check the side to side leveling of the cutting uni...

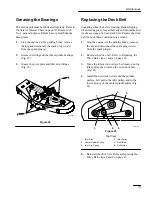
Page 17: ...arks and cracks are signs of a worn deck belt Replace the deck belt if any of these conditions are evident 1 Stop the engine set the parking brake remove the key and disconnect the spark plug wire s from the spark plug s 2 Remove the drive belt Refer to Replacing the Drive Belt steps 3 and 4 on page 16 3 Move the idler arm to relieve belt tension on the idler pulley then remove the worn deck belt ...

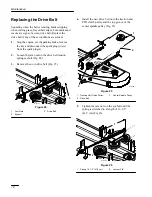
Page 18: ...k plug s 2 Loosen the jam nuts on the drive belt tension spring eyebolt Fig 24 3 Remove the worn drive belt Fig 25 m 2757 2 1 3 Figure 24 1 Jam Nuts 2 Eyebolt 3 Drive Belt 4 Install the new drive belt onto the traction unit PTO clutch pulley and the top groove of the center spindle pulley Fig 25 m 2756 1 3 2 Figure 25 1 Traction Unit Clutch Pulley 2 Drive Belt 3 Center Spindle Pulley 5 Tighten the...

Page 19: ...ets Fig 27 IMPORTANT The grass deflector must be spring loaded in the down position Lift the deflector up to test that it snaps to the full down position 2 4 7 1 5 m 2549 6 3 Figure 27 1 Bolt 2 Deflector Mount 3 Spring 4 Cone Locknut 5 Pivot Bracket 6 Carriage Bolt 7 Locknut Storage 1 Clean any dirt and chaff from the top of the mower 2 Scrape any heavy buildup of grass and dirt from the underside...

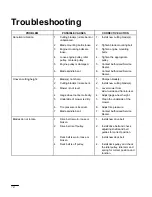
Page 20: ...g 2 Cutting blade s is are bent 2 Install new cutting blade s 3 Mower is not level 3 Level mower from side to side and front to rear 4 Gage wheel not set correctly 5 Underside of mower is dirty 4 Adjust gage wheel height 5 Clean the underside of the mower 6 Tire pressure is incorrect 6 Adjust tire pressure 7 Blade spindle bent 7 Contact Authorized Service Dealer Blades do not rotate 1 Drive belt i...

Page 21: ......

Page 22: ......

Page 23: ......

Page 24: ......

Reviews: