
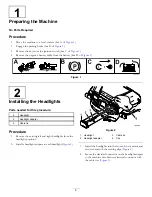
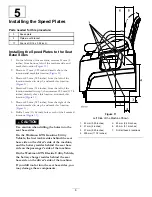


5.
Install the plate lights to the plate bracket using the 4
Phillips-head screws (#10 x 5/8 inch) and 4 locknuts
(#10) as shown in
.
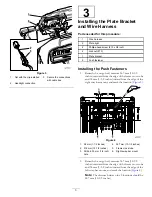
6.
Unplug the left taillight wire harness from the Brake
and Signal Kit wire harness.
7.
Connect the wire harness from this kit to the left
taillight wire harness and the Brake and Signal Kit wire
harness.
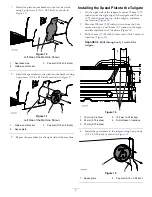
Figure 8
1.
Left taillight wire harness
3.
Brake and Signal Kit wire
harness
2.
Wire harness from this kit
8.
Use cable ties to secure the wire harness to the machine.
4
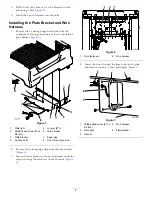
Installing the Serial Plate
Parts needed for this procedure:
1
Serial plate
Procedure
1.
Install the serial plate using 4 rivets in the location
shown in
.
Figure 9
Tire Not Shown
1.
Bracket
4.
Rivet
2.
13 mm (1/2 inch) left of the
bracket
5.
19 mm (3/4 inch) below
edge of the frame
3.
Serial plate
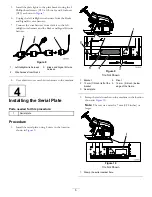
2.
Stamp the serial number on the machine in the location
shown in
Note:
The text size must be 7 mm (0.28 inches) or
larger.
Figure 10
Tire Not Shown
1.
Stamp the serial number here.
5


