


g036762
Figure 2
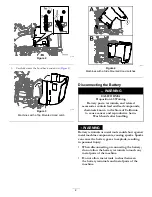
3.
Carefully rotate the hood back and down (
).
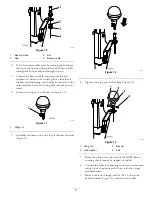
g189330
Figure 3
Machines with a Top Mounted Hood Latch
g036763
Figure 4
Machines with a Side Mounted Hood Latches
Disconnecting the Battery
WARNING
CALIFORNIA
Proposition 65 Warning
Battery posts, terminals, and related
accessories contain lead and lead compounds,
chemicals known to the State of California
to cause cancer and reproductive harm.
Wash hands after handling.
WARNING
Battery terminals or metal tools could short against
metal machine components, causing sparks. Sparks
can cause the battery gases to explode, resulting
in personal injury.
•
When disconnecting or connecting the battery,
do not allow the battery terminals to touch any
metal parts of the machine.
•
Do not allow metal tools to short between
the battery terminals and metal parts of the
machine.
2


