WOOD CHIPPER
18
GB
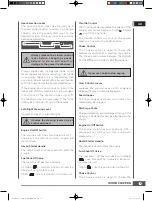
Wait until the machine completely stops.
Allow the engine to completely cool. Remove
the engine’s spark plug. Then clean out the
interior of the machine and its discharge
chute.
MAINTENANCE
Never use a “pressure washer” to
clean your unit. Water can penetrate
tight areas of the machine and its
transmission case and cause damage
to spindles, gears, bearings, or the
engine. The use of pressure washers
will result in shortened life and
reduce serviceability.
1.
2.
3.
4.
5.
Maintaining your mini tracked dumper will
ensure long life to the machine and its
components.
Preventive Maintenance
Turn off the engine and disengage all
command levers. The engine must be cool.
Keep the engine’s throttle lever in its SLOW
position and remove the spark plug wire
from the spark plug and secure.
Inspect the general condition of the power
trackbarrow. Check for loose screws,
misalignment or binding of moving parts,
cracked or broken parts, and any other
condition that may affect its safe operation.
Use a soft brush, vacuum or compressed
air to remove all contaminants from the
machine. Then use high quality light oil to
lubricate all moving parts.
Check the spark plug wire regularly for
signs of wear, and replace when needed.
Tracked Dumper Maintenance
1.
1.
2.
3.
Adjusting Clutch
When the clutch begins to show wear, the
handle reach will become wider, making it
more difficult to reach. Follow these steps
to return the clutch lever back to its original
position.
Adjusting Steering
If steering becomes difficult to engage, follow
these steps to adjust the cable tension.
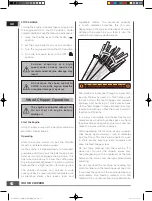
Loosen the jam nut by turning it counter
clockwise with 10mm wrench.
Tighten or loosen the cable by turning the
cable adjustment nut clockwise or counter
clockwise with 10mm wrench until you
have reached your required tightness.
Once tightness is set, return the jam nut
against the handle to hold the cable in
place.
Loosen the jam nut by turning it counter
clockwise with 10mm wrench.
2.
3.
Tighten or loosen the cable by turning the
cable adjustment nut clockwise or counter
clockwise with 10mm wrench until you
have reached your required tightness.
Once tightness is set, return the jam nut
against the handle to hold the cable in place.
Jam Nut
Adjustment Nut
Adjustment Nut
Jam Nut
Jam Nut
1
2
3
36087UK00M100-出货版_更新回收处理标志.indd 18
2019/10/22 16:18:05

