Page
39
of
51
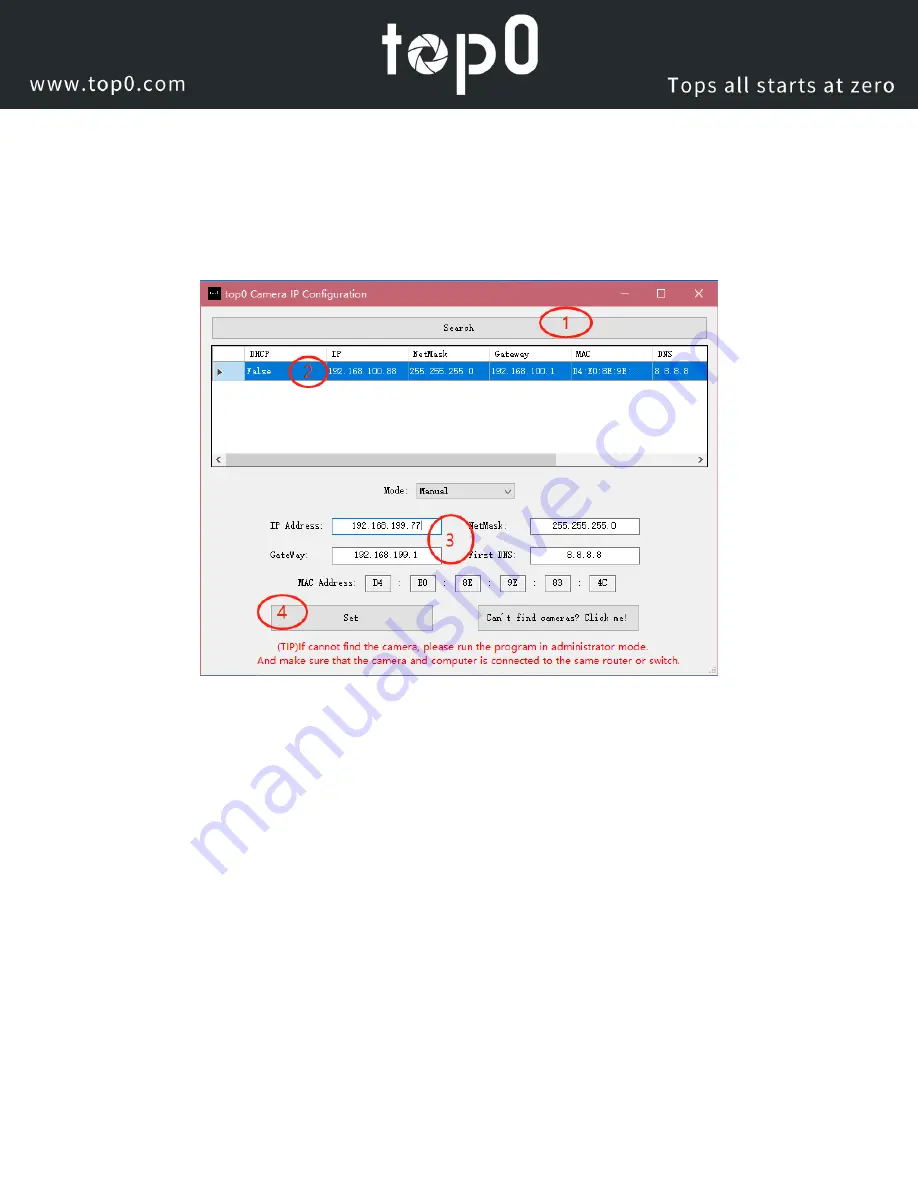
5.The next thing to do is change your camera's IP address to be in the same range as your network. The camera comes with a
default static IP address of 192.168.100.88. You will need to update that to be in the same range as your network. As the
picture shows, our network is set up to be 192.168.199.77.
NOTE: if you need to find the IP range of your network, you can do so by following the guide in the extras section at the
end of this document.
7.Once you know your IP range you can change the IP address for the PTZ Camera with click "Set".
You should now be able to set your cameras IP address to one in the range of your network. You should be able to leave
the subnet mask alone unless there is a reason for you to change it. The Gateway should be the same as the IP address
you used, but .1 instead of the last set of digits in your IP address. So, in my example above, 192.168.199.77 IP address
should have 192.168.199.1 as the gateway.
Please note: in more complex network environments you may have to request a "STATIC IP" from the IT department to
prevent any possible complications on your network in addition to the appropriate Network Mask, Default Gateway and
First DNS for that Static IP


