CLICK!
3
4
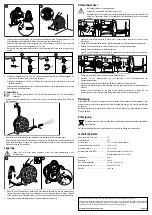
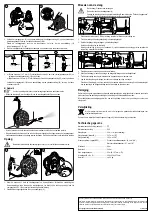
3. Connect the connecting hose adapter (14) to the hose connection (10) on the back of the garden hose
drum. Ensure that the adapter clicks into place.
Place the garden hose drum upright onto the wall mount. Ensure that the connecting hose (16) sits in
the notches (11, 13).
4. Gently press the garden hose drum downwards onto the wall mount so that it hooks in place.
5a
5b
(20)
(19)
(18)
(19)
(18)
(19)
5. a) For a tap with an 18.7 mm (1/2") thread, screw the thread adapter (20) and then the tap adapter (19)
to the tap.
b) For a tap with a 24.2 mm (3/4") thread, screw the tap adapter (19) directly onto the tap.
Connect the connecting hose adapter (18) to the tap connector (19). Ensure that the adapter clicks into
place.
b) Using the garden hose drum
You can remove the garden hose drum from the wall mount for mobile use.
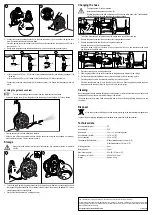
• Unwind the garden hose (5) from the garden hose drum using the crank handle (8). Turn on the tap.
•
Turn the nozzle to turn on and adjust the water flow.
• After use, turn off the tap and wind the hose onto the hose drum using the crank handle. Let drain any
excess water in the hose. Turn the nozzle to close it.
Storage
Always store the product in a frost-proof environment. Pay particular attention in the winter
months.
CLICK!
1
2
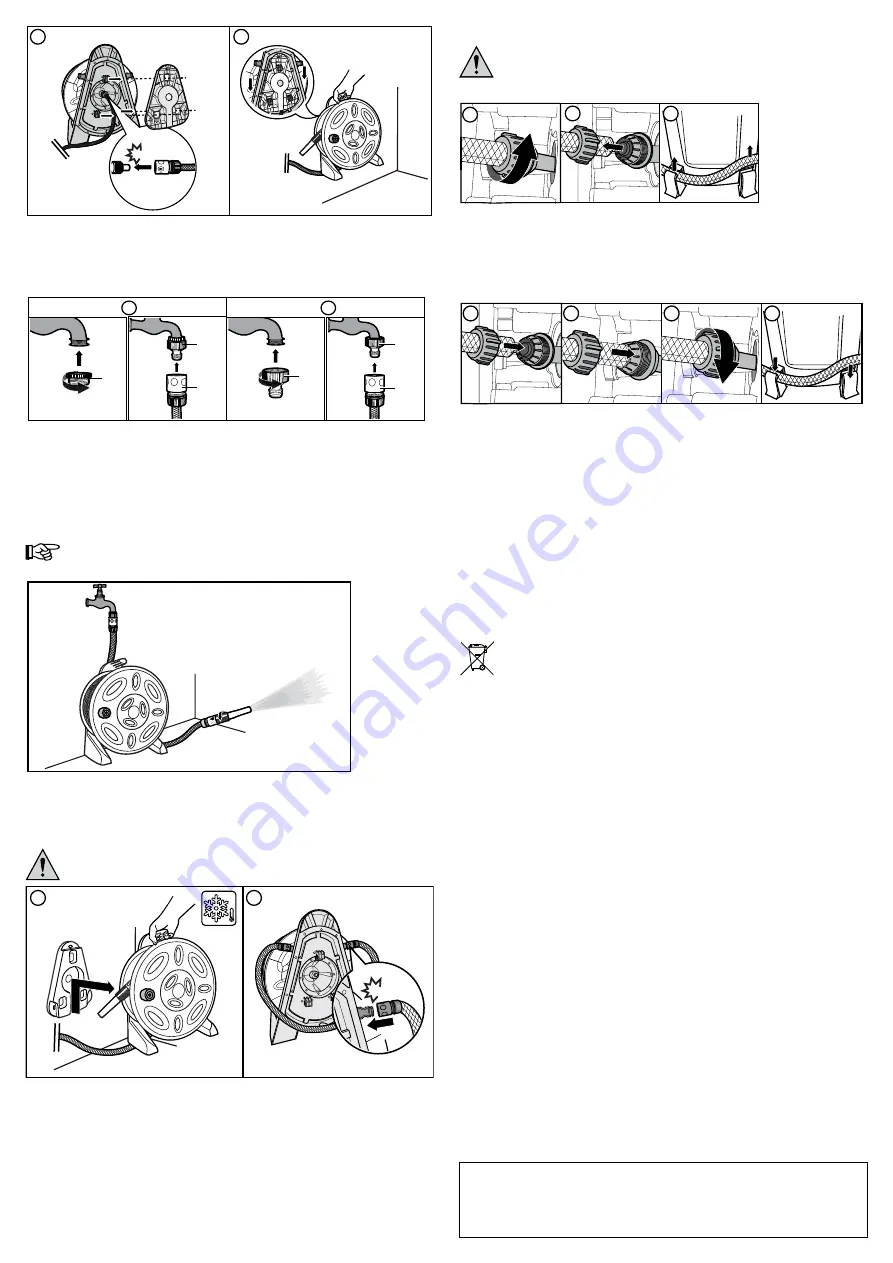
1. Turn off the tap. Remove the garden hose drum from the wall mount. Remove the connecting hose from
the tap and the garden hose drum. Pay attention to the direction of the arrow on the adapter (14, 18) and
carefully remove the connecting hose.
2. Place both of the adapters onto a storage knob (9).
Changing the hose
The garden hose (5) can be replaced.
Never dismantle the garden hose drum (6).
Replace the garden hose with a suitable hose. Observe the information in the "Technical data"
section. The maximum hose capacity must not be exceeded.
1
2
1
3
1. Turn off the water supply. Completely unwind the garden hose. Loosen the screw ring.
2. Remove the garden hose from the hose connection in the garden hose drum.
3. Remove the garden hose from the slots in the garden hose drum.
Remove the screw ring from the garden hose.
Loosen the screw ring (4) on the nozzle (2), pull out the end of the hose, and then remove the screw
ring. Dispose of the garden hose.
4
6
7
5
4. Place the screw ring onto the new garden hose.
5. Slide the garden hose into the hose connection on the garden hose drum as far as it will go.
6. Pull the screw ring over the thread of the connection and turn it until it is securely in place.
7. Place the garden hose into the slots before winding it onto the hose drum.
Place the nozzle screw ring (4) onto the other end of the hose. Slide the garden hose into the hose
connection on the nozzle as far as it will go and turn it to secure it place.
Cleaning
Never use aggressive and abrasive detergents, rubbing alcohol or other chemical solutions, as these could
damage the housing or even impair the functioning of the product.
If the hose gets very dirty, clean it with a damp cloth and let it dry out thoroughly before winding it onto the
hose drum.
Disposal
At the end of its service life, dispose of the product according to the relevant statutory regulations.
You thus fulfil your statutory obligations and contribute to the protection of the environment.
Technical data
Housing material (drum) ................................PP
Hose material ................................................PVC
Hose length ...................................................25 m + 1 m (connecting hose)
Hose diameter (inner Ø) ................................12.7 mm (1/2")
Hose connection ............................................19.1 mm (3/4")
Tap adapter (BSP standard) ..........................Without thread adapter: 24.2 mm (3/4")
With thread adapter: 18.7 mm (1/2")
Working pressure ..........................................8 bar
Burst pressure ...............................................24 bar
Max. hose capacity ........................................30 m (Ø 12.7 mm (1/2"))
Dimensions (W x H x D) ................................366 x 439 x 275 mm
Weight ...........................................................Approx. 5.2 kg
This is a publication by Conrad Electronic SE, Klaus-Conrad-Str. 1, D-92240 Hirschau (www.conrad.com).
All rights including translation reserved. Reproduction by any method, e.g. photocopy, microfilming, or the capture in electronic data
processing systems require the prior written approval by the editor. Reprinting, also in part, is prohibited. This publication represent the
technical status at the time of printing.
© Copyright 2016 by Conrad Electronic SE.
V1_0116_02-LS


