background image

3

PL

 | Instrukcja obsługi

Wskazówki bezpieczeństwa specyficzne dla urządzenia  


-

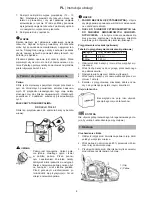
 Gdy łańcuch tnący się porusza należy trzymać od niego z dala wszystkie części ciała. Przed uruchomieniem 

pilarki upewnić się, że łańcuch ni dotyka żadnych przedmiotów. 

Podczas pracy pilarką moment nieuwagi może 

spowodować, że części ubrania lub ciała zostaną uszkodzone przez łańcuch tnący.


-

 Zawsze trzymać pilarkę prawą ręka na tylnym uchwycie a lewą ręką na przednim.


Trzymanie pilarki w odwrotny 

sposób (lewą ręka – tylny uchwyt / prawa ręka – przedni uchwyt) podczas pracy zwiększa ryzyko powstania zranie

-

nia i nie jest dozwolone.


-

 Nosić ochronniki oczu i słuchu. Zaleca się noszenie zabezpieczeń na głowę, ręce, nogi i stopy.


Odpowiednie 

ubranie ochronne i wyposażenie ochronne zmniejsza ryzyko zranienia przez wyrzucane kawałki drewna i przypad

-

kowy kontakt z łańcuchem tnącym.


-

 Nie ciąć będąc na drzewie. 

Cięcie pilarką znajdując się na drzewie powoduje wysokie ryzyko zranienia.


-

 W każdej chwili stać pewnie na stabilnym podłożu, używać pilarki tylko, gdy się stoi na solidnym, bezpiecz

-

nym i równym podłożu.


Śliskie podłoże niestabilna powierzchnia jak szczeble drabiny mogą prowadzić do utraty 

równowagi i utraty kontroli nad pilarką.


-

 Podczas cięcia naprężonej gałęzi należy wziąć pod uwagę możliwość uderzenia po przecięciu. 


Kiedy naprę

-

żone włókna drewna są zwolnione gałąź może odskoczyć i uderzyć operatora i/lub spowodować utratę kontroli nad 

pilarką.


-

 Zachować szczególną uwagę podczas cięcia krzewów i młodych drzew. 


Cienki materiał może być pochwyco

-

ny przez łańcuch i uderzyć operatora lub wytrącić go z równowagi.


-

 Podczas przenoszenia pilarka musi być wyłączona i trzymana za przedni uchwyt z łańcuchem trzymanym 

z dala od ciała. 

Ostrożne obchodzenie się z pilarką zmniejsza ryzyko przypadkowego dotknięcia ostrego łańcucha 

tnącego.


-

 Postępować zgodnie z instrukcjami dotyczącymi smarowania, napięcia łańcucha i zmiany akcesoriów.


Nie

-

prawidłowo  napięty  lub  smarowany  łańcuch  może  spowodować  jego  zerwanie  oraz  znacząco  zwiększa  ryzyko 

odbicia.


-

 Uchwyty utrzymywać w czystości, suche i bez śladów oleju i smarów.


Tłuste, naoliwione uchwyty są śliskie i 

mogą prowadzić do utraty kontroli.


-

 Pilarki  używać  wyłącznie  do  cięcia  drewna!  Nie  używać  pilarki  łańcuchowej  do  pracy,  do  której  nie  jest 

przeznaczona. – Przykład: nie używać pilarki łańcuchowej do cięcia plastiku, cegieł lub innych materiałów 

budowlanych, które nie są zrobione z drewna. 

 Użycie pilarki do zastosowań, do których nie jest przeznaczona 

może spowodować powstanie niebezpiecznych sytuacji.

 -

 Nigdy nie używać niekompletnego urządzenia lub przerobionego urządzenia.

 -

 Te urządzenia nie są przeznaczone do obsługi przez osoby, które mają niedostateczne doświadczenie i/lub niedo

-

stateczną wiedzę bądź też przez osoby z ograniczonymi zdolnościami fizycznymi, umysłowymi lub sensorycznymi z 

wyjątkiem sytuacji, kiedy są one doglądane przez osobę odpowiedzialną za ich bezpieczeństwo lub też są pouczo

-

ne w zakresie prawidłowej obsługi urządzenia. 

 -

 Dzieciom i osobom nieznającym niniejszej instrukcji nie wolno obsługiwać urządzenia. Lokalne prawo może ograni

-

czać wiek użytkownika.

Summary of Contents for PC 41 TL

Page 1: ...ch sorgf ltig und machen Sie sich mit der ordnungsgem en Nutzung Ihrer Kettens gen vertraut bevor Sie diese in Betrieb nehmen Bewahren Sie dieses Handbuch griffbereit auf Warnung Diese Kettens ge ist...

Page 2: ......

Page 3: ...struktionen an die befolgt werden m ssen um Unf lle zu verhindern die zu ernsthafter k r perlicher Verletzung oder zum Tod f hren k nnten WICHTIG Dieses Zeichen zeigt Instruktionen an die befolgt werd...

Page 4: ...schriebener Geh rschutz getragen wird Einatmen giftiger Partikel Abgase des Verbrennungsmotors Hautkontakt mit Benzin L rm Ein gewisser Ger uschpegel der Maschine l sst sich nicht vermeiden Regelm ige...

Page 5: ...effen und oder die Kettens ge der Kontrolle entrei en Seien Sie besonders vorsichtig beim Schneiden von Unterholz und jungen B umen Das d nne Material kann sich in der S gekette verfangen und auf Sie...

Page 6: ...e 2 F hrungsschiene 3 Vorderer Handschutz 4 Startergriff 5 Luftfilterdeckel 6 Schraube Luftfilterdeckel 7 Starterklappe Choke 8 Gashebelsperre 9 Hinterer Griff 10 Gashebel 11 Maschinenschalter 12 ltan...

Page 7: ...sehr hohen oder niedrigen Temperaturen berpr fen Sie im mer die B ume auf tote Zweige die w hrend des F llvorgangs herabfallen k nnten 5 Verwenden Sie rutschfeste Sicherheits schuhe eng anliegende Kl...

Page 8: ...verwendet werden um die Schwungscheibe zu entfernen oder zu befestigen k nnte ein Schaden auf treten 15 Stellen Sie immer den Motor ab bevor Sie die Maschine ablegen 16 Seien Sie u erst vorsichtig bei...

Page 9: ...UNG Die S gekette hat sehr scharfe Schneider Benutzen Sie Schutzhandschuhe f r Ihre Sicherheit 1 Ziehen Sie den Schutz in Richtung des vorderen Handgriffs um zu berpr fen ob die Kettenbremse nicht akt...

Page 10: ...CHTIG 1 KRAFTSTOFF OHNE 2 TAKT L REINES BENZIN wird sehr schnell schwere Sch den an den Innen teilen des Motors verursachen 2 L F R 4 TAKT MOTOREN oder WASSERGE K HLTE 2 TAKT MOTOREN kann die Z ndker...

Page 11: ...ARNUNG Starten Sie den Motor nicht w hrend Sie die Motors ge in einer Hand halten Die S gekette kann Ihren K rper ber hren Dies ist sehr gef hrlich 8 Sobald Z ndungen erfolgen dr cken Sie den Chokekno...

Page 12: ...1 Vorderer Handgriff 2 Freigabe 3 Bremse 4 Vordergriff schutz Um die Bremse freizugeben ziehen Sie den Hand schutzb gel in Richtung zum vorderen Handgriff bis ein Klick zu h ren ist WARNUNG Wenn die...

Page 13: ...erm glichen 2 Stellen Sie den Schalter auf die Position O STOPP 1 Motor Schalter 8 S gen WARNUNG Bevor Sie mit Ihrer Arbeit fortfahren lesen Sie den Ab schnitt F r den sicheren Betrieb F r die erste...

Page 14: ...llrichtung Einschlag und Entastung WARNUNG 1 Immer auf festen Stand achten sowie auf die Stabi lit t des Baumes 2 Achten Sie darauf dass abgeschnittene St cke nicht rollen 3 Lesen Sie die Anweisungen...

Page 15: ...sungen im Handbuch F hren Sie nach der Instandsetzung ei nen Probelauf durch Wenn Vibrationen oder mecha nische Ger usche auftreten schalten Sie die S ge aus und wenden Sie sich an unseren Service 9 W...

Page 16: ...ng 1 Zylinderrippen Verstopfung durch Staub zwischen den Zylinderrippen verursacht berhitzung des Motors In regelm igen Abst nden berpr fen Reinigen Sie die Zylinderrippen nach dem Entfernen des Luftf...

Page 17: ...F hrungs schiene WARNUNG Es ist sehr wichtig f r die reibungslose und sichere Bedienung die Schneidez hne immer scharf zu halten Die Schneidez hne m ssen immer gesch rft werden wenn das S gemehl wie...

Page 18: ...e des Hobelzahns Wenn eine L cke zwi schen ihnen festgestellt wird ist die F hrungsschiene normal Andernfalls ist die F hrungsschiene abge nutzt Solch eine F hrungsschiene muss korrigiert oder ersetzt...

Page 19: ...ine Sammelstelle Die Kettens ge geben Sie bitte ebenfalls an einer Ver wertungsstelle ab Die Kunststoff und Metallteile Ihres Altger tes k nnen hier getrennt und der Wiederverwertung zugef hrt werden...

Page 20: ...fen Sie den Z ndfunken Ersetzen Sie die Z ndkerze 2 Schwache Leistung schwache Beschleunigung rauer Leerlauf berpr fen Sie den Kraftstoff auf Wasser oder qualitativ minderwer tige Mischung Ersetzen du...

Page 21: ...inch Die technischen Daten unterliegen nderungen ohne vorherige Ank ndigung Wir Ikra GmbH Schlesierstra e 36 D 64839 M nster Germany erkl ren in alleiniger Verantwortung dass das Produkt Benzin Ketten...

Page 22: ...o read all such instructions carefully and follow them without fail WARNINGS IN THE MANUAL WARNING This mark indicates instructions which must be followed in order to prevent accidents which could lea...

Page 23: ...avoidable Route noisy work is to be licensed and limits for certain periods Keep rest periods and they may need to restrict the working hours to a minimum For their personal protec tion and protection...

Page 24: ...ontrol Apply particular caution when cutting brush and young trees The thin material may get caught in the chain and hit you or throw you off balance Carry the switched off chain saw using the front h...

Page 25: ...1 Saw chain 2 Guard bar 3 Front hand guard 4 Starter handle 5 Air filter cover 6 Top cover screw 7 Choke knob 8 Throttle trigger lock out 9 Rear handle 10 Throttle trigger 11 Engine switch 12 Oil tan...

Page 26: ...e Idle adjustment screw Position upper left of the rear handle g Shows the directions that the chain brake is released white arrow and activated black arrow Position Front of the chain cover Guarantee...

Page 27: ...at is under ten sion be alert for spring back so that you will not be struck when the tension in the wood fibers is released 18 Keep the handles dry clean and free of oil or fuel mixture 19 Guard agai...

Page 28: ...itting the saw chain around the guide bar mount the guide bar to the power unit 1 Chain tensioner bolt 2 Chain cover 3 Mounting nut NOTE Pay attention to the correct direction of the saw chain 1 Movin...

Page 29: ...to the engine inner parts very quickly 2 OIL FOR 4 CYCLE ENGINE USE or WATER COOLED 2 CYCLE ENGINE USE It can cause spark plug fouling exhaust port blocking or piston ring sticking Mixing table for f...

Page 30: ...Chain oil The chain oil flow can be changed by inserting a scre wdriver in the hole on bottom of the clutch side Adjust according to your work conditions 1 Chain oil flow adjusting screw 2 Rich 3 Lean...

Page 31: ...chain saws in temperatures of 0 5 C at times of high humidity may result in ice forming within the carburetor and this in turn may cause the output power of the engine to be reduced or for the engine...

Page 32: ...ht pressure while running the engine at full throttle It is recommended that daily inspection before use and after dropping or other impacts to identify significant damage or defects Racing the engine...

Page 33: ...a B saw down from the top one third and finish by sawing up from the bottom Limbing a felled tree First check which way the limb is bent Then make a shallow cut into the compressed side to prevent the...

Page 34: ...may result in serious dama ge to the machine Use only the spare parts which named in this manual Use the other spare part can cause serious injury Maintenance after each use 1 Air filter Dust on the...

Page 35: ...er through the filler port and clean in gasoline When putting the filter back into the tank make sure that it comes to the front right corner Also clean off dirt in the tank 2 Oil filter 4 Spark plug...

Page 36: ...as illustrated After every cutter has been set check the depth gauge and file it to the proper level as illustrated WARNING Be sure to round off the front edge to reduce the chance of kickback or tie...

Page 37: ...d or replaced 1 Ruler 2 Gap 3 No gap 4 Chain tilts 11 Storage 1 Empty the fuel tank and run the engine out of fuel 2 Empty the oil tank 3 Clean the entire unit 4 Store the unit in a dry place out of t...

Page 38: ...ranties The warranty period is 36 months beginning from the hand over of the device which has to be proved by the original purchasing document For commercial use and use for rent the warranty period i...

Page 39: ...Gauge 1 27 mm 0 050 inch Specifications are subject to change without notice We Ikra GmbH Schlesierstra e 36 D 64839 M nster Germany declare under our sole responsibility that the product petrol chai...

Page 40: ...ctions et les suivre sans faute LES AVERTISSEMENTS DANS LE MANUEL AVERTISSEMENT Cette marque indique les instructions qui doivent tre suivies afin de pr venir les accidents qui pourraient provoquer de...

Page 41: ...age au niveau de l ou e si la protection auditive prescrite n est pas port e Inhalation de particules nocives de gaz d chappement provenant du moteur combustion Contact de l essence sur la peau Bruit...

Page 42: ...s tension n oubliez pas qu elle peut rebondir comme un ressort Lorsque la tension des fibres du bois se lib re la branche sous tension risque de frapper l utilisateur et ou d arra cher la scie cha ne...

Page 43: ...r la main qui est en avant 4 Manette de d marrage 5 Protection du filtre air 6 Vis du couvercle du filtre air 7 Starter Choke 8 Fermeture de la manette de l acc l rateur 9 Poign e arri re 10 Manette d...

Page 44: ...V rifier toujours l arbre cause des branches mortes qui peuvent tomber lors de l op ration d abattage 5 Utilisez des chaussures de s curit des v tements confortables et des pro tections de travail po...

Page 45: ...e de bouger quand la manette de contr le de l acc l rateur est l ch e 14 Toutes les r parations de la tron on neuse qui ne figurent pas sur la liste du manuel de l op rateur doivent tre effectu es par...

Page 46: ...es paules 6 Suivez les instructions d aff tage et de maintenance du fabricant pour la cha ne de la scie 7 N utilisez en remplacement que les barres et les cha ne sp cifi es par le fabricant ou leurs q...

Page 47: ...isez une huile de qualit contenant des antioxydants express ment labellis e pour l utilisation de moteurs deux temps refroidis l air TAUX DE M LANGE RECOMMAND ESSENCE 40 HUILE 1 Ces machine sont certi...

Page 48: ...sera ensuite plac en position de d marrage 5 Starter NOTE Quand vous red marrez imm diatement apr s avoir arr t la machine placez le starter en position ouverte NOTE Une fois que le starter a t tir i...

Page 49: ...ti T dans le sens contraire des aiguilles d une montre pour que la cha ne de la scie ne tourne pas Si la vitesse en laissant tourner le moteur est trop basse tournez la vis dans le sens des aiguilles...

Page 50: ...avoir pour r sultat d emp cher l appareil de red marrer convenablement ou de fonctionner une vitesse normale et c est pour cette raison que vous devez toujours remettre l appareil en mode de fonctionn...

Page 51: ...in en avant La cha ne devrait s arr ter imm diatement avec le moteur plein r gime Si la cha ne est lente s arr ter ou ne s arr te pas remplacez alors la bande du frein et le tambour de l embrayage ava...

Page 52: ...dessus des paules 4 Utilisez toujours les deux mains pour agripper la scie AVERTISSEMENT 1 N utilisez pas d appui instable ou d escabeau 2 Ne visez pas trop haut 3 Ne coupez pas au dessus des paules 4...

Page 53: ...le bord jusqu ce qu il y ait un d clic 2 Entr e pour l huile D montez la barre guide et v rifiez l encrassement de la sortie d huile 1 Sortie d huile 3 Barre guide Quand la barre guide est d mont e e...

Page 54: ...i n cessaire 0 65 mm 5 Cran V rifiez les fissures et l usure excessive interf rant avec la conduite de la cha ne Si de l usure est manifestement trouv e remplacez avec du neuf N int grez jamais une no...

Page 55: ...eau appropri comme il est montr AVERTISSEMENT Assurez vous d arrondir l extr mit avant pour r duire le risque de recul ou la rupture de la courroie Assurez vous que chaque dent ait la m me longueur et...

Page 56: ...mmages sur la machine 1 R gle 2 Espace 3 Pas d espace 4 Inclinaison de la cha ne 11 Stockage 1 Videz le r servoir du carburant et faites fonctionner le moteur pour qu il soit sec 2 Videz le r servoir...

Page 57: ...e conclu par le fournisseur avec le consommateur final nous accordons pour cet appareil la garantie suivante La p riode de garantie est de 36 mois avec Enregistrement 60 mois et entre en vigueur la re...

Page 58: ...e 1 27 mm 0 050 inch Les sp cifications sont sujettes tre modifi es sans pr avis Nous Ikra GmbH Schlesierstra e 36 D 64839 M nster Germany d clarons sous notre seule responsabilit que le produit tron...

Page 59: ...VVERTIMENTI PRESENTI NEL MANUALE AVVERTIMENTO Questo simbolo indica delle istruzioni cui necessario attenersi per evitare incidenti che potrebbero causare gravi lesioni personali o addirittura la mort...

Page 60: ...per un intervallo di tempo limitato Osservare le ore di silenzio e limitare al minimo le ore di lavoro Indossare e far indossare alle persone che si trovano nelle immediate vicinanze una protezione p...

Page 61: ...ramaglia ed alberi giovani Il materiale sottile pu rimanere inca strato nella catena della sega e colpire l operatore o causare la perdita dell equilibrio Reggere la motosega tenendola spenta per l i...

Page 62: ...e della mano 4 Maniglia avviamento 5 Coperchio del filtro dell aria 6 Vite coperchio filtro dell aria 7 Valvola dell aria 8 Blocco della leva dell acceleratore off 9 Maniglia posteriore 10 Leva dell a...

Page 63: ...e della bassa velocit La vite con l incisione T la vite per la regolazione del minimo Posizione sopra sulla maniglia sinistra posteriore g Indica le direzioni che rilasciano il freno della catena frec...

Page 64: ...do si taglia una parte in tensione stare attenti a non venirne colpiti quan do la tensione viene a mancare 18 Tenere le maniglie asciutte pulite e pri ve di olio o miscela di carburante 19 Proteggersi...

Page 65: ...catena sul rocchetto e durante il mon taggio della catena della sega attorno alla barra di guida montare la barra di guida sull unit del motore 1 Bullone di messa in tensione della catena 2 Copertura...

Page 66: ...AFFREDDATI AD ACQUA pu sporcare le candele di accensione intasare lo scap pamento oppure bloccare il pistone COME MISCELARE IL CARBURANTE Tabella per la miscelazione del carburante BENZINA Olio 2 temp...

Page 67: ...dare il motore premendo leggermente la leva dell acceleratore Poi mettere la valvola dell aria su RUN c CONTROLLO DELL ALIMENTAZIONE DELL OLIO Dopo aver avviato il motore lasciar girare la catena ad u...

Page 68: ...la frizione e pu causare dei problemi Controllare durante l ispezione quotidiana la frenata 1 Per farlo spegnere il motore 2 Tenere la sega a catena in posizione orizzontale togliere la mano dalla man...

Page 69: ...o AVVERTIMENTO Prima di proseguire con il lavoro leggere la sezione Per il funzionamento sicuro Si consiglia di fare inizialmente pratica con tronchi di piccole dimensioni Questo aiuta anche ad acquis...

Page 70: ...pre di avere una buona base di ap poggio e che l albero sia stabile 2 Assicurarsi che i pezzi tagliati non rotolino 3 Leggere le istruzioni Avvertimenti di sicurezza per il funzionamento sicuro per ev...

Page 71: ...di seguire le istruzioni riportate nel manuale Effettuata la riparazione eseguire una prova di funzionamento Se si presentano vibrazioni o rumori meccanici spegnere la sega e rivol gersi al nostro ser...

Page 72: ...del motore Controllare ad intervalli regolari Pulire le alette del cilindro dopo aver rimosso il filtro dell aria e la copertura del cilindro Durante l in stallazione del coperchio del cilindro assicu...

Page 73: ...io I denti da taglio devono essere sempre affilati se la segatura sembra polvere occorre pi forza per tagliare il taglio non presenta un andamento dritto le vibrazioni aumentano aumenta il consumo di...

Page 74: ...10 85 0 025 Calibro di profondit Lima Barra di guida Invertire periodicamente la barra di guida per evitare la formazione di usura solo su un lato Il bordo della barra di guida deve essere sempre ad a...

Page 75: ...lo qui potranno essere separati e destinati al riciclo Informazioni al riguardo sono disponibili anche presso gli enti pubblici comunali e municipali 13 Garanzia Per questo attrezzo benzina indipenden...

Page 76: ...nsione Sostituire la candela di accensione 2 Bassa potenza scarsa acceler azione minimo dal rumore non armonico Controllare se presente acqua nel carburante o se la miscela di cattiva qualit Sostituir...

Page 77: ...dello Oregon 91 P 057X Passo 9 525 mm 0 375 inch Spessore del materiale 1 27 mm 0 050 inch Dati tecnici soggetti a cambiamenti senza preavviso Noi Ikra GmbH Schlesierstra e 36 D 64839 M nster Germany...

Page 78: ...1 RU 1 2 2 4 3 5 4 5 5 6 6 8 7 8 8 11 9 13 10 15 11 17 12 17 13 17 14 18 15 19 16 19 80 dB A...

Page 79: ...2 RU 1...

Page 80: ...3 RU...

Page 81: ...4 RU 2 1 2 3 4 5 6 7 8 9 10 11 12 13 14 15...

Page 82: ...5 RU f H L g LWA 4 1 2 3 4 5 6 10 3 3 a MIX GASOLINE b c O d e MAX MIN...

Page 83: ...6 RU 7 8 30 10 9 10 11 12 13 14 15 16 17 18 19 20 1 2...

Page 84: ...7 RU 3 4 5 6 7 5 1 2 3 4 5 6 1 2 3 1 2 3 1 4 5 6 2 3...

Page 85: ...8 RU 6 7 12 15 Nm 8 6 40 1 3 10 1 2 4 2 40 1 1 25 5 125 1 2 3 4 5 7 1 2 80 3 1 2...

Page 86: ...9 RU 4 I 3 5 4 6 5 5 7 8 9 1 1 1 2 3...

Page 87: ...10 RU 1 H L H 1 4 L 1 4 2 1 2 L 3 H 4 T 5 H 1 2 3 4 1 2 0 5 C...

Page 88: ...11 RU 1 2 Sunshine 3 Snow a b 1 2 3 1 2 3 4 5 snow 6 1 2 O 1 8...

Page 89: ...12 RU 1 2 1 2 3 4 1 2 3 1 2 3 A B...

Page 90: ...13 RU 1 2 3 4 1 2 3 4 9 1...

Page 91: ...14 RU 2 1 3 1 2 3 4 1...

Page 92: ...15 RU 2 a 1 b 3 2 4 0 65 mm Champion RCJ7Y 5 6 10...

Page 93: ...16 RU Oregon 91P 5 32 in 4 0 mm 55 91P 5 32 30 0 80 0 025 91PJ 5 32 30 0 80 0 025 91VG 5 32 30 0 80 0 025 E1 25AP060T 5 32 30 10 85 0 025...

Page 94: ...17 RU 1 2 3 4 PC 41 TL 3 8 16 40cm 0 050 1 3mm Orgeon 160SDEA041 Orgeon 91P057X 3 8 18 45cm 0 050 1 3mm Orgeon 180DEA041 Orgeon 91P063X 11 1 2 3 4 12 13 36 60 12 5 www tonino lamborghini garden com...

Page 95: ...18 RU 14 1 2 3 Ko 5 7...

Page 96: ...5 m s2 160SDEA041 400 mm 16 inch 370 mm Oregon 91 P 057X 9 525 mm 0 375 inch 1 27 mm 0 050 inch 16 Ikra GmbH Schlesierstra e 36 D 64839 M nster Germany PC 41 TL 2006 42 EC 2004 108 EC 97 68 EC 2011 88...

Page 97: ...h uwa nego przeczytania i post powanie zgodnie z nimi UWAGA W INSTRUKCJI UWAGA To oznaczenie wskazuje na zalecenia kt re musz by przestrzegane w celu zapobie enia wypadkom mog cym prowadzi do powa nyc...

Page 98: ...co mo e prowadzi do ograniczenia okres w pracy Dla ochrony osobistej oraz os b znajduj cych si w pobli u nale y nosi odpowiednie ochronniki s uchu Wibracja UWAGA Poziom wibracji emitowany przez urz d...

Page 99: ...as ci cia krzew w i m odych drzew Cienki materia mo e by pochwyco ny przez a cuch i uderzy operatora lub wytr ci go z r wnowagi Podczas przenoszenia pilarka musi by wy czona i trzymana za przedni uchw...

Page 100: ...wignia hamulca bezw adno ciowego 4 Uchwyt rozrusznika 5 Pokrywa filtra powietrza 6 ruba pokrywy g rnej 7 D wignia ssania 8 Blokada d wigni gazu 9 Uchwyt tylny 10 D wignia gazu 11 W cznik pilarki 12 Z...

Page 101: ...cia 5 U ywa obuwia antypo lizgowego dopasowanego ubrania kasku oraz ochronnik w s uchu i oczu 6 Podczas nape niania zbiornika zacho wa ostro no Wytrze ewentualne lady po rozlanym paliwie i przed uru c...

Page 102: ...y i poci gn operatora do przodu wytr caj c go z r wnowagi 17 Podczas ci cia napi tych ga zi uwa a na mo liwo ich odskoczenia i uderzenia operatora gdy napiecie w kien ga zizostanie zwolnione 18 Uchwyt...

Page 103: ...aby upewni si ze jest on zwolniony 2 Odkr ci nakr tk i zdj os on 3 a cuch za o ony na prowadnicy zaz bi na z batce nap dowej i zamocowa j do jednostki nap dowej 1 Trzpie napinacza a cucha 2 Os ona a...

Page 104: ...niem zbiornika nale y zatrzyma silnik i pozwoli mu ostygn Miejsce nalewania paliwa powinno by na zewn trz i mie stabilne pod o e Przed ponownym uruchomieniem pi larki oddali si przynajmniej o 3m od mi...

Page 105: ...ka gry pilarka jest trzymana jedn r k a cuch mo e dotkn cia a To jest bardzo nie bezpieczne 9 Gdy pilarka rozpocznie na chwil pracowa nale y wcisn d wigni ssania i ponownie poci gn link rozrusznika ab...

Page 106: ...wany przez si bezw adno ci Mo e by r wnie za czony poprzez jego pchni cie w kierunku przodu pilarki 1 Uchwyt przedni 2 Zwolnienie a cucha 3 Aktywacja a cucha 4 D wignia hamulca a cucha Aby zwolni hamu...

Page 107: ...kt re mog ogranicza u ycie urz dzenia Pilarki wolno u ywa wy cznie do ci cia drewna Zabrania si ci cia innych materia w Wibracje i odbicie zmieniaj si w zale no ci od materia u i nie mo na by oby prze...

Page 108: ...Zwr ci uwag na mo liwo potoczenia si ci tej k ody 3 Przeczyta Dla bezpiecznej pracy aby zmniejszy ryzyko odbicia Przed rozpocz ciem pracy sprawdzi kierunek napr e z przecinanej k odzie Zawsze ko czy...

Page 109: ...y Od czy przew d ze wiecy zap onowej aby uniemo liwi przypadkowego uruchomienia Przestrzega instrukcji dotycz cych regularnej obs ugi procedury sprawdzania przed u yciem i codziennej obs ugi Nieprawid...

Page 110: ...ciwym umieszczeniu podk adek 2 Filtr paliwa a U ywaj c haczyka z drutu wyci gn filtr z kana u wlewowego 1 Filtr paliwa b Rozmontowa filtr i umy go w benzynie w razie potrzeby wymieni na nowy WA NE Po...

Page 111: ...j si y Ci cie nie przebiega prosto Wibracje s zwi kszone Wyst puje zwi kszone zu ycie paliwa Parametry ostrzenia z b w tn cych UWAGA Zawsze nosi r kawice ochronne Przed ostrzeniem Upewni si e a cuch j...

Page 112: ...zy nimi szczelin prowadnica jest w dobrym stanie W przeciwnym razie prowadnica jest zu yta Taka prowadnica musi by naprawiona lub wymieniona Rodzaj a cucha rednica pilnika K t ostrzenia K t pochylenia...

Page 113: ...g by odzyskane i powt rnie przerobione Informacji o punktach przyjmowania odpad w k opotliwych mo na uzyska w lokalnych organach administracji 13 Gwarancja Na to urz dzenie spalinowe gwarant udziela k...

Page 114: ...zy ci wiec zap onow Uruchomi silnik nie u ywaj c ssania Brak iskry Wymieni wiec zap onow 2 Brak mocy Silnik nie przyspie sza nier wna praca na biegu ja owym Niew a ciwe paliwo Nape ni w a ciwym paliwe...

Page 115: ...7 mm 0 050 cali Specyfikacja mo e ulec zmianie bez wcze niejszej informacji My Ikra GmbH Schlesierstra e 36 64839 D M nster Germany deklarujemy na nasz wy czn odpowiedzialno e produkt spalinowa pilark...

Page 116: ...s com cuidado e segui las sem falhas ADVERT NCIAS CONTIDAS NO MANUAL ATEN O Esta marca indica instru es que devem ser seguidas para evitar acidentes que possam causar les es corporais graves ou a mort...

Page 117: ...balhando num ambiente ruidoso este deve estar licenciado e est sujeito a limita es em certos per odos Deve respeitar os per odos de descanso e quaisquer restri es ao tempo de trabalho Prote o auditiva...

Page 118: ...ado quando do corte de arbustos e rvores jovens O material fino pode prender na corrente da serra e bater contra si ou lhe desequilibrar Carregar a serra de corrente na pega dianteira no estado deslig...

Page 119: ...que est frente 4 Alavanca de arranque 5 Tampa do filtro de ar 6 Parafuso do filtro de ar 7 Starter 8 Bloqueio da alavanca do acelerador 9 Pega traseira 10 Gatilho do acelerador 11 Interruptor do moto...

Page 120: ...a base do motor f O parafuso sob a marca H o parafu so de ajuste de alta velocidade O parafuso sob a marca L o parafu so de ajuste de baixa velocidade O parafuso sob a marca T o parafu so de ajuste pa...

Page 121: ...realizada por pes soal qualificado para a repara o das motosserras por exemplo se forem usadas ferramentas s o usadas para remover o volante ou se ferramentas inadequadas s o usados para segu rar o v...

Page 122: ...rra 3 Guia 4 Protector da guia 5 Chave de velas 6 Lima Abra a caixa e instale a guia e a corrente da serra na unidade motriz como se segue ATEN O A corrente da serra tem bordos muito afiados Use luvas...

Page 123: ...r IMPORTANTE 1 COMBUST VEL SEM LEO RAW GASOLINE Ele ir causar danos graves nas partes internas do motor muito rapidamente 2 LEO PARA UTILIZA O EM MOTORES A 4 TEMPOS ou PARA UTILIZA O A MOTORES A 2 TEM...

Page 124: ...un cionamento puxe para fora a alavanca do acelerador ATEN O Antes de ligar o motor certifique se a serra n o entra em contacto com qualquer objecto 7 Enquanto segura firmemente a serra no ch o puxe v...

Page 125: ...a H Trav o da corrente O trav o de corrente um sistema que interrompe a corrente de imediato se a serra salta por causa do re cuo Normalmente o freio acionado automaticamente por for a inercial Ele ta...

Page 126: ...ra cima e depois fa a a voltar sua posi o original na tampa do cilindro 6 Fixe a tampa do cilindro novamente na sua posi o original e depois fixe todas as outras pe as nova mente nas suas posi es corr...

Page 127: ...lhe ATEN O Quando abater uma rvore assegure se de que avisa do perigo os trabalhadores na vizinhan a 1 Corte de entalhe 2 Corte de abate 3 Direc o de corte Cortar o tronco e desmembrar ATEN O 1 Assegu...

Page 128: ...ra o se necess rio deslo cando o ponto de apoio da garra de abate garra de abate 9 Manuten o ATEN O Antes de limpar inspeccionar ou reparar a unidade assegure se que o motor est parado e arrefecido De...

Page 129: ...ro Ao instalar a tampa do cilindro assegure se de que os fios dos interruptores e os tubos est o posicionados correctamente 2 Filtro de combust vel a Usando um gancho de arame retire o filtro de entra...

Page 130: ...dos quando A serradura se torna como um p Necessita de mais for a para serrar A linha de corte n o direita A vibra o aumenta O consumo de combust vel aumenta Normas de regula es dos cortadores ATEN O...

Page 131: ...ntre estes a calha est normal Caso contr rio a calha da guia est gasta Uma guia necessita de ser rectificada ou substitu da 1 R gua 2 Folga 3 N o h folga 4 Corrente inclina se Tipo de corrnte Tamanho...

Page 132: ...o de garantia de 36 meses com registo 60 meses e come a com a entrega que deve ser com provada com o recibo original de compra No caso de emprego comercial bem como aluguel o prazo de garantia fica re...

Page 133: ...fique a vela de igni o Substitua por uma nova vela 2 Falta de pot ncia Fraca ace lera o Ralenti irregular Verifique no combust vel a exist ncia de gua ou mistura incorrecta Substitua por combust vel a...

Page 134: ...ipo Oregon 91 P 057X Passo 9 525 mm 0 375 inch Calibre 1 27 mm 0 050 inch As especifica es est o sujeitas a altera es sem aviso M nster 18 04 2014 Gerhard Knorr Direc o t cnica Ikra GmbH Documenta o t...

Page 135: ...an olvassa el s vegye azokat figyelembe FIGYELMEZTET SEK A K ZIK NYVBEN VESZ LY A szimb lum azokat az utas t sokat jelzi amelyek figyelmen k v l hagy sa eset n letvesz lyes balesetek k vetkez hetnek b...

Page 136: ...ig folythat Munkak zben figyelembe kell venni az el rt pihen ket s a munk t a minimumra kell cs kkenteni A kezel nek s a k zelben l v szem lyeknek k telez az el rt f lv d haszn lata Vibr ci k Figyelem...

Page 137: ...yag beakadhat a f r szl ncba s nh z csap dhat vagy egyens lya elveszt s t okozhatja A l ncf r szt az el ls ny ln l fogva hordozza kikapcsolt llapotban a f r szl ncnak test vel ellenkez ir nyba kell n...

Page 138: ...r szei 1 l nc 2 vezet lemez 3 els k zv d 4 ber nt foganty 5 l gsz r fed l 6 l gsz r fed l csavarja 7 szivat 8 g zkar reteszel s 9 h ts markolat 10 g zkar 11 bekapcsol 12 olajtart ly 13 zemanyagtart ly...

Page 139: ...t v d szem veget f lv d t s v d sisakot 6 Legyen vatos ha zemanyaggal kell dolgoznia A f r szt az zemanyag bet lt s nek helysz n t l legal bb 3 m terre ind tsa be 3 Szimb lumok a szersz mon A g p hasz...

Page 140: ...a fa fesz l se hirtelen al bbhagy 18 gyeljen arra hogy a foganty k legye nek sz razak tiszt k s olajt l illetve zemanyagkever kt l mentesek 19 vja meg nmag t a visszacsap d s t l A visszacsap d s a ve...

Page 141: ...tsa el a l ncv d burkolatot 3 A l ncot helyezze a l ncker kre s a vezet lemez k r a vezet lemezt pedig a motoros egys gre 1 L ncfesz t csavar 2 L ncburkolat 3 Szerel si di f l k JAVASLAT gyeljen a l n...

Page 142: ...pufog bet m d s t vagy a dugattyu leblokkol s t okozhatja ZEMANYAG KEVER SE T bl zat az zemanyag bekever s re Benzin 2 tem olaj 40 1 1 liter 25 ml 5 liter 125 ml 1 M rje ki a kever shez sz ks ges benz...

Page 143: ...yukba dugja bele a csavarh z t Az olaj adagol s t gy ll tsa be hogy az megfelel jen az aktu lis munkak r lm nyeknek 1 csavar az olajadagol s be ll t s hoz 2 kisebb mennyis g 3 nagyobb men nyis g FONTO...

Page 144: ...g t lmelegedik ami gondokat okozhat Ha a f k a motor m k d se alatt kapcsol dik be azon nal engedje el a g zkart s ll tsa le a motort A porlaszt fagy elleni v delme Ha a l ncf r sz 0 5 C h m rs kleten...

Page 145: ...m k d motorn l a l nc elakad meghib sodhat a kuplungrendszer Ha a l nc v g s k zben akad el ne pr blja er szakkal kih zni hanem haszn ljon ehhez rudat vagy ket Visszacsap s elleni v delem kickback A f...

Page 146: ...g Az els v g st a hajl s bels r sz n v gezze majd a az gat az ellenkez ir nyb l f r szelje t FIGYELEM Figyeljen az gak vissza t s re s r l s vesz lye Metsz s El sz r alulr l v gjon bele majd a f r sz...

Page 147: ...leveg haszn lata eset n a leveg t a bels oldalr l f jja A sz r sszeszerel s hez nyomja meg a perem t m g egy kattan st nem hall 2 L ncolajoz ny l s Vegye le a vezet lemezt s ellen rizze hogy a l ncol...

Page 148: ...tkef vel s sz ks g eset n a t vols got ll tsa 0 65 mm re 5 L ncker k Ellen rizze az esetleges hasad sokat s az elhasz n l d st amelyek befoly solhatj k a l nc megfelel forg s t Er sebb kop s eset n c...

Page 149: ...gy a fog orra sz le le van kerek tve amivel megakad lyozza a a visszacsap st vagy a l nc t r s t Vigy zzon hogy minden egyes fog hossz s ga s v g sz ge egyforma legyen Vezet lemez A vezet lemezt id nk...

Page 150: ...y jt helyre K rj k a k sz l ket szint n adja le egy hullad kgy jt helyen A m anyag s f mr szek itt k l nv laszthat k s jra felhaszn l s al vethet k Erre vonatkoz felvil gos t st a k zs gi vagy v rosi...

Page 151: ...megh z sa de szivat n lk l Gy jt szikra ellen rz se Gy jt gyertya cser je 2 Gyenge teljes tm ny rossz gyor sul s nyugtalan resj rat Ellen rizze nincs e v z az zem anyagban vagy vizsg lja meg a kever...

Page 152: ...ag vastags ga 1 27 mm 0 050 inch Fenntartjuk a m szaki v ltoztat sok jog t el zetes k zz t tel n lk l Mi az Ikra GmbH Schlesierstra e 36 D 64839 M nster Germany kiz r lagos felel ss ggel kinyilatkozta...

Page 153: ...i ig ny bejelent s nek id pontja Jav t sra tv tel id pontja Hiba oka Jav t s m dja A term k fogyaszt r sz re val visszaad s nak id pontja A j t ll s kijav t s id tartam val meghosszabb tott j hat ride...

Page 154: ...Baracskai S ndor 7000 S rdbog rd Asztalos u 2 b 06 25 460 243 M1620 KIR LY Elektro 2841 Oroszl ny F rst S t 24 Pf 75 06 34 365 127 M1708 EM Elektromechanika Kft 9023 Gy r T r k Istv n u 32 a 06 96 42...

Page 155: ...ikk tulajdonosa rv nyes theti felt ve hogy fogyasz t nak min s l 14 2 A k telez j t ll s rv nyess g hez valamint a j t ll sb l ered jogok rv nyes t s hez a v llalkoz s a rendeletben foglaltakon t l to...

Page 156: ...k nt nem sz ll that term ket a j rm vek kiv tel vel az zemeltet s hely n kell megjav tani Ha a jav t s az zemeltet s hely n nem v gezhet el a le s felszerel sr l valamint az el s vissza sz ll t sr l a...

Page 157: ......

Page 158: ...90 ZAGREB 385 91 571 3164 7 385 1 3454 906 IT Brumar Garden Products S r l Loc Valgera 110 B 14100 ASTI AT 39 0141 477309 7 39 0141 440385 LT UAB Baltic Continent P Luk io g 23 09132 Vilnius 370 8 700...

Page 159: ......
Page 160: ...elefon 49 6071 3003 0 Telefax 49 6071 3003 30 service tonino lamborghini garden com www tonino lamborghini garden com PRODOTTI DISTRIBUITI DA PRODUCTS DISTRIBUTED BY SU LICENZA DI TONINO LAMBORGHINI S...

Reviews: