Pg. 6
Pg. 7
Your bike has been pre-assembled and requires only a few simple steps to get it
ready for you to ride:
1. Remove the outside carton after cutting the nylon bands and lift off the entire box
from the tray at the bottom. Carefully remove your bike from the bottom tray and
gently rest it in place with the kickstand down.
2. Remove all of the inside cardboard protection and bubble wrap.
3. Please locate and set aside the kit box containing the battery charger and tool kit.
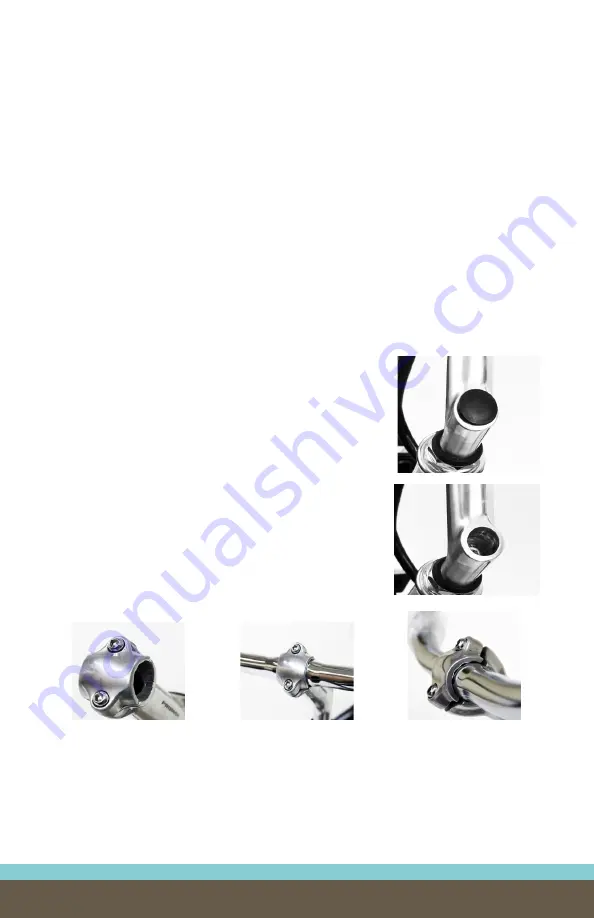
4. The handlebars must be adjusted for height and align-
ment. First, remove the rubber protective cap and insert
the handlebar stem into the frame of the bicycle. With the
allen wrench provided in the tool kit, tighten the screw on
top of the stem underneath the rubber protective cap to
secure the handlebars in place. Make sure the handlebars
are aligned with the front wheel before tightening and that
the stem is not set above the maximum height indicator.
If need be, the angle of the handlebars may be positioned to your personal preference.
Loosen the front 2 bolts on the front stem plate and angle the handlebars to your liking,
then securely tighten the 2 bolts on the front stem plate. Make sure that, when tightening,
there is even spacing between the top and bottom bolts to ensure maximum stability.
Assembly Instructions


