background image


dream

ee


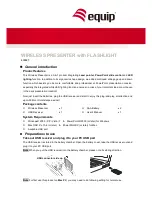
sleep & nursery monitor system

the 

u

ltimate 


video


sound


movement monitor

Getting set up

1.

  Plug the cable into the Parent unit, then plug it into the mains power socket and switch the socket on. 

  Note: The first time you use the unit or if you haven’t used it for a long time, it may take longer to charge.


2.

  Leave to charge for 4 hours or until the red light indicator turns off. 

3.

  Place the Baby unit near a power socket in the room where you’re going to be monitoring your baby most of 

the time. It should be at least one metre away from your baby. 

4.

  Plug the cable into the Baby unit, then plug it into the mains power socket and switch the socket on.

5.

  Keep the Parent unit at least 3ft/0.9m metre away from the Baby unit to avoid audio feedback.

6.

  Once the Parent unit has charged, turn it and the Baby unit on and you’re ready to start monitoring.

7.

  To prepare the Movement sensor mat, set the lock lever to “open”, slide open the battery door in direction as 

shown. Install 3 AA (UM-3) alkaline batteries in the correct orientation.  Slide the battery cover back on and set 

the lever to lock.  

Note: The battery life of the movement sensor mat lasts up to 90 days.

CAMERA

•  Place the camera onto a stable surface or mounted on the wall at least 3ft/0.9m away from baby.

•  Press and hold the power button (1) to turn on.

•  Adjust the microphone sensitivity to your desirable sound level.

•  The camera will only transmit when baby makes a noise.

•  Once the camera starts to transmit, the transmit indicator (3) will light up blue. When baby is silent, the 

microphone (5) will not pick up any sound, the camera will stop transmitting and go into standby mode.

•  The night light can be set to 

ON, OFF

 or 

VOX

 (when detecting sound) using the Parent Unit.

•  The light intensity can be adjusted using +/- buttons (7).

How to use the Baby unit (camera)

CONTROLS

1.


Power ON/OFF button 

2.

  Power ON indicator

3.

  Transmit indicator

4.

  Night light

5.

 Microphones

6.

  USB socket

7.

  Night light intensity (up and down)

8.

 Speaker

9.

  Pairing button

25.


Temperature sensor

Baby unit

Parent unit

Movement sensor mat

1

2

3

4

5

25

6

7

9

8

23

Summary of Contents for dreamee

Page 1: ...ttery door in direction as shown Install 3 AA UM 3 alkaline batteries in the correct orientation Slide the battery cover back on and set the lever to lock Note The battery life of the movement sensor...

Page 2: ...ra lens will automatically track the movement of your toddler Note If there are several moving objects within the view as captured by camera lens this tracking function may not operate accurately How...

Page 3: ...ntil your baby has settled down or fallen asleep Ensure the Camera and movement sensor mat are in the same room less than 10 metres apart or you may be unable to detect movement If the movement sensor...

Page 4: ...l sound and the screen will display HOW TO PAIR YOUR PARENT UNIT WITH YOUR CAMERA AND MOVEMENT SENSOR MAT Note The parent unit and camera are already paired when purchased however this may be required...

Page 5: ...a sound the screen will switch to CAM 1 view and then back to CAM 3 once the sounds stops To make sure you never miss any sounds your baby makes if a Baby unit detects a sound when you are viewing ano...

Page 6: ...aby is quiet This helps save the battery power in the Parent unit and reduces radiation from the camera to a minimum Set a reminder for feeding with a countdown on the Parent unit screen To set the al...

Page 7: ...on the Parent unit screen Temperature Display In VOX mode the night light will be on once the camera detects baby s cry and go off when the room becomes silent Automatically track your baby s movemen...

Page 8: ...your baby via the Parent unit This is different from the lullaby sound volume which you can adjust in the Lullaby settings menu Night vision Movement sensor mat To set the movement sensor mat ON or O...

Page 9: ...ur unit When using your equipment basic safety precautions should always be followed to reduce the risk of fire electric shock and injury to persons including the following Do not use this product nea...

Page 10: ...horities Separating and recycling of your product at the time of disposal will help conserve natural resources and ensure that the product is recycled in a manner that protects human health and the en...

Reviews: