8
5. I/M Readiness
There are two modes to show I/M readiness monitor status. You can
configure work modes in the Setup menu.
5.1 Ready Test Mode
Scan Tool Mode is the default work mode. After the vehicle’s monitors have
run and completed their diagnosis and testing, the scan tool will turn to
OBDII diagnostic procedures.
NOTE:
Only in this mode can you perform the OBDII diagnostics
The green, yellow and red LEDs provide a quick way to help you determine
if a vehicle is ready for an Emission Test.
The LED and audio tone indications are as interpreted below:
LED Interpretation
1 GREEN LED - Indicates that engine systems are “OK” and operating
normally
The number of monitors supported by the vehicle which have run and
performed their self-diagnostic testing is in the allowed limit. The MIL is
off and there are no stored and pending DTCs. The vehicle is ready for an
Emissions Test.
2 YELLOW LED - Indicates there are three or more possible conditions to
cause the yellow LED to illuminate and with the MIL light off
If the yellow light is illuminated, there is possibly a “Stored” or “Pending”
Diagnostic Trouble Code that has been detected
3 RED LED - Indicates there is a problem with one or more of the vehicle’s
system.
A vehicle displaying a red LED is definitely not ready for an emissions
test. The red LED is also an indication that there are DTCs present. The
MIL lamp on the vehicle’s instrument panel will light steady. The problem
that is causing the red LED to light must be repaired before an Emissions
Test can be performed. It is also suggested that the vehicle be inspected/
repaired before driving the vehicle further.
Audio Tone Interpretation
The audio tone could be configured according to the I/M Readiness Status.
This function is invaluable when working in bright areas where LED
illumination alone is not sufficient.
It is recommended to set the audio tone to Beep ON. For detailed setup
information, please refer to Status Beep Set in 3.7 System Setup.
NOTE: The following audio tone description only works in Scan Tool mode.
Different audio tone with different LED lights will indicates different I/M
Readiness Status.
5.2 Scan Tool Mode
After the vehicle’s monitors have run and completed their diagnosis and
testing, the scan tool will return to the previous screen. This mode is only
used to check the emission-related monitors’ status
NOTE:
This function reads off the real time data of emission-related
monitoring systems readiness status every two minutes. Once the scan
tool has finished other operations, for example, clearing trouble codes, and
the real time data been changed, the I/M Readiness Status indication will
be changed accordingly. In order to reset these monitors, the vehicle must
be driven through a complete drive cycle. Times for reset vary depending
on vehicle.
Repairs to the emissions control systems of a 1996 or newer vehicle cause
the vehicle’s computer (ECU) memory to be cleared. The vehicle must go
through a drive cycle to allow the ECU to perform a series of tests to ensure
that the repair was successful, and before a state mandated emissions test
can be conducted.
In the Ready Test Mode it is possible to check the I/M Readiness status to
determine whether an OBD II vehicle is ready for an emission test.
To enter this mode simply press the One-Click (Fn) Key at any time if the
One-Click function key is set to I/M readiness. Or while the scan tool in
Ready Test Mode, select Diagnostics in the main screen.
If the scan tool is at idle it will show the result immediately. If it is busy it
will wait till the current procedure is finished. After viewing the status press
One-Click (Fn) Key or the ‘ENTER’ key to exit. This will take a few seconds.
4. OBD II Diagnostics cont.
4.6 Vehicle Information
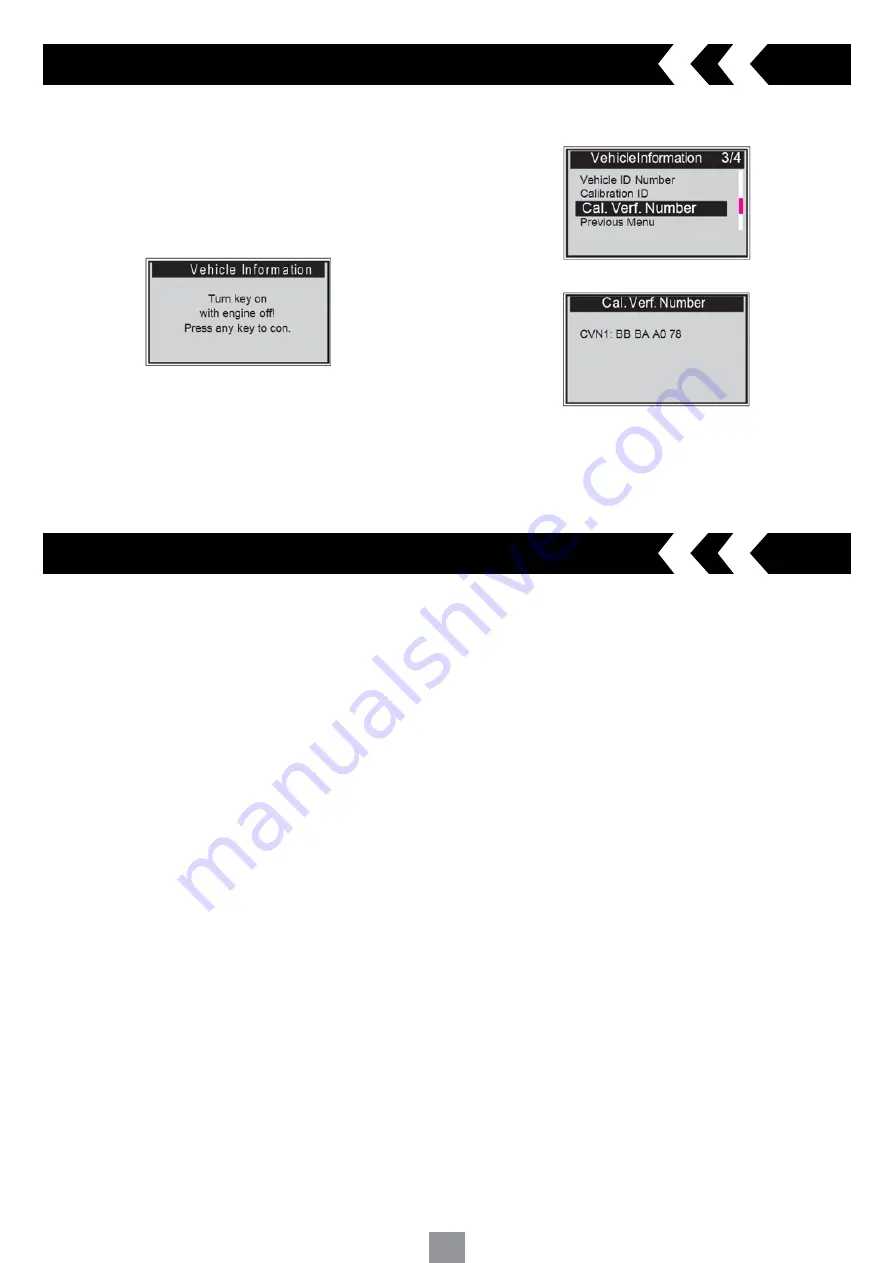
The vehicle information feature enables you to retrieve the Vehicle
Identification Number (VIN), Calibration ID Number (CIN), Calibration
Verification Number (CVN) and In-use Performance Tracking on 2000 and
newer vehicles that support Mode 9
1 Select vehicle info and press the ‘Enter’ key
A message will appear ‘Turn key on with engine off! Press any key
to con.’
NOTE:
If the vehicle does not support this mode, a warning message will
appear that the mode is not supported
2 If it is not supported, scroll through and select an available option and
press the ‘Enter’ key
3 View retrieved vehicle information
4.7 Exiting the OBDII Test
1 Scroll through and highlight ‘Previous Menu’ and press the ‘Enter’ key
to exit
2 A confirmation message will appear. Press the ‘Enter’ key to exit.


